
Switching from the classic WCABE: a simple guide for you and your team
On this page6 sections
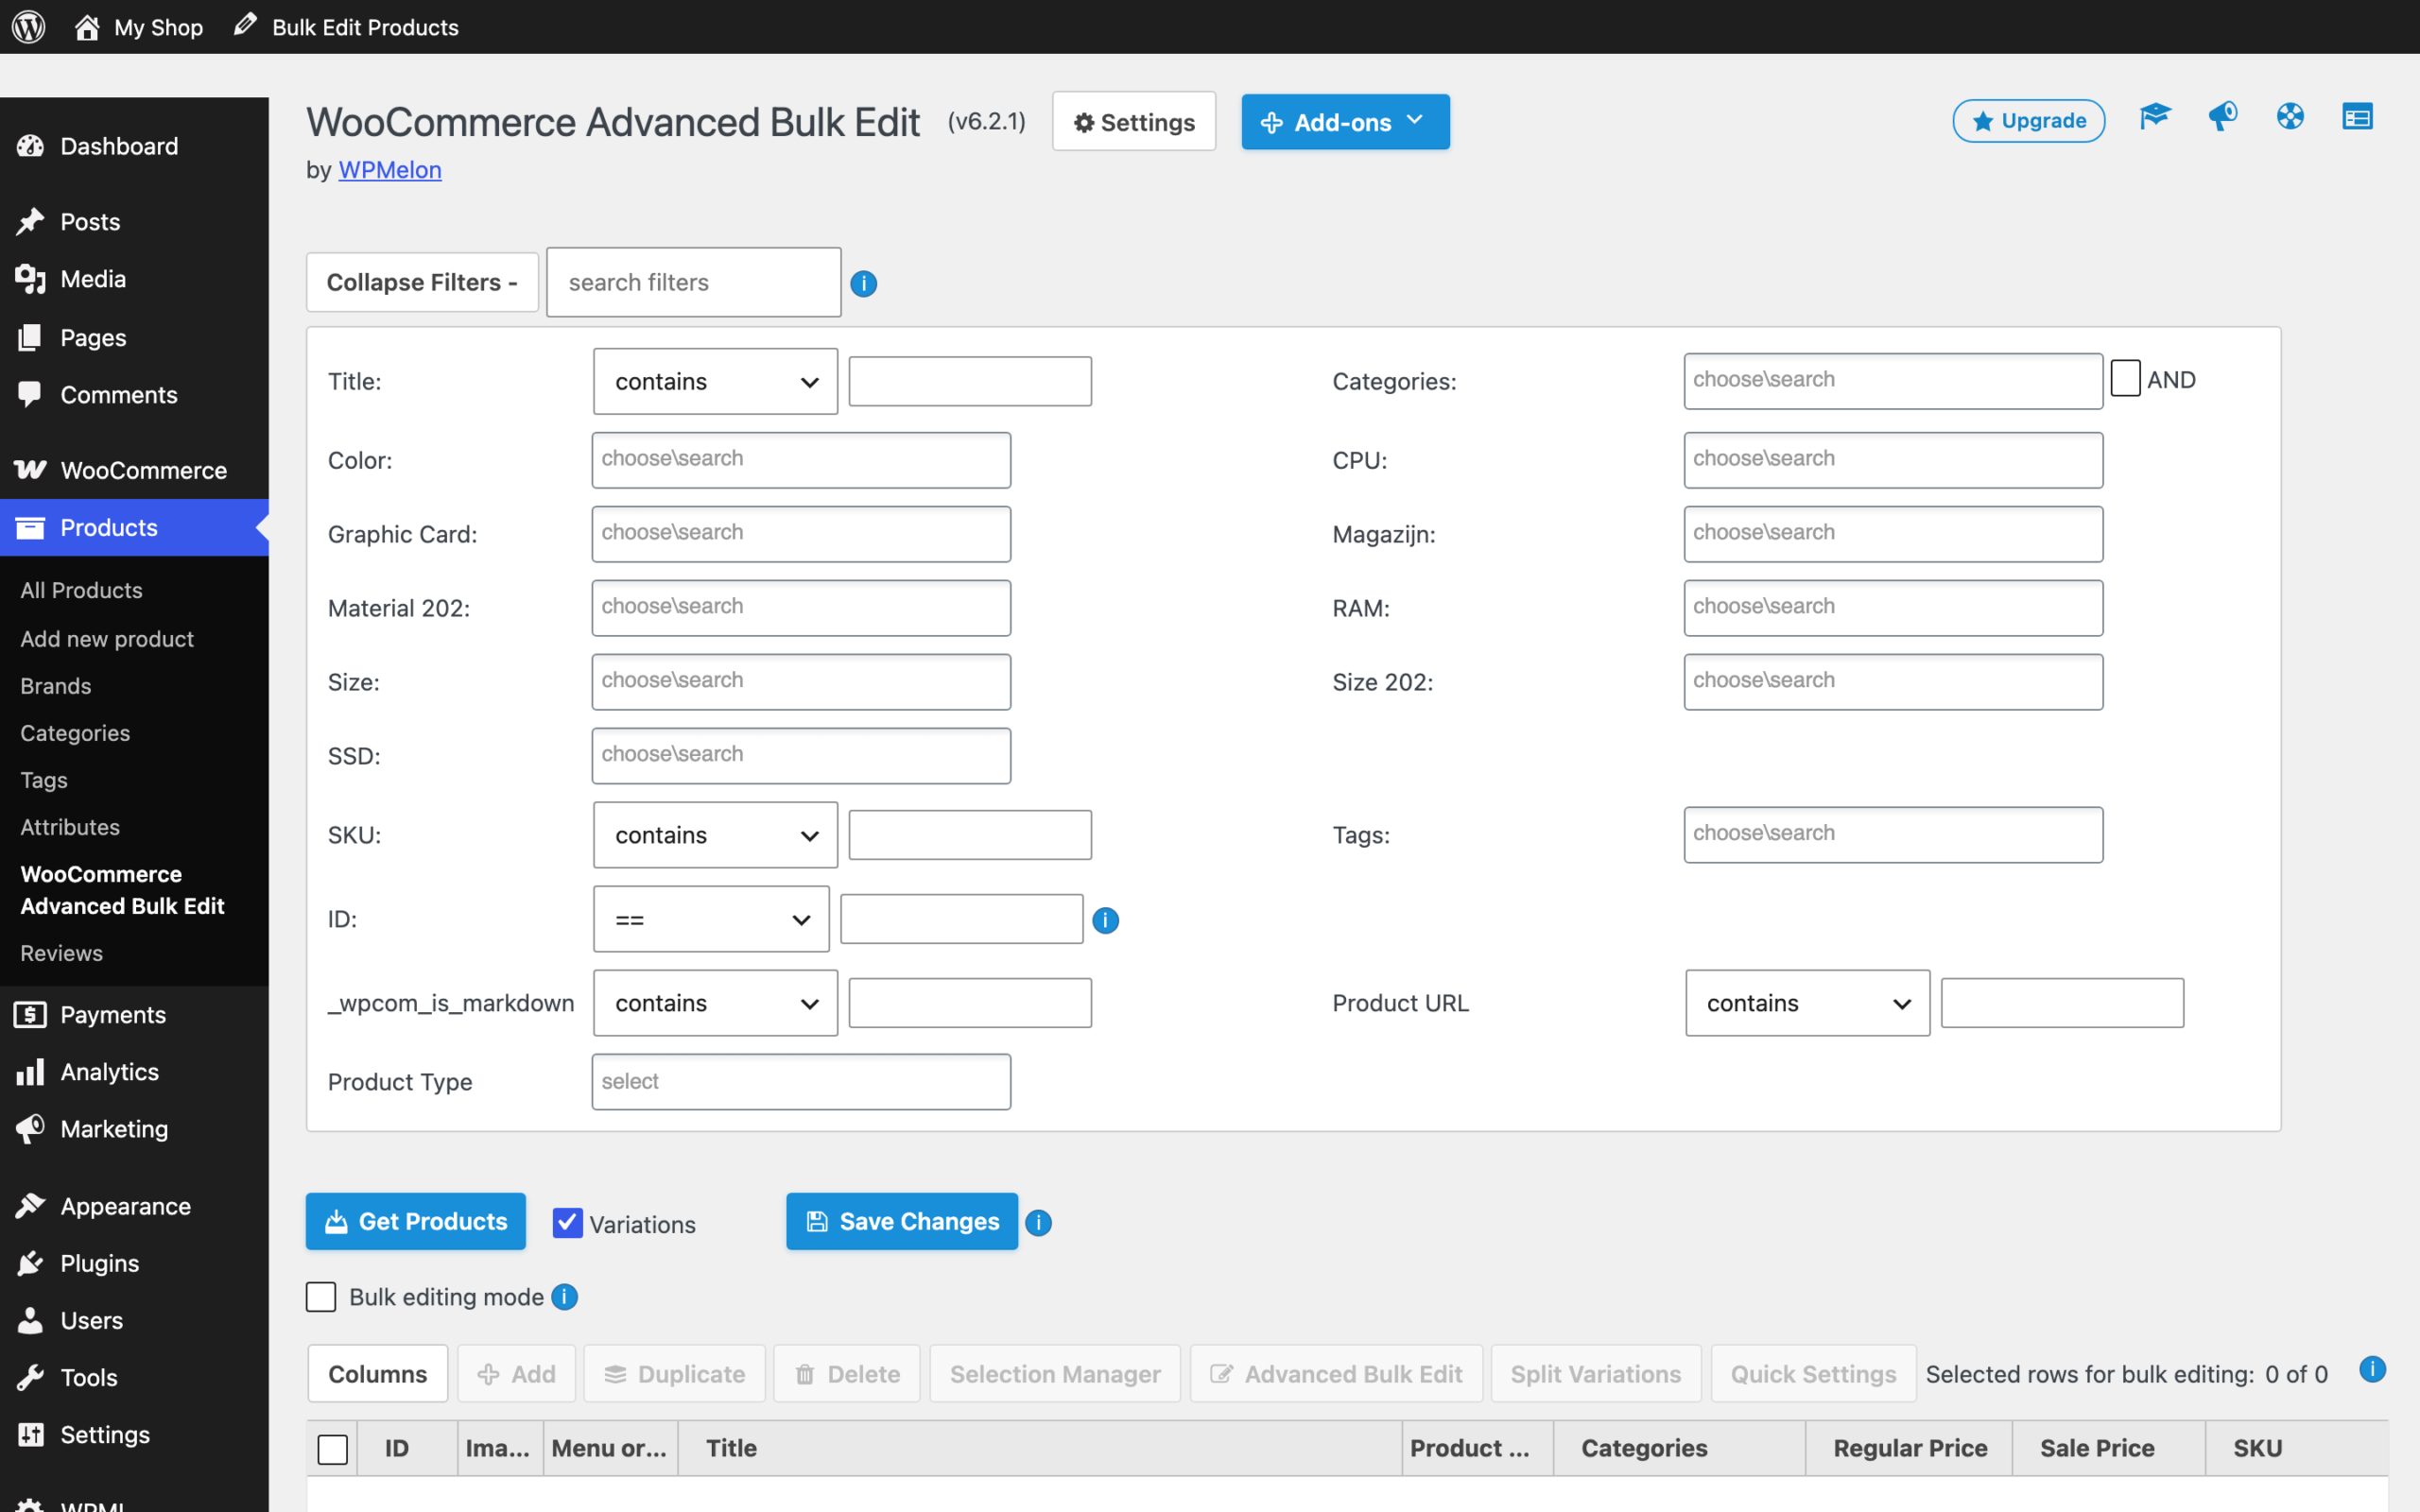
If you or your staff have used WooCommerce Advanced Bulk Edit (the classic WCABE) for a while, the new Bulk Edit will look different at first. Some buttons have new names and the screen is cleaner. The work is the same: find your products, change them in the table, and save. This guide shows where everything went, so nobody has to learn from zero.
What you need: WPMelon Advanced Bulk Edit (free on WordPress.org) and a Shop Manager or Administrator account. Everything below is in the free version, except the parts marked PRO.
You don’t have to switch in one day
The new Bulk Edit is a separate plugin. It runs alongside your classic WCABE on the same site, so both can be active at the same time. Your classic WCABE keeps working and gets critical compatibility maintenance for at least 12 months after the new version’s launch, so you can switch at your own pace.
Set up the screen for your team (see below) and let them try it for a week or two while the classic one is still there.
Two “Bulk Edit Products” links? With both plugins active, the top bar shows it twice. To hide the classic one, open the classic WCABE, click Plugin Options, tick Hide topbar link “Bulk Edit Products”, click OK and reload the page.
The daily routine in 4 steps
Prefer to watch? This 2-minute video shows the same routine.
1. Open Bulk Edit
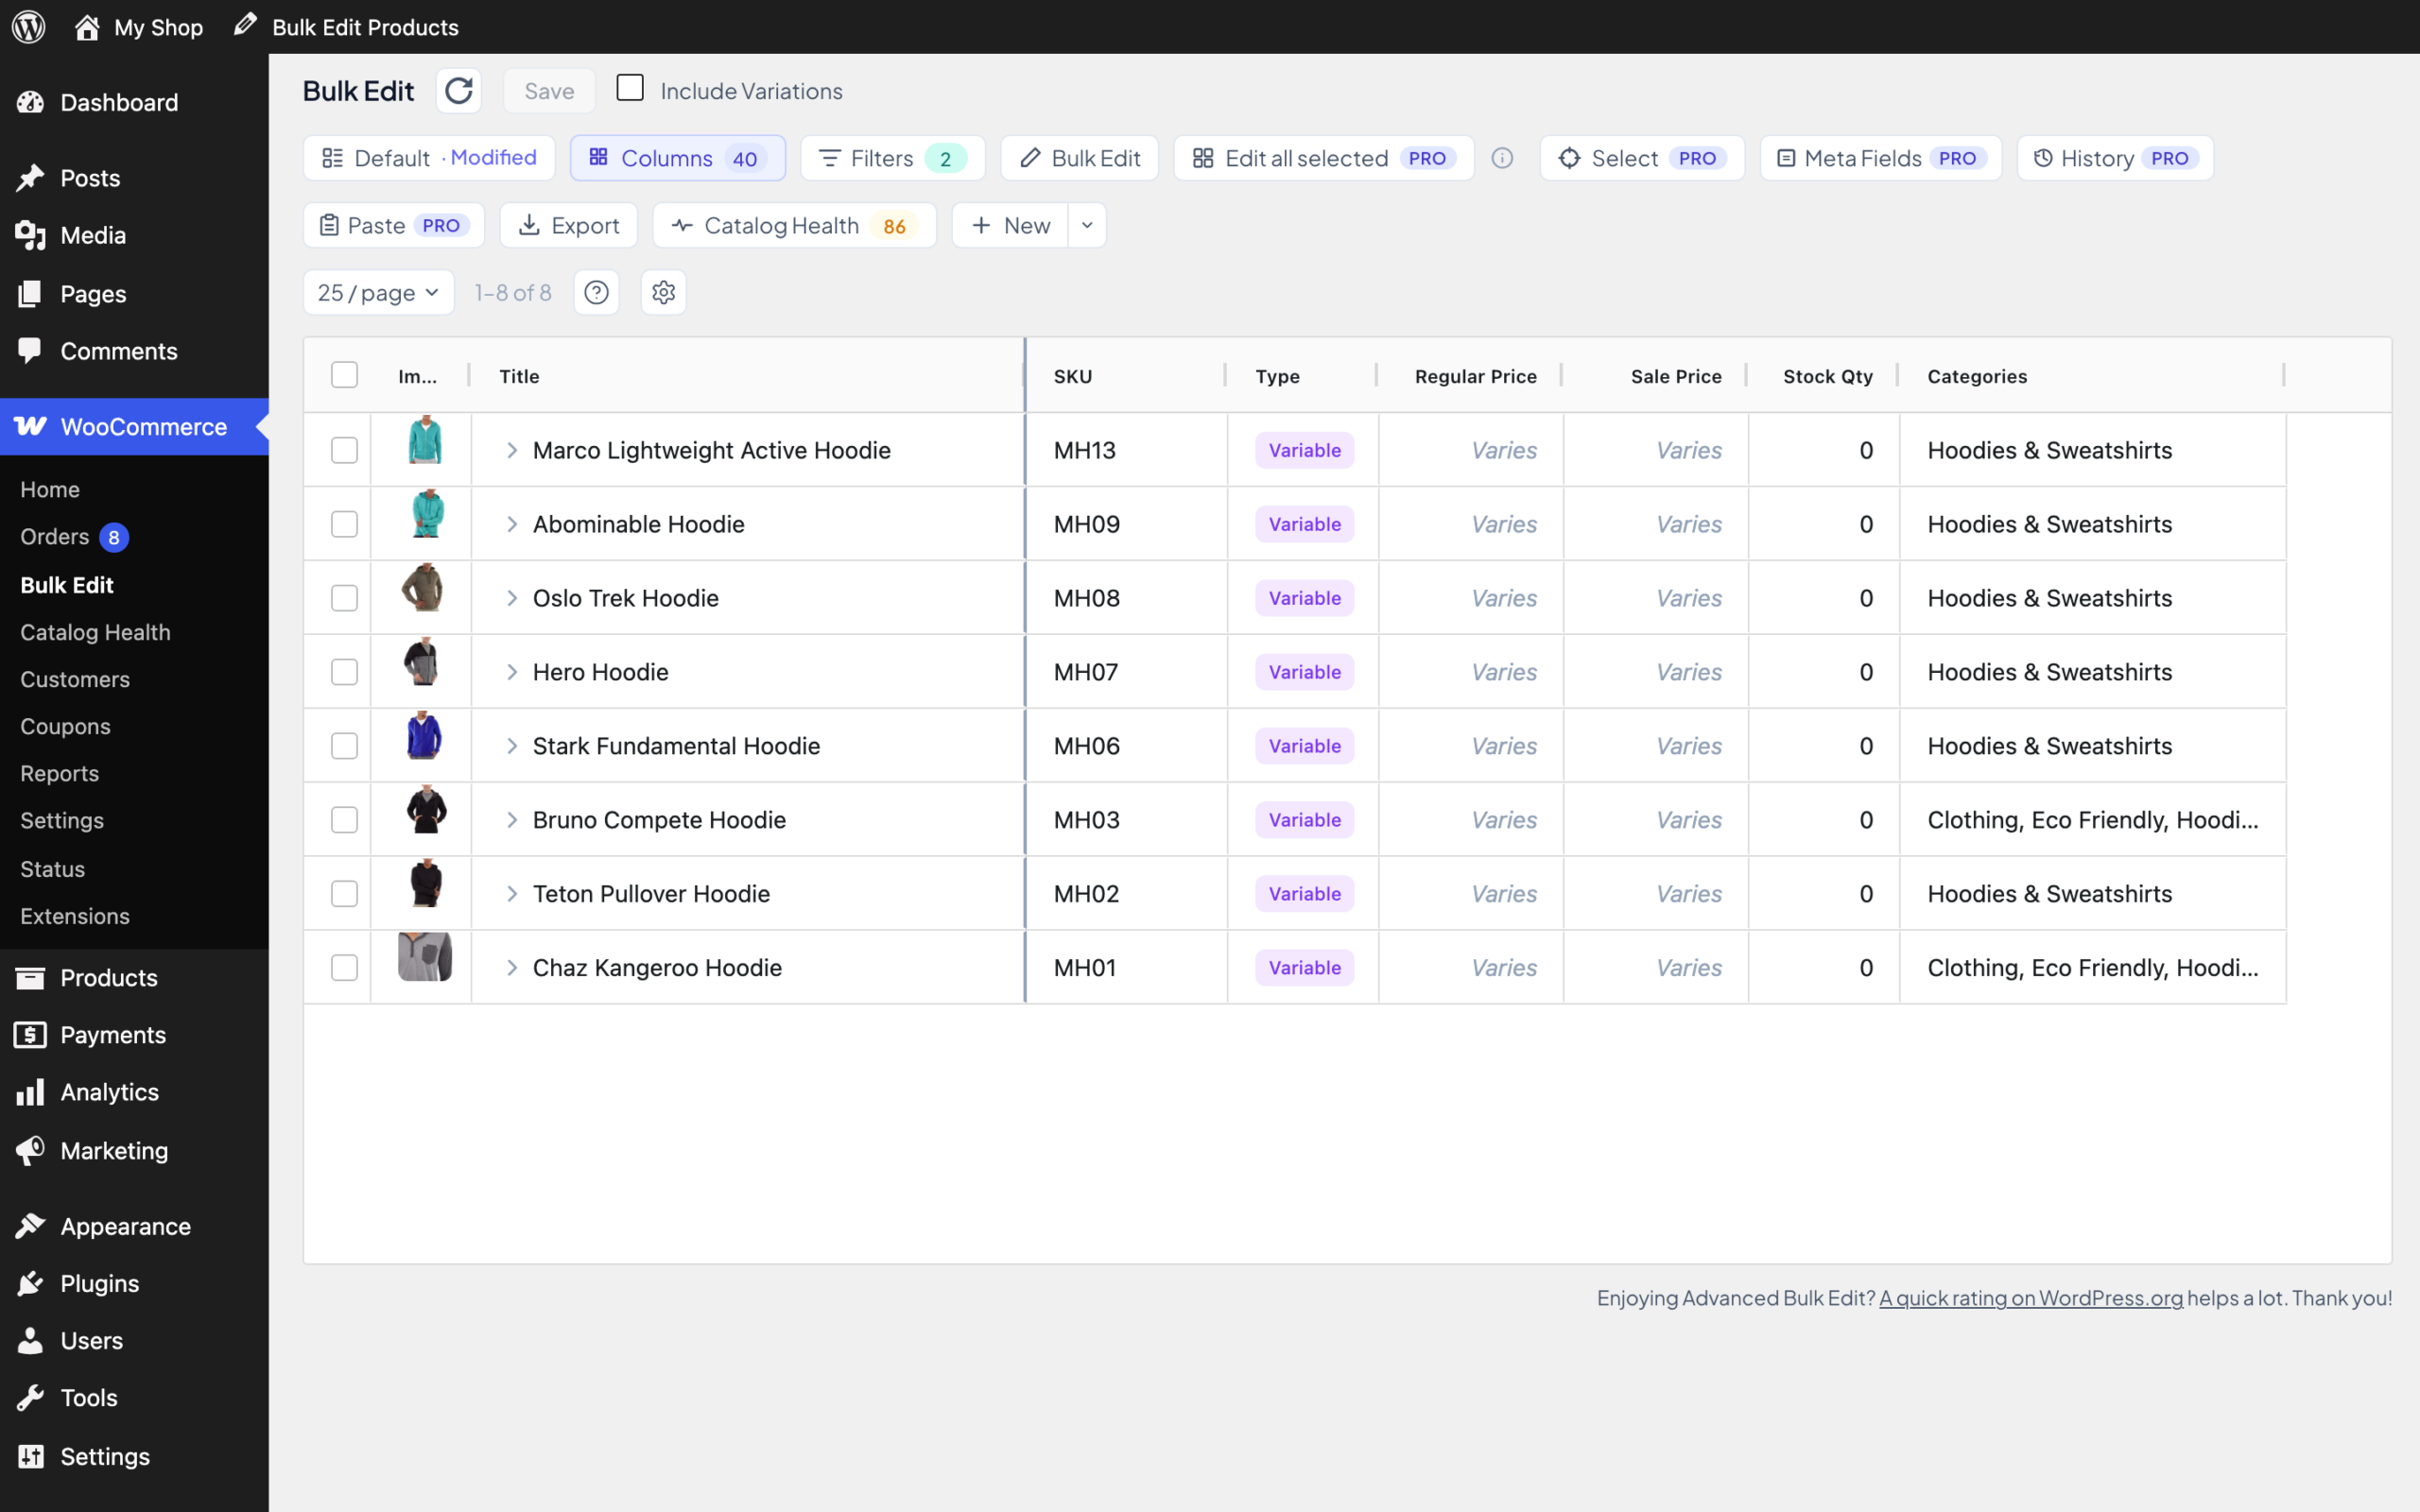
In the WordPress menu, go to WooCommerce → Bulk Edit (the classic one was under Products). Your products load straight away, with no Get Products button.
2. Find the products you need
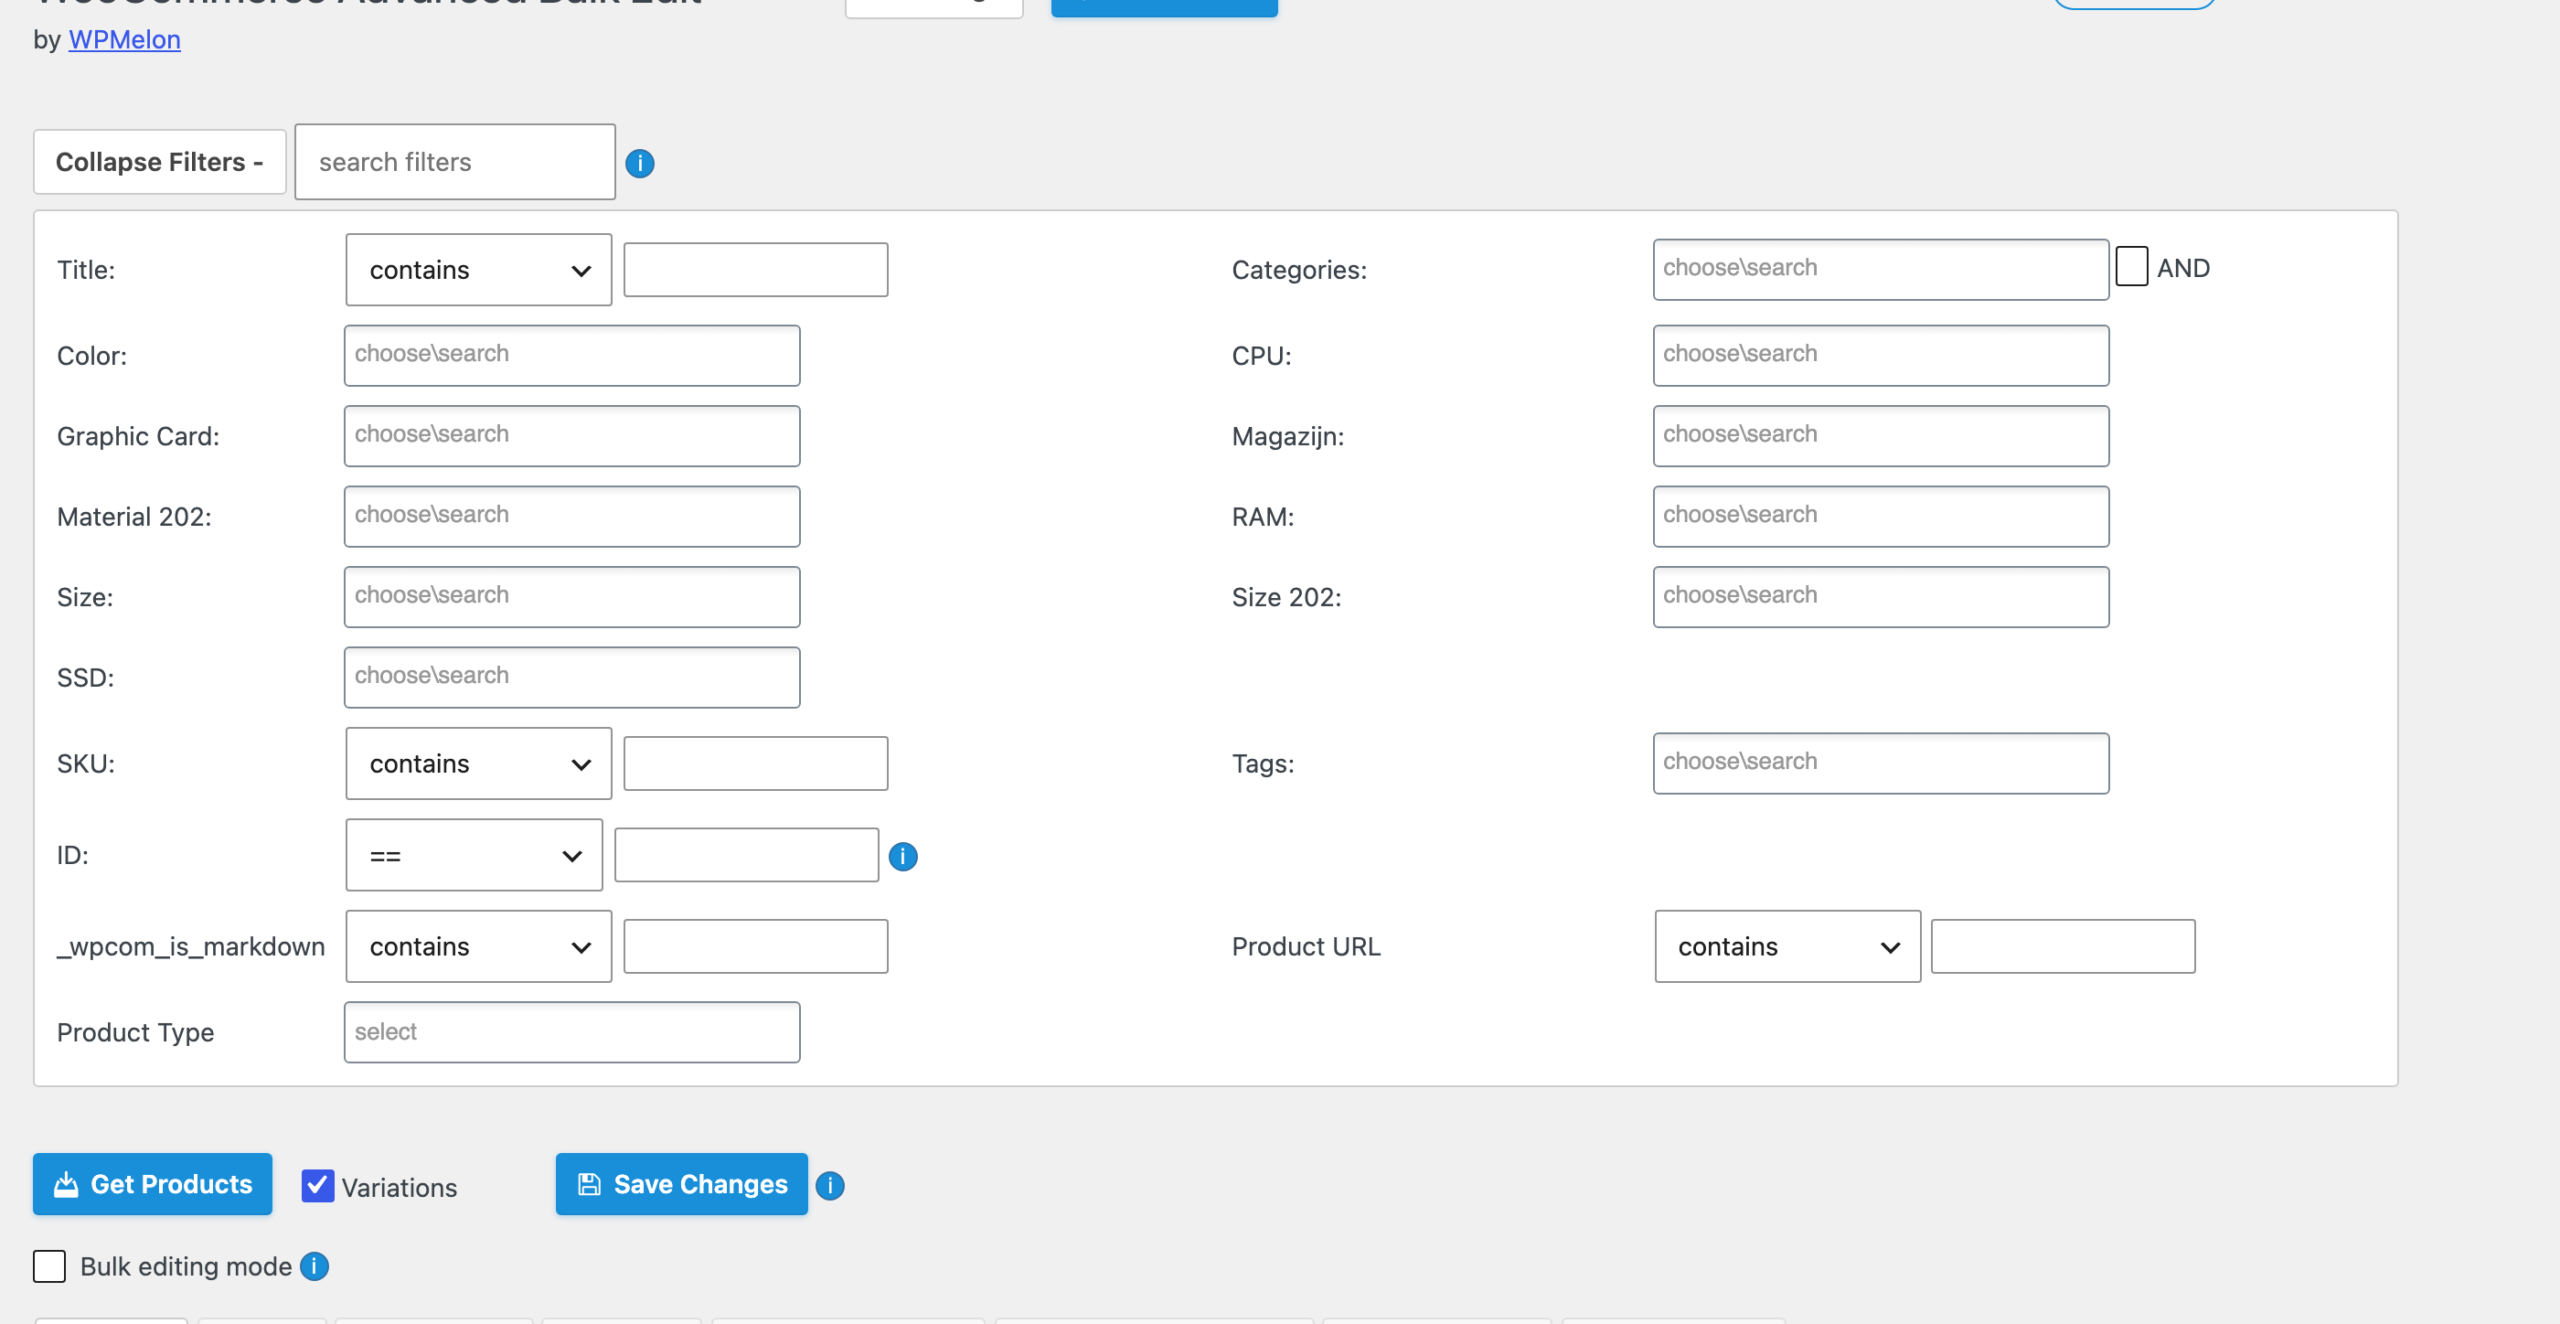
Click Filters. Type part of a product name in Search by name…, or open Category and tick one. Then click Apply. A filter hides the products you don’t need right now; Clear All brings them back.
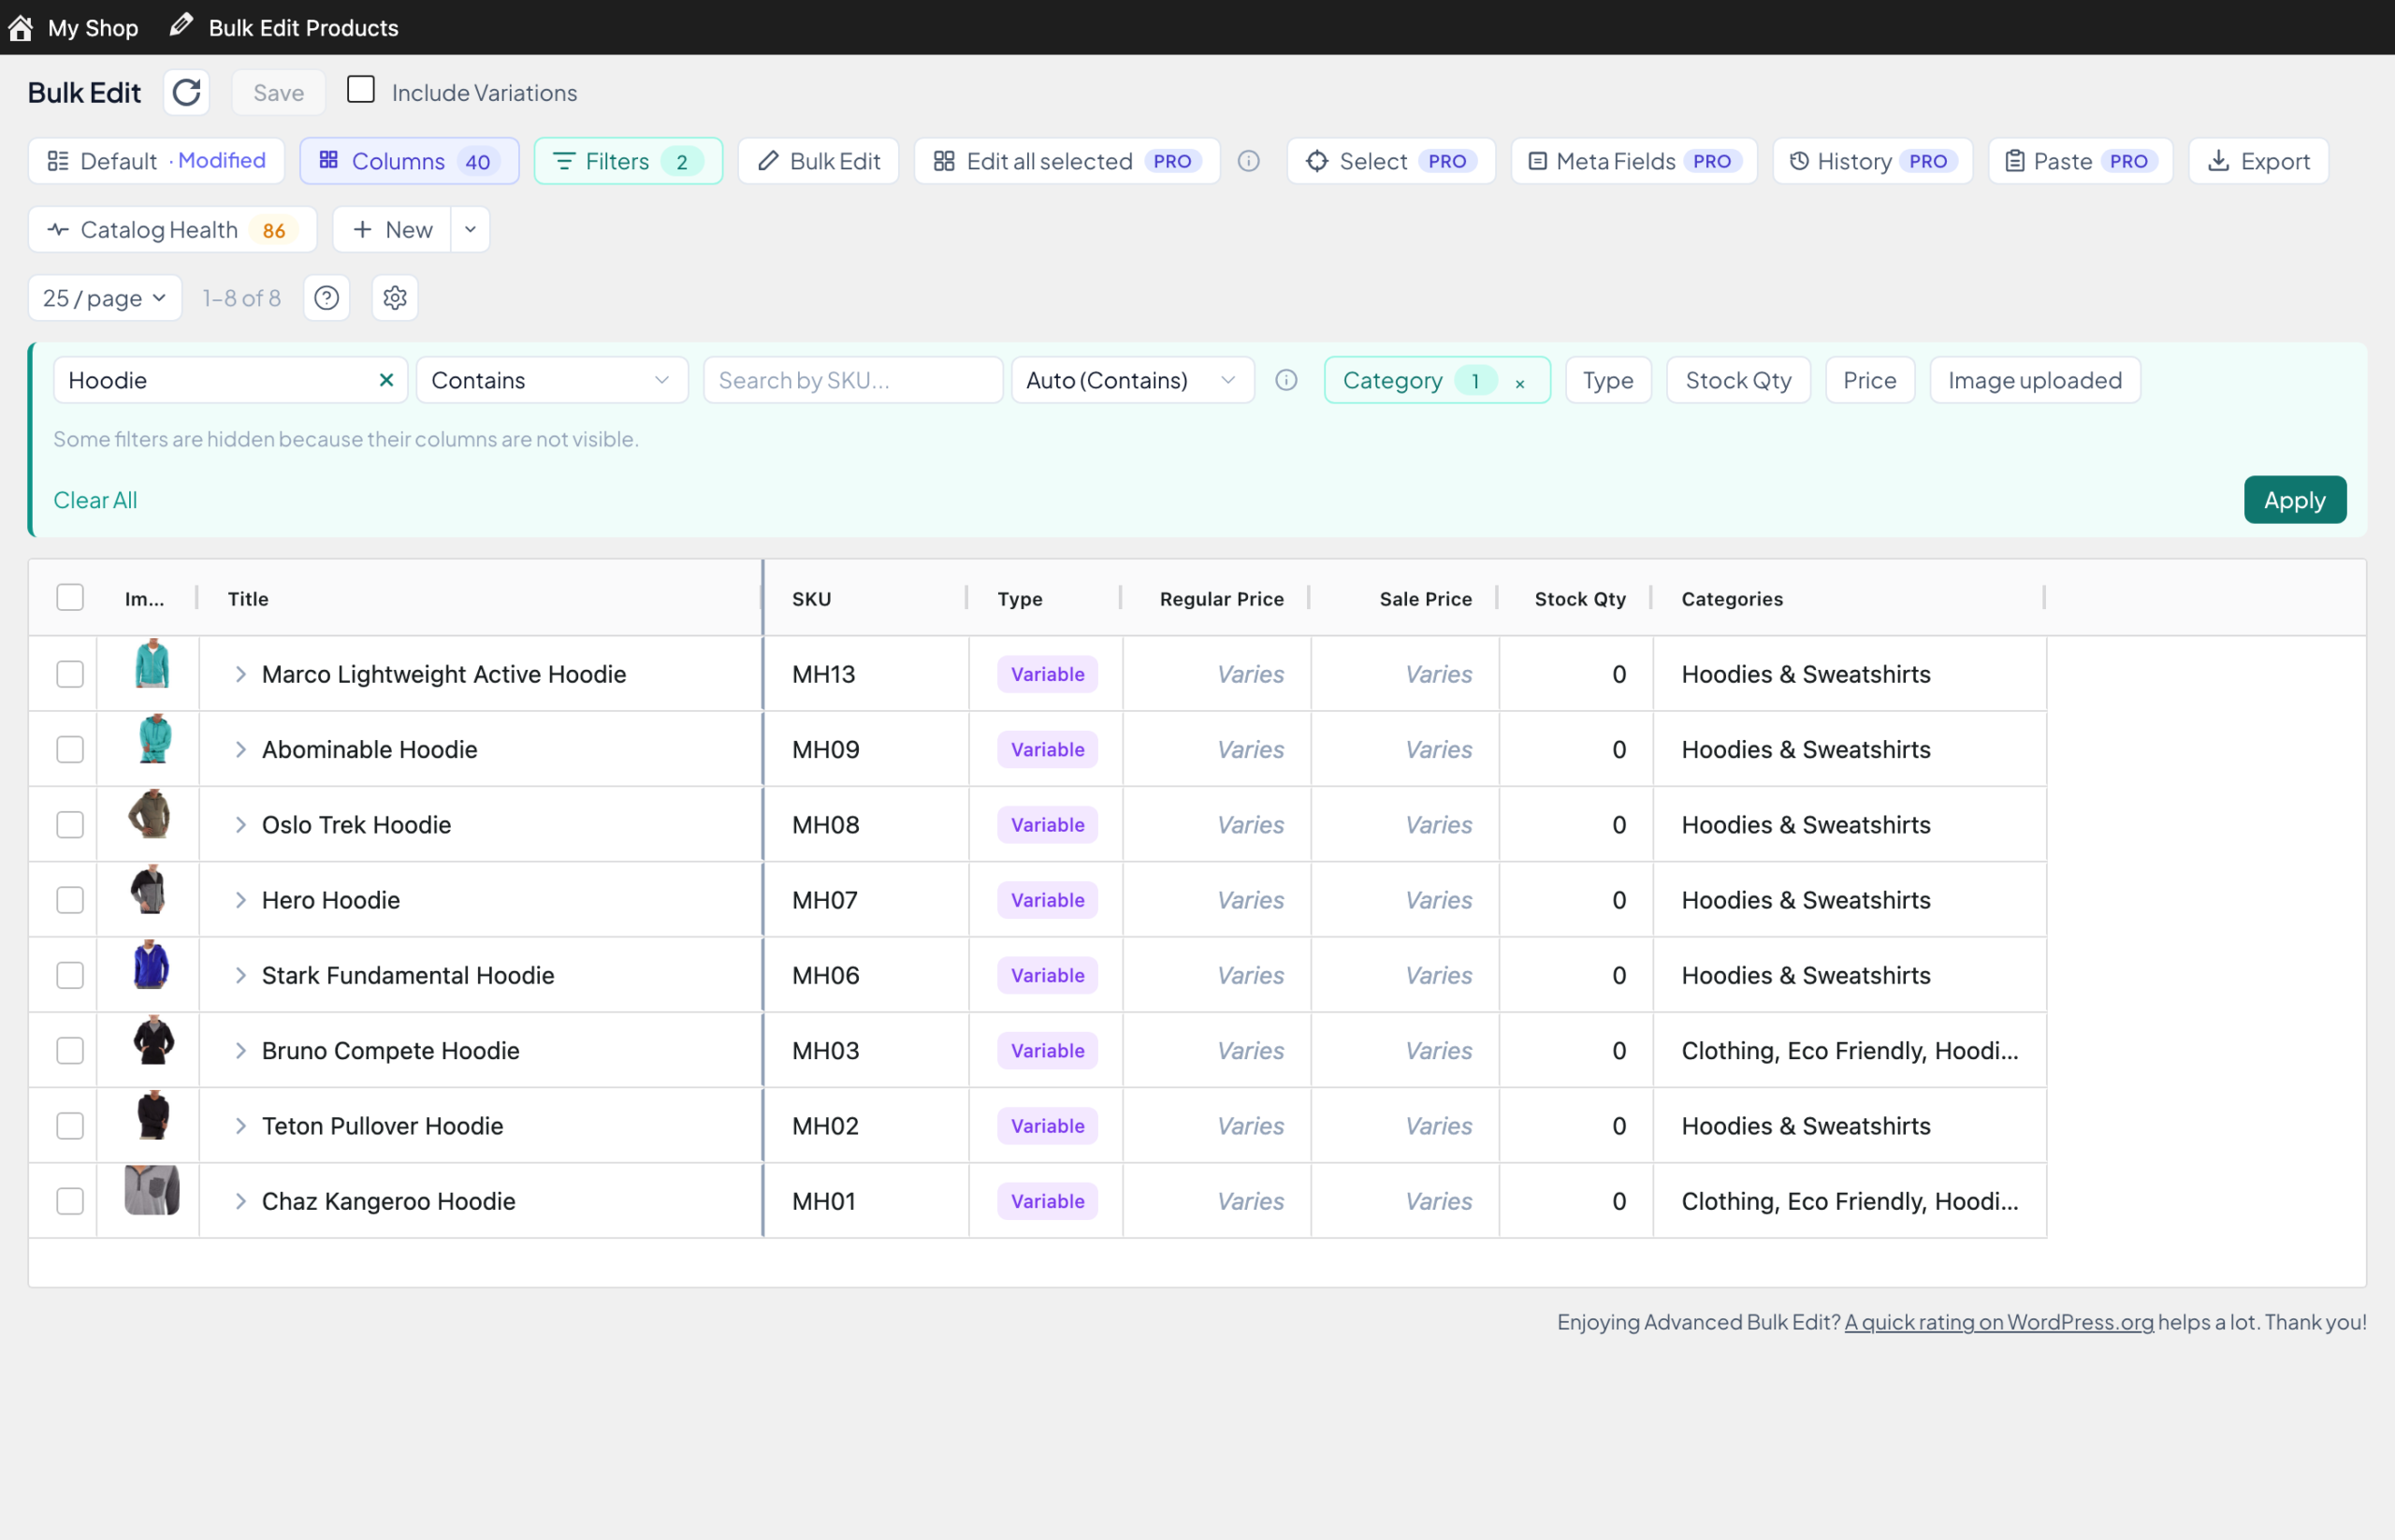
No Category filter? Open Columns and tick Categories first.
3. Change the values in the table
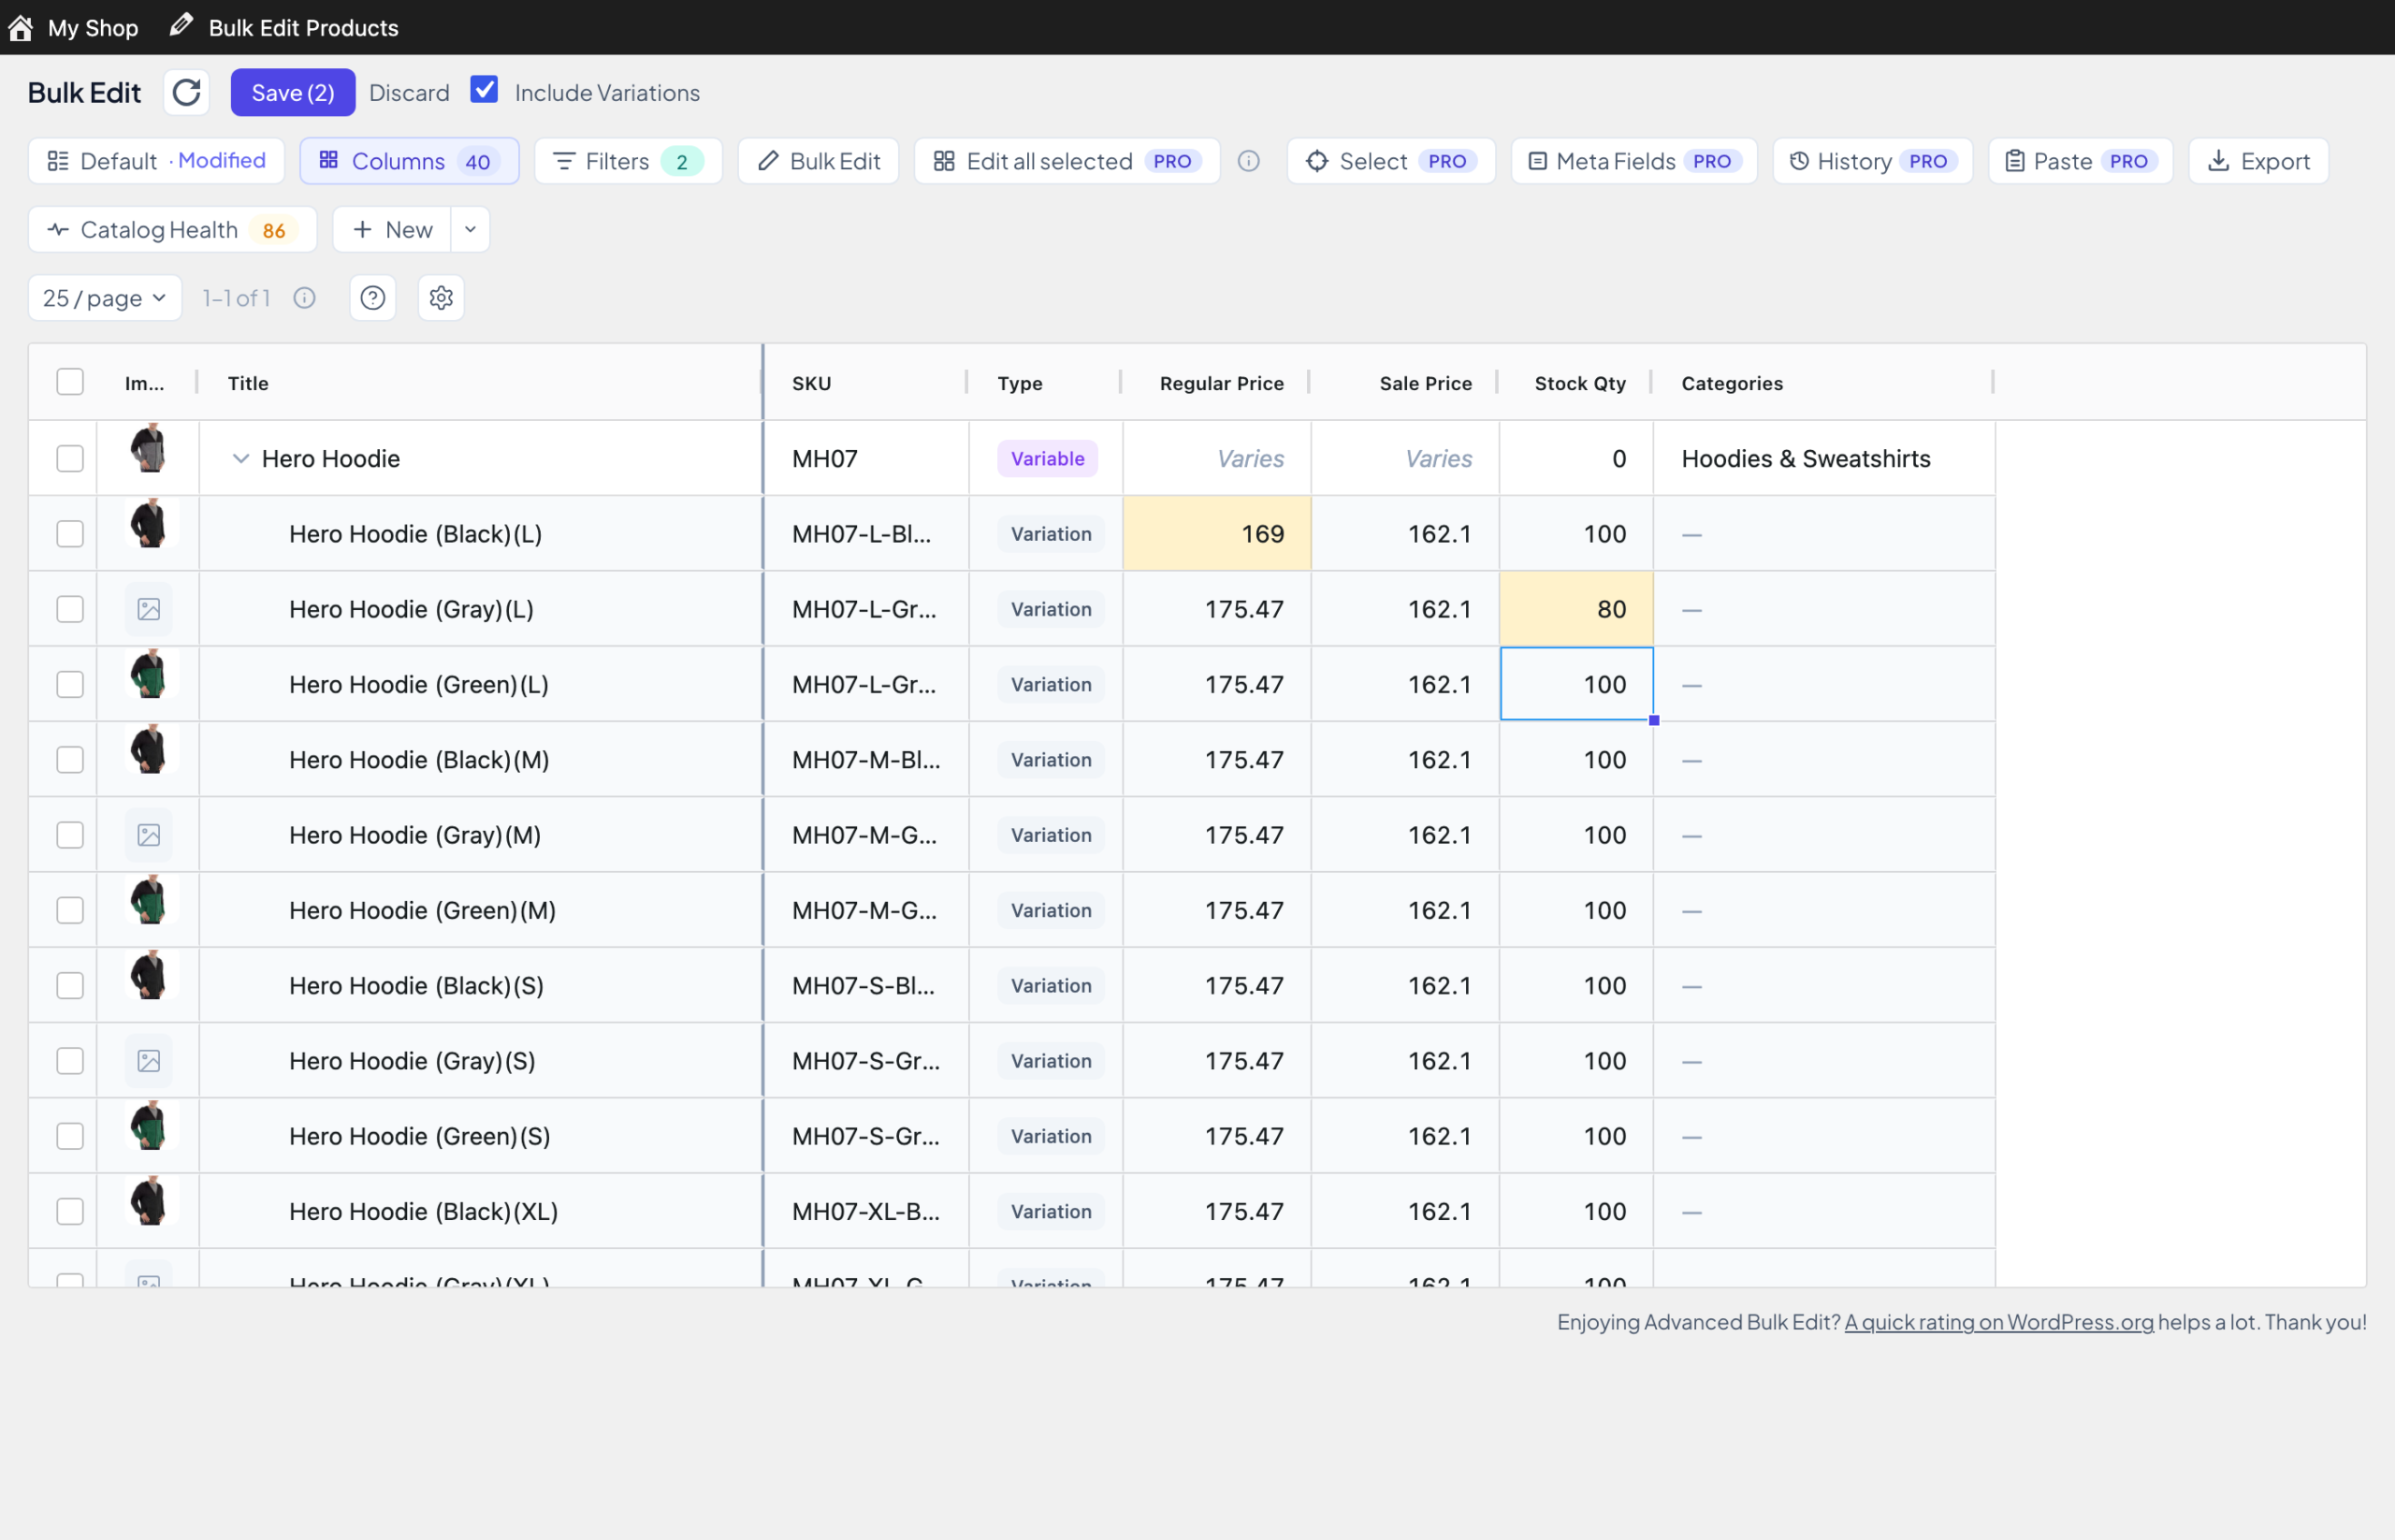
Click a cell, type the new value and press Enter, like in a spreadsheet. The cell turns yellow: changed, but not saved yet. The Save button counts the waiting changes.
Products with sizes or colours have variations, one row per version (“Hero Hoodie, black, L”). Tick Include Variations to see them.
4. Save
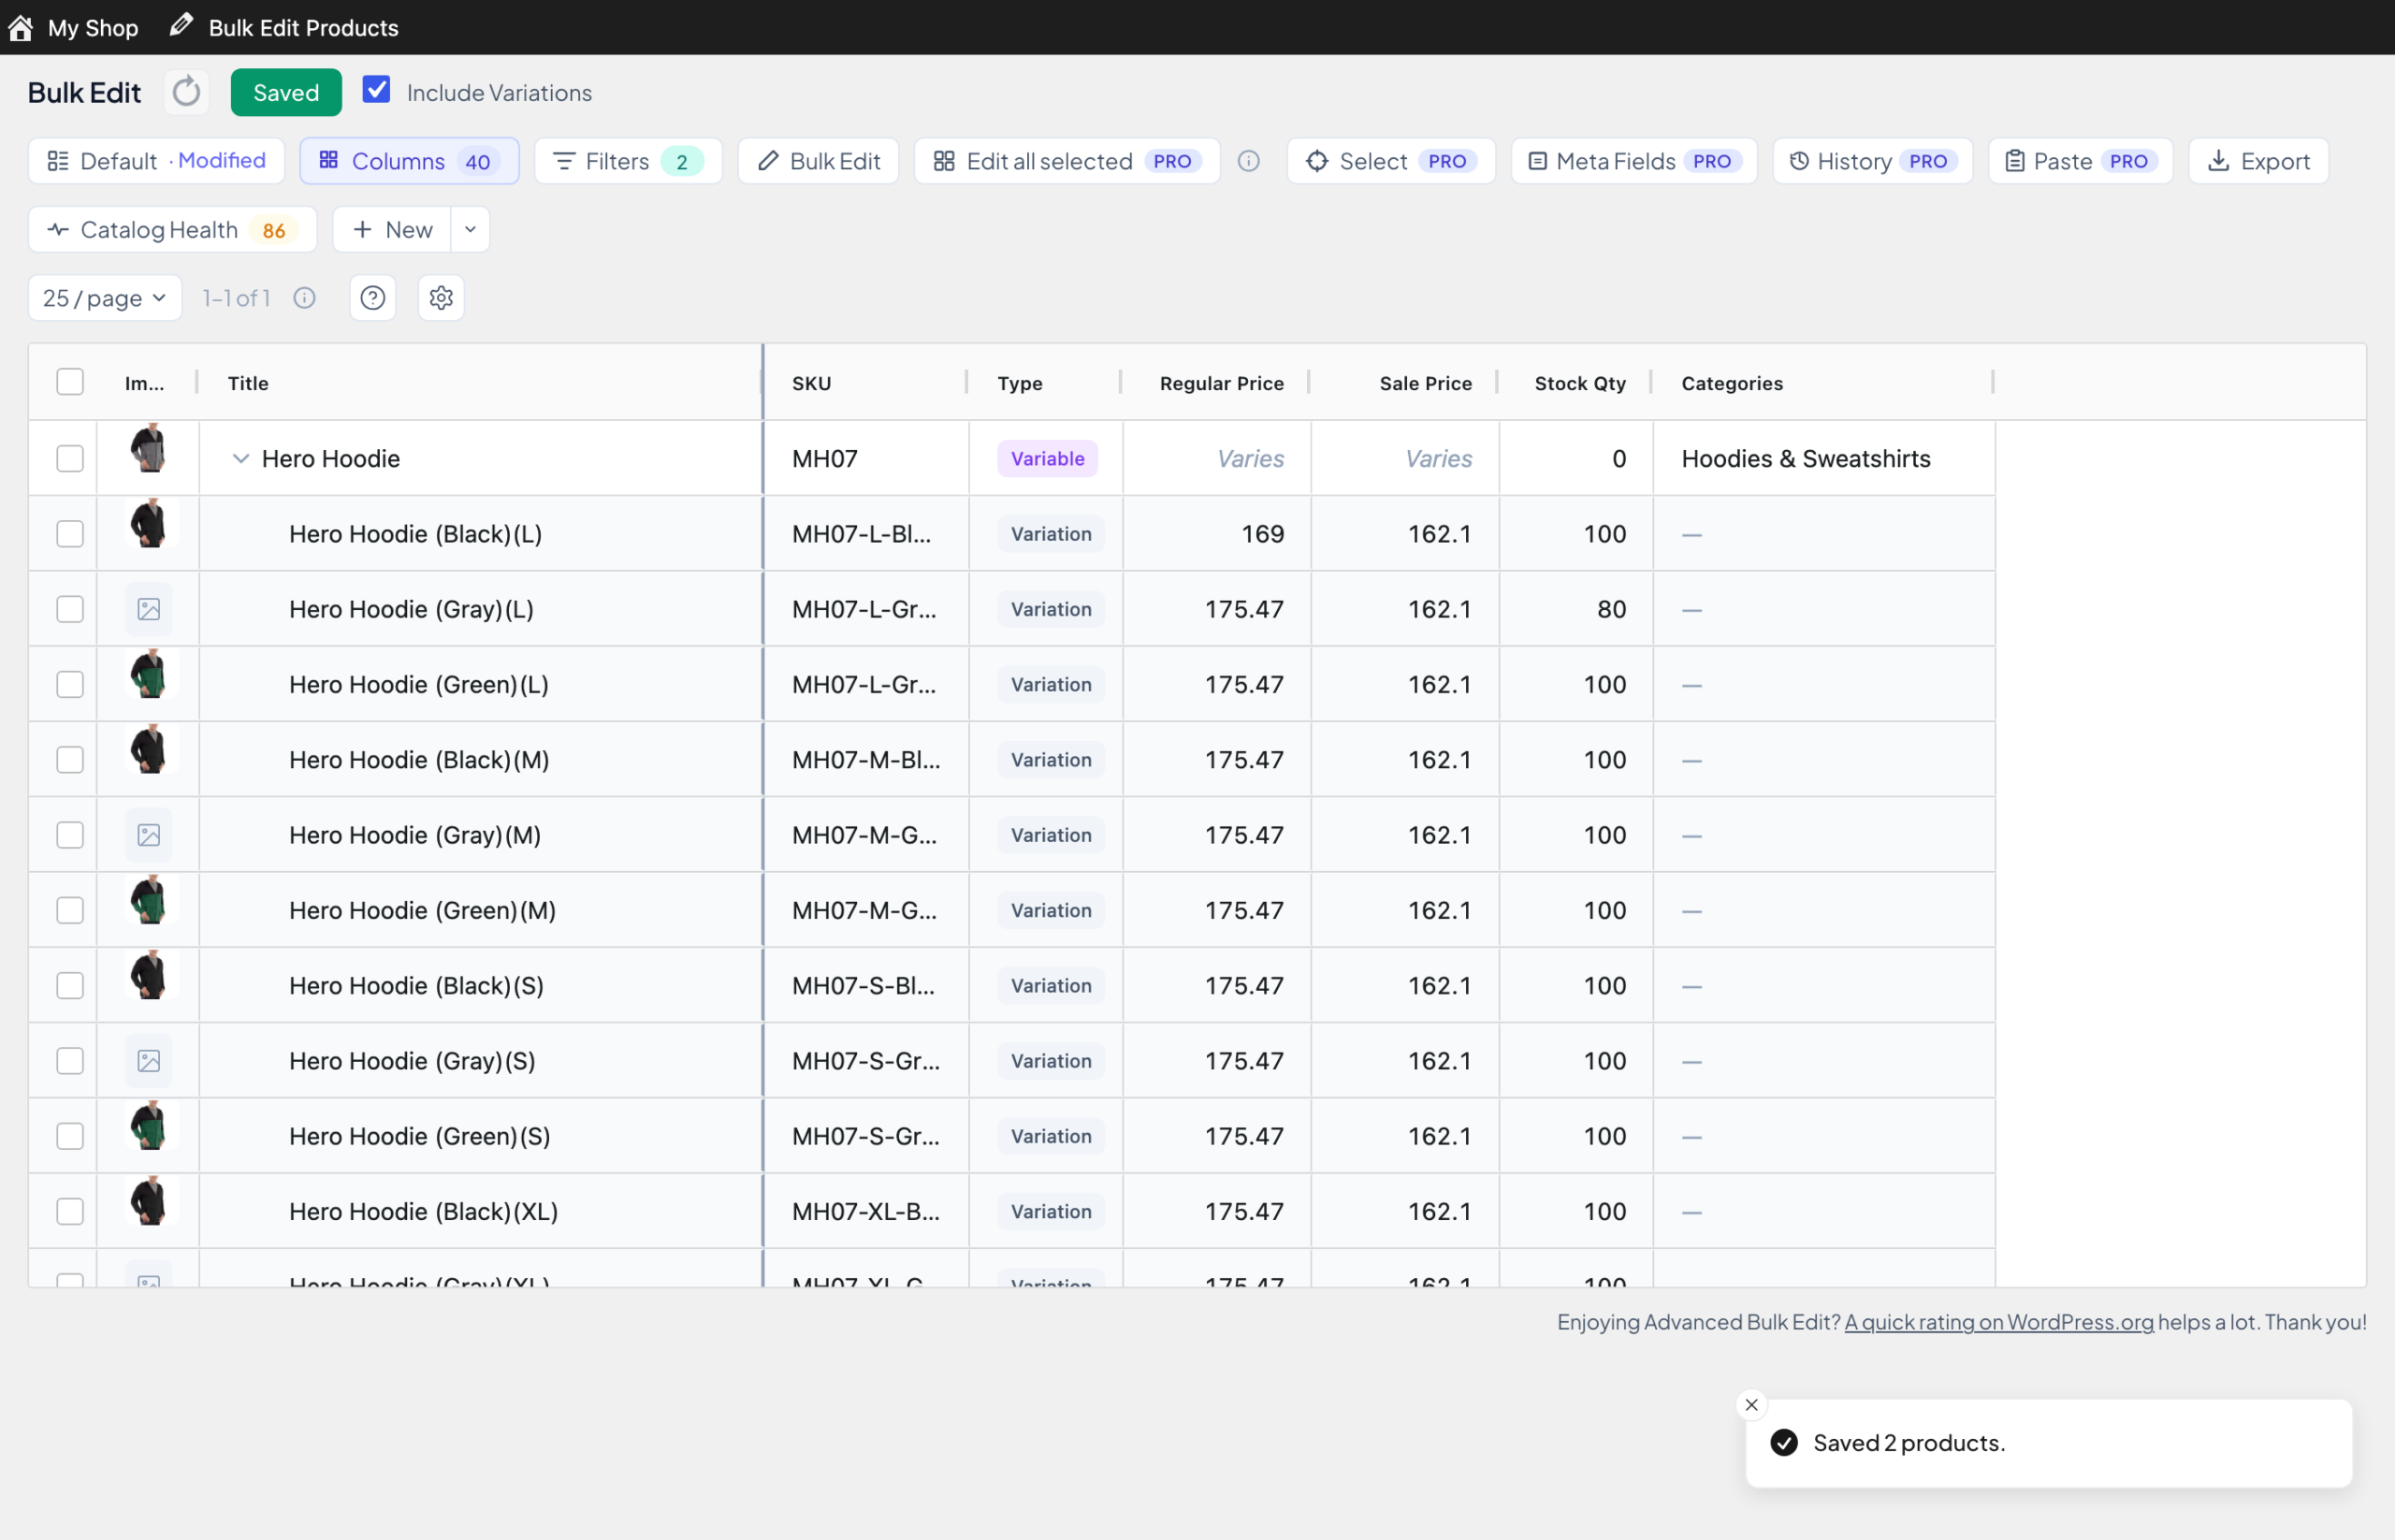
Click Save (or press Ctrl+S, Cmd+S on a Mac). A message confirms it and the yellow goes away. If you try to leave with unsaved changes, the browser asks first.
Where did it go?
Each everyday task, with its old name and its new one.
| What you want to do | Classic WCABE | Bulk Edit |
|---|---|---|
| Open the editor | Products → WooCommerce Advanced Bulk Edit | WooCommerce → Bulk Edit |
| See your products | Click Get Products | They load on their own |
| Find products by name or category | Filter panel at the top | Filters, then Apply |
| Find products by price or stock | Switch on in Plugin Options first | Filters → Price, Stock Qty (ready to use) |
| Change one value | Click the cell and type | Click the cell, type, press Enter |
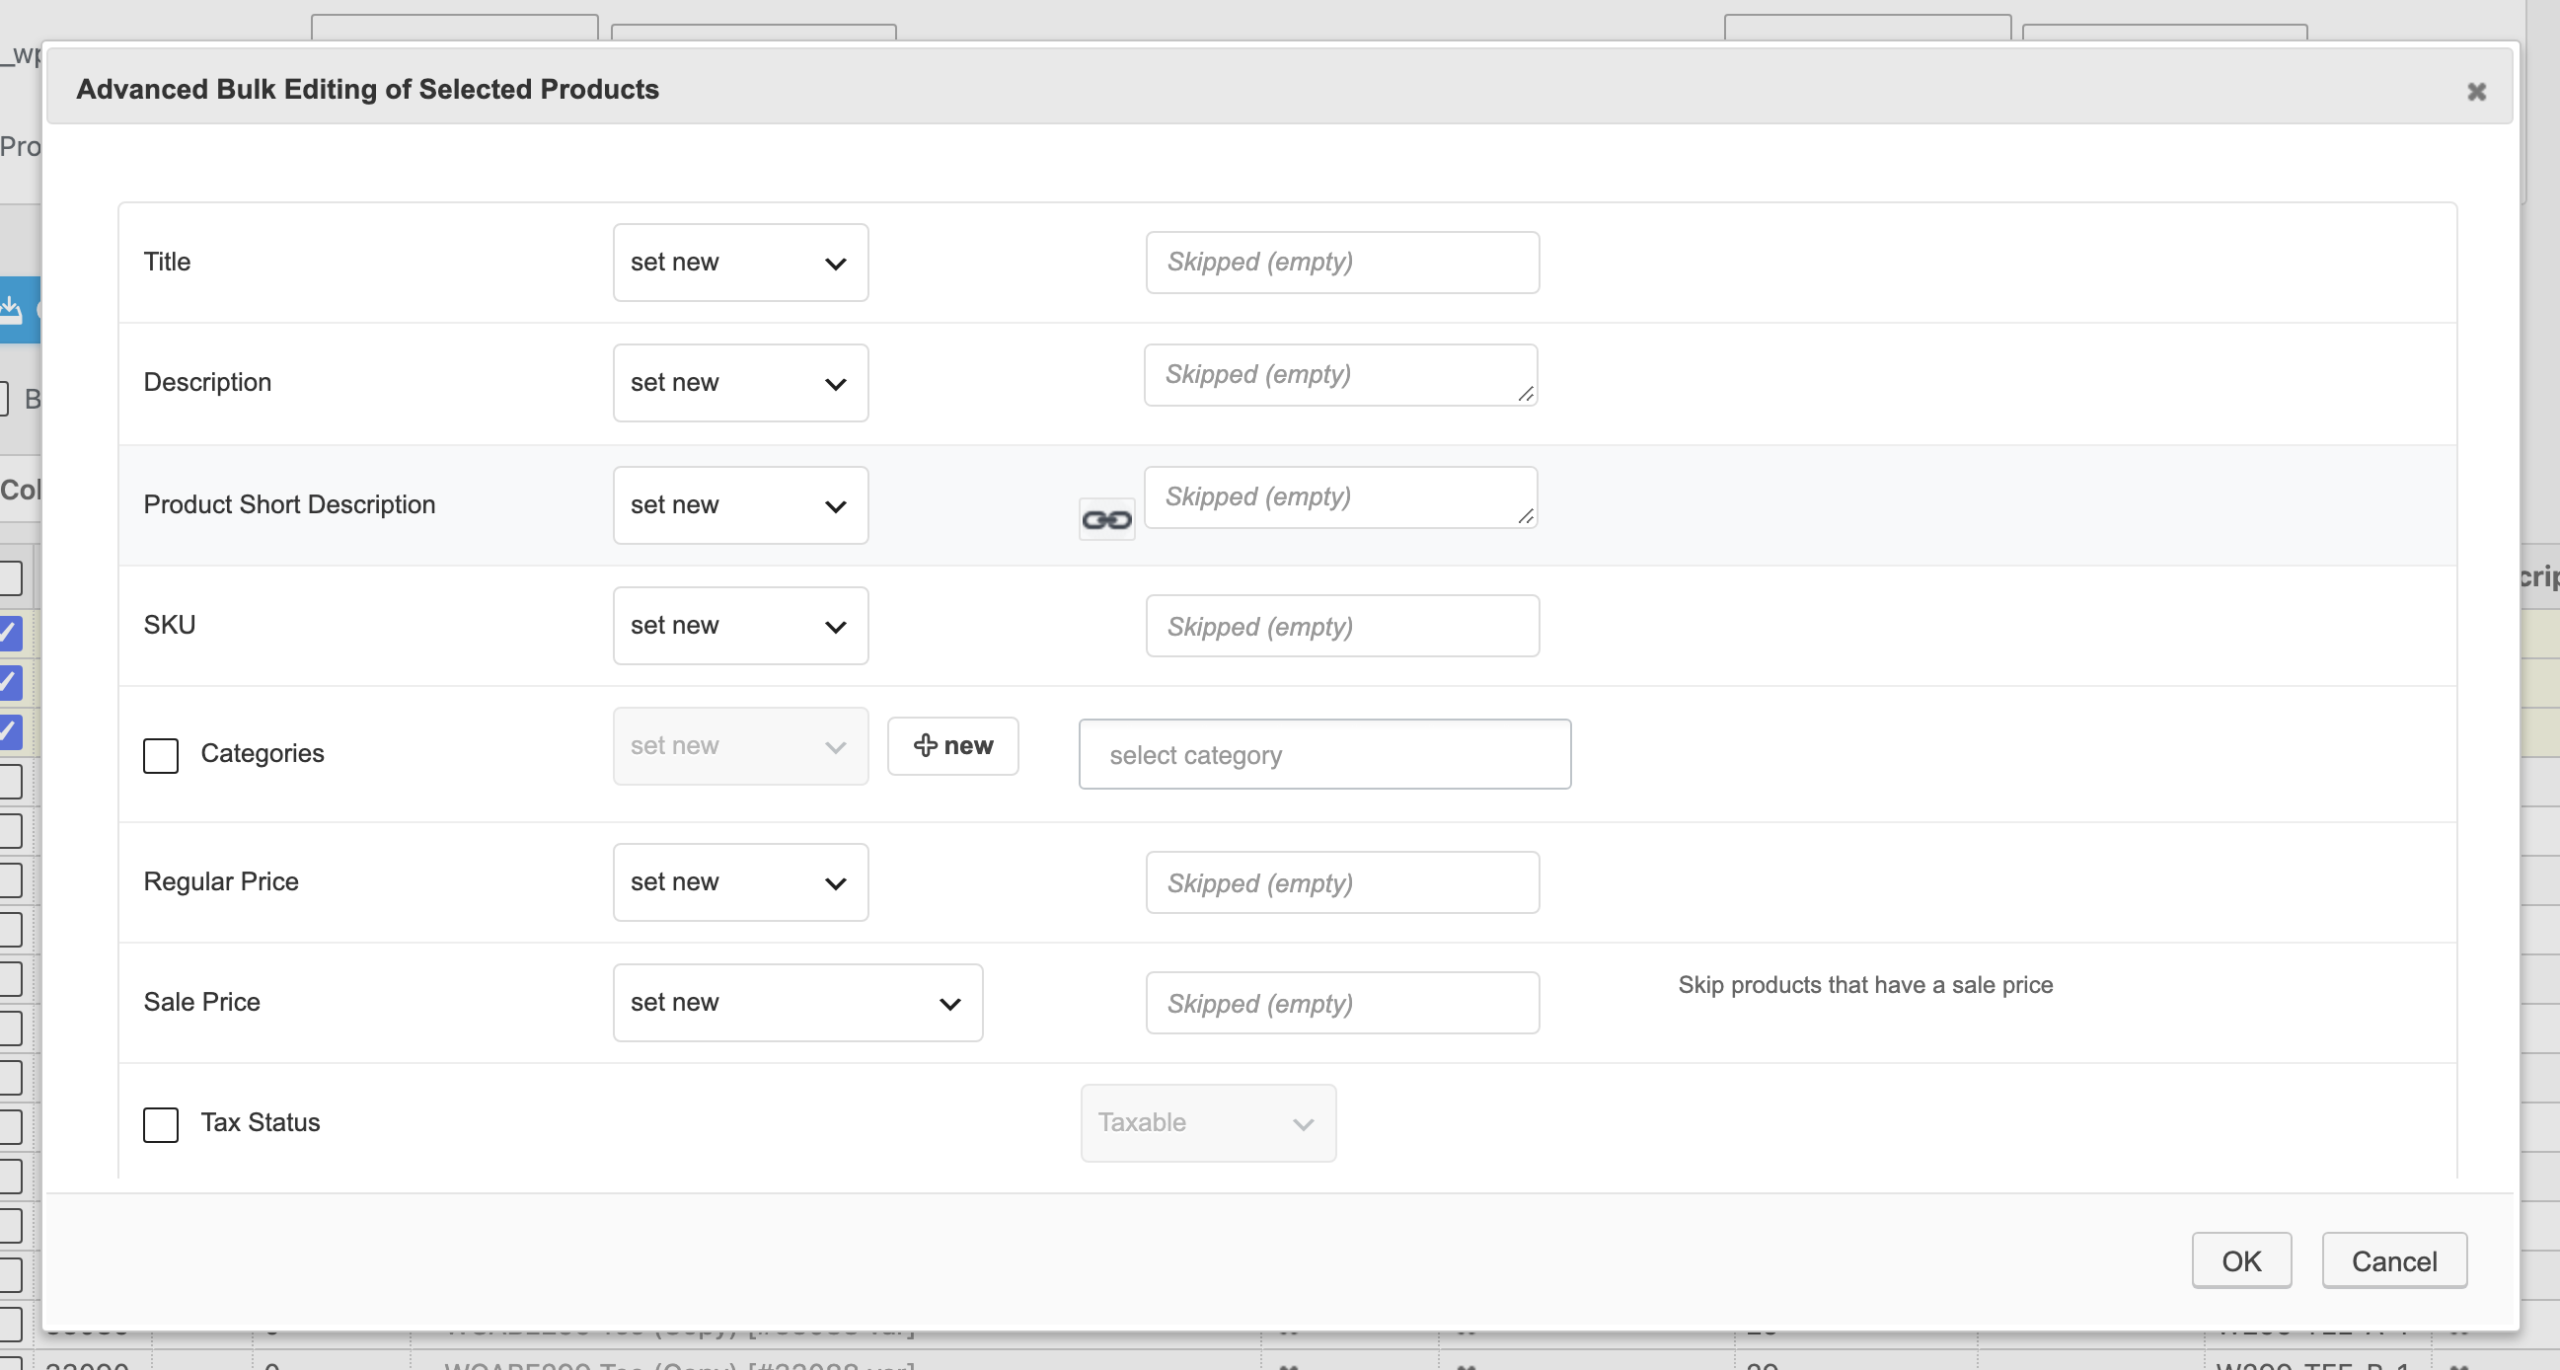
| Change many products at once | Advanced Bulk Edit | Bulk Edit |
| Find and replace text | Advanced Bulk Edit → replace text | Bulk Edit → Find & Replace |
| Type once, change every selected row | Bulk editing mode | Edit all selected PRO |
| Pick products by rules | Selection Manager | Select PRO |
| Save | Save Changes | Save |
| Throw away changes you haven’t saved | Revert to original value | Discard |
| Undo a change after saving | Not possible | History → Restore PRO |
| See sizes and colours (variations) | Variations checkbox | Include Variations checkbox |
| Keep a screen layout | Load/Save View | The views button (says Default at first) |
| Export to a spreadsheet (CSV) | Export to CSV | Export |
| Update products from a spreadsheet | Update via CSV | Paste PRO |
| Add, copy or delete products | Add, Duplicate, Delete | New, and the Actions menu |
Opening the editor
Finding products
Changing many products at once
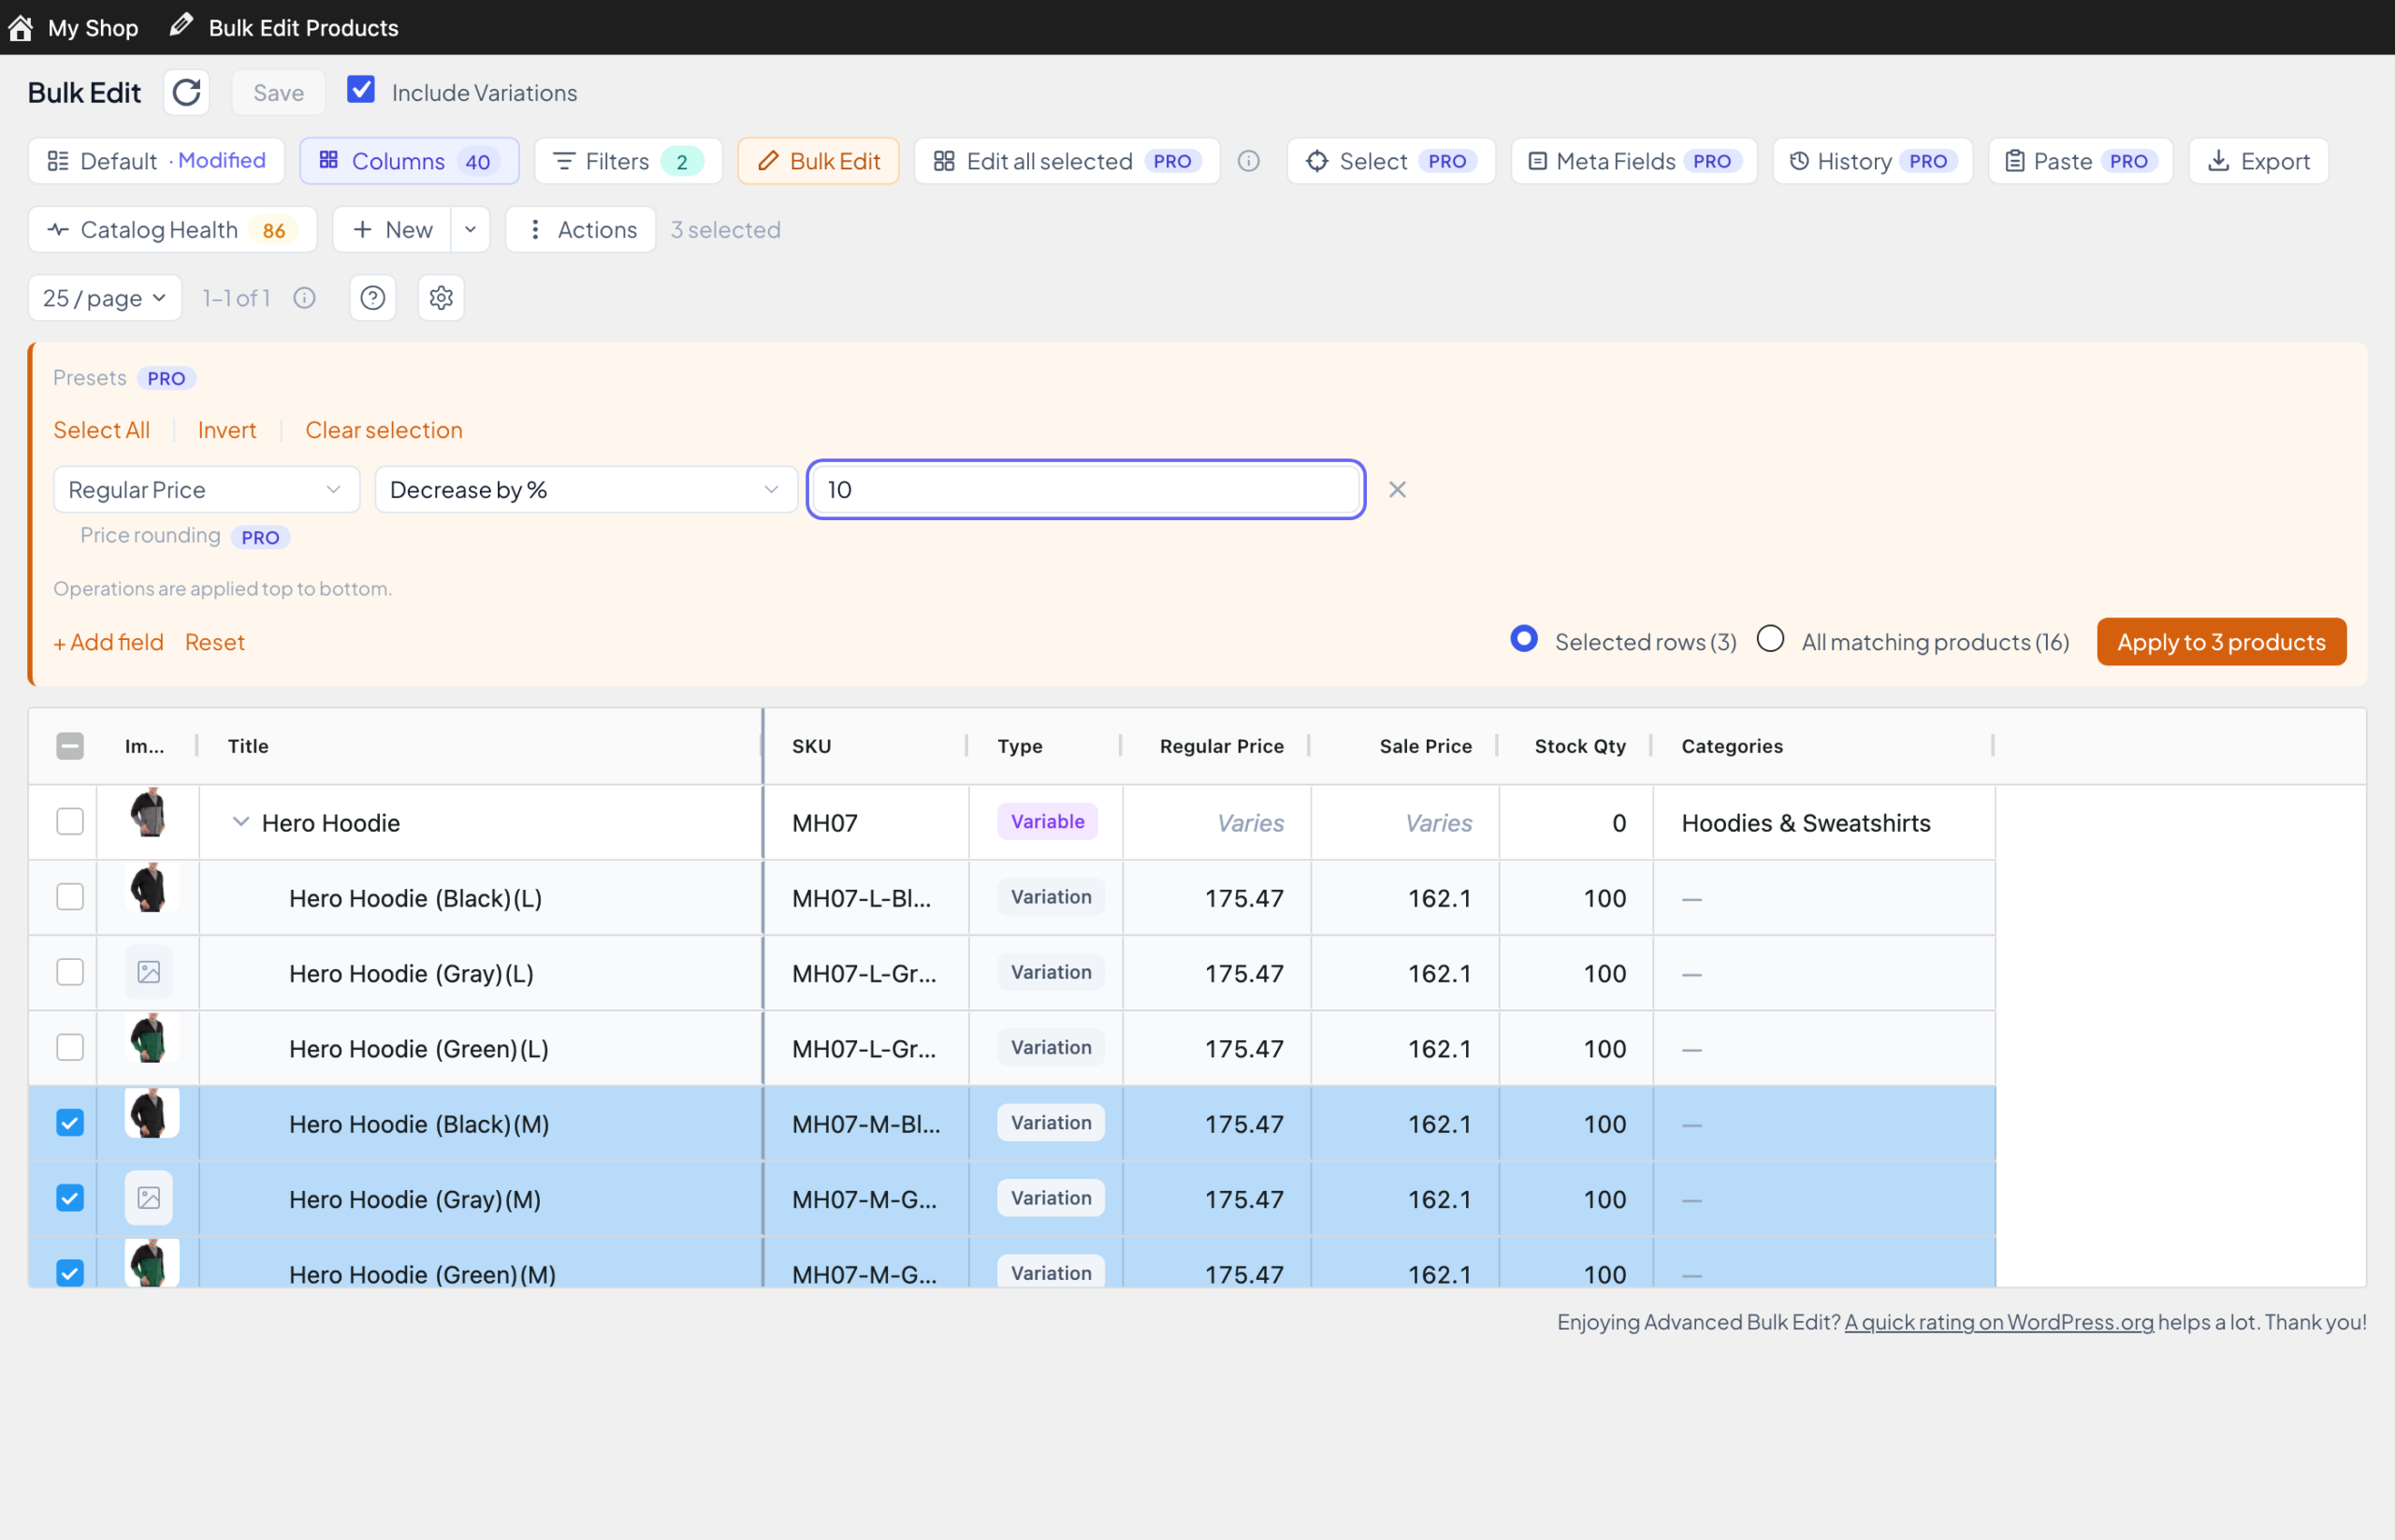
Tick the products, click Bulk Edit, choose a field in Select field…, pick what to do (say Decrease by %) and type the number. Apply to 3 products shows the new values in yellow to check before you Save. All matching products changes everything your filter finds, on every page, with a preview first.
What’s not in Bulk Edit
A few classic tools have no match:
- Split Variations, which turned variations into separate simple products.
- Importing a CSV file. Use WooCommerce’s own importer (Products → Import), or Paste from Excel PRO.
- Reverting only the selected rows before saving. Discard throws away all unsaved changes at once.
- Hiding the editor from Shop Managers. Everyone who can manage WooCommerce (Administrators and Shop Managers) can open Bulk Edit.
- The Require confirmation on save option.
Set up the screen before your staff start
A short, tidy table is easier for a shop assistant. Build it once and hand it over.
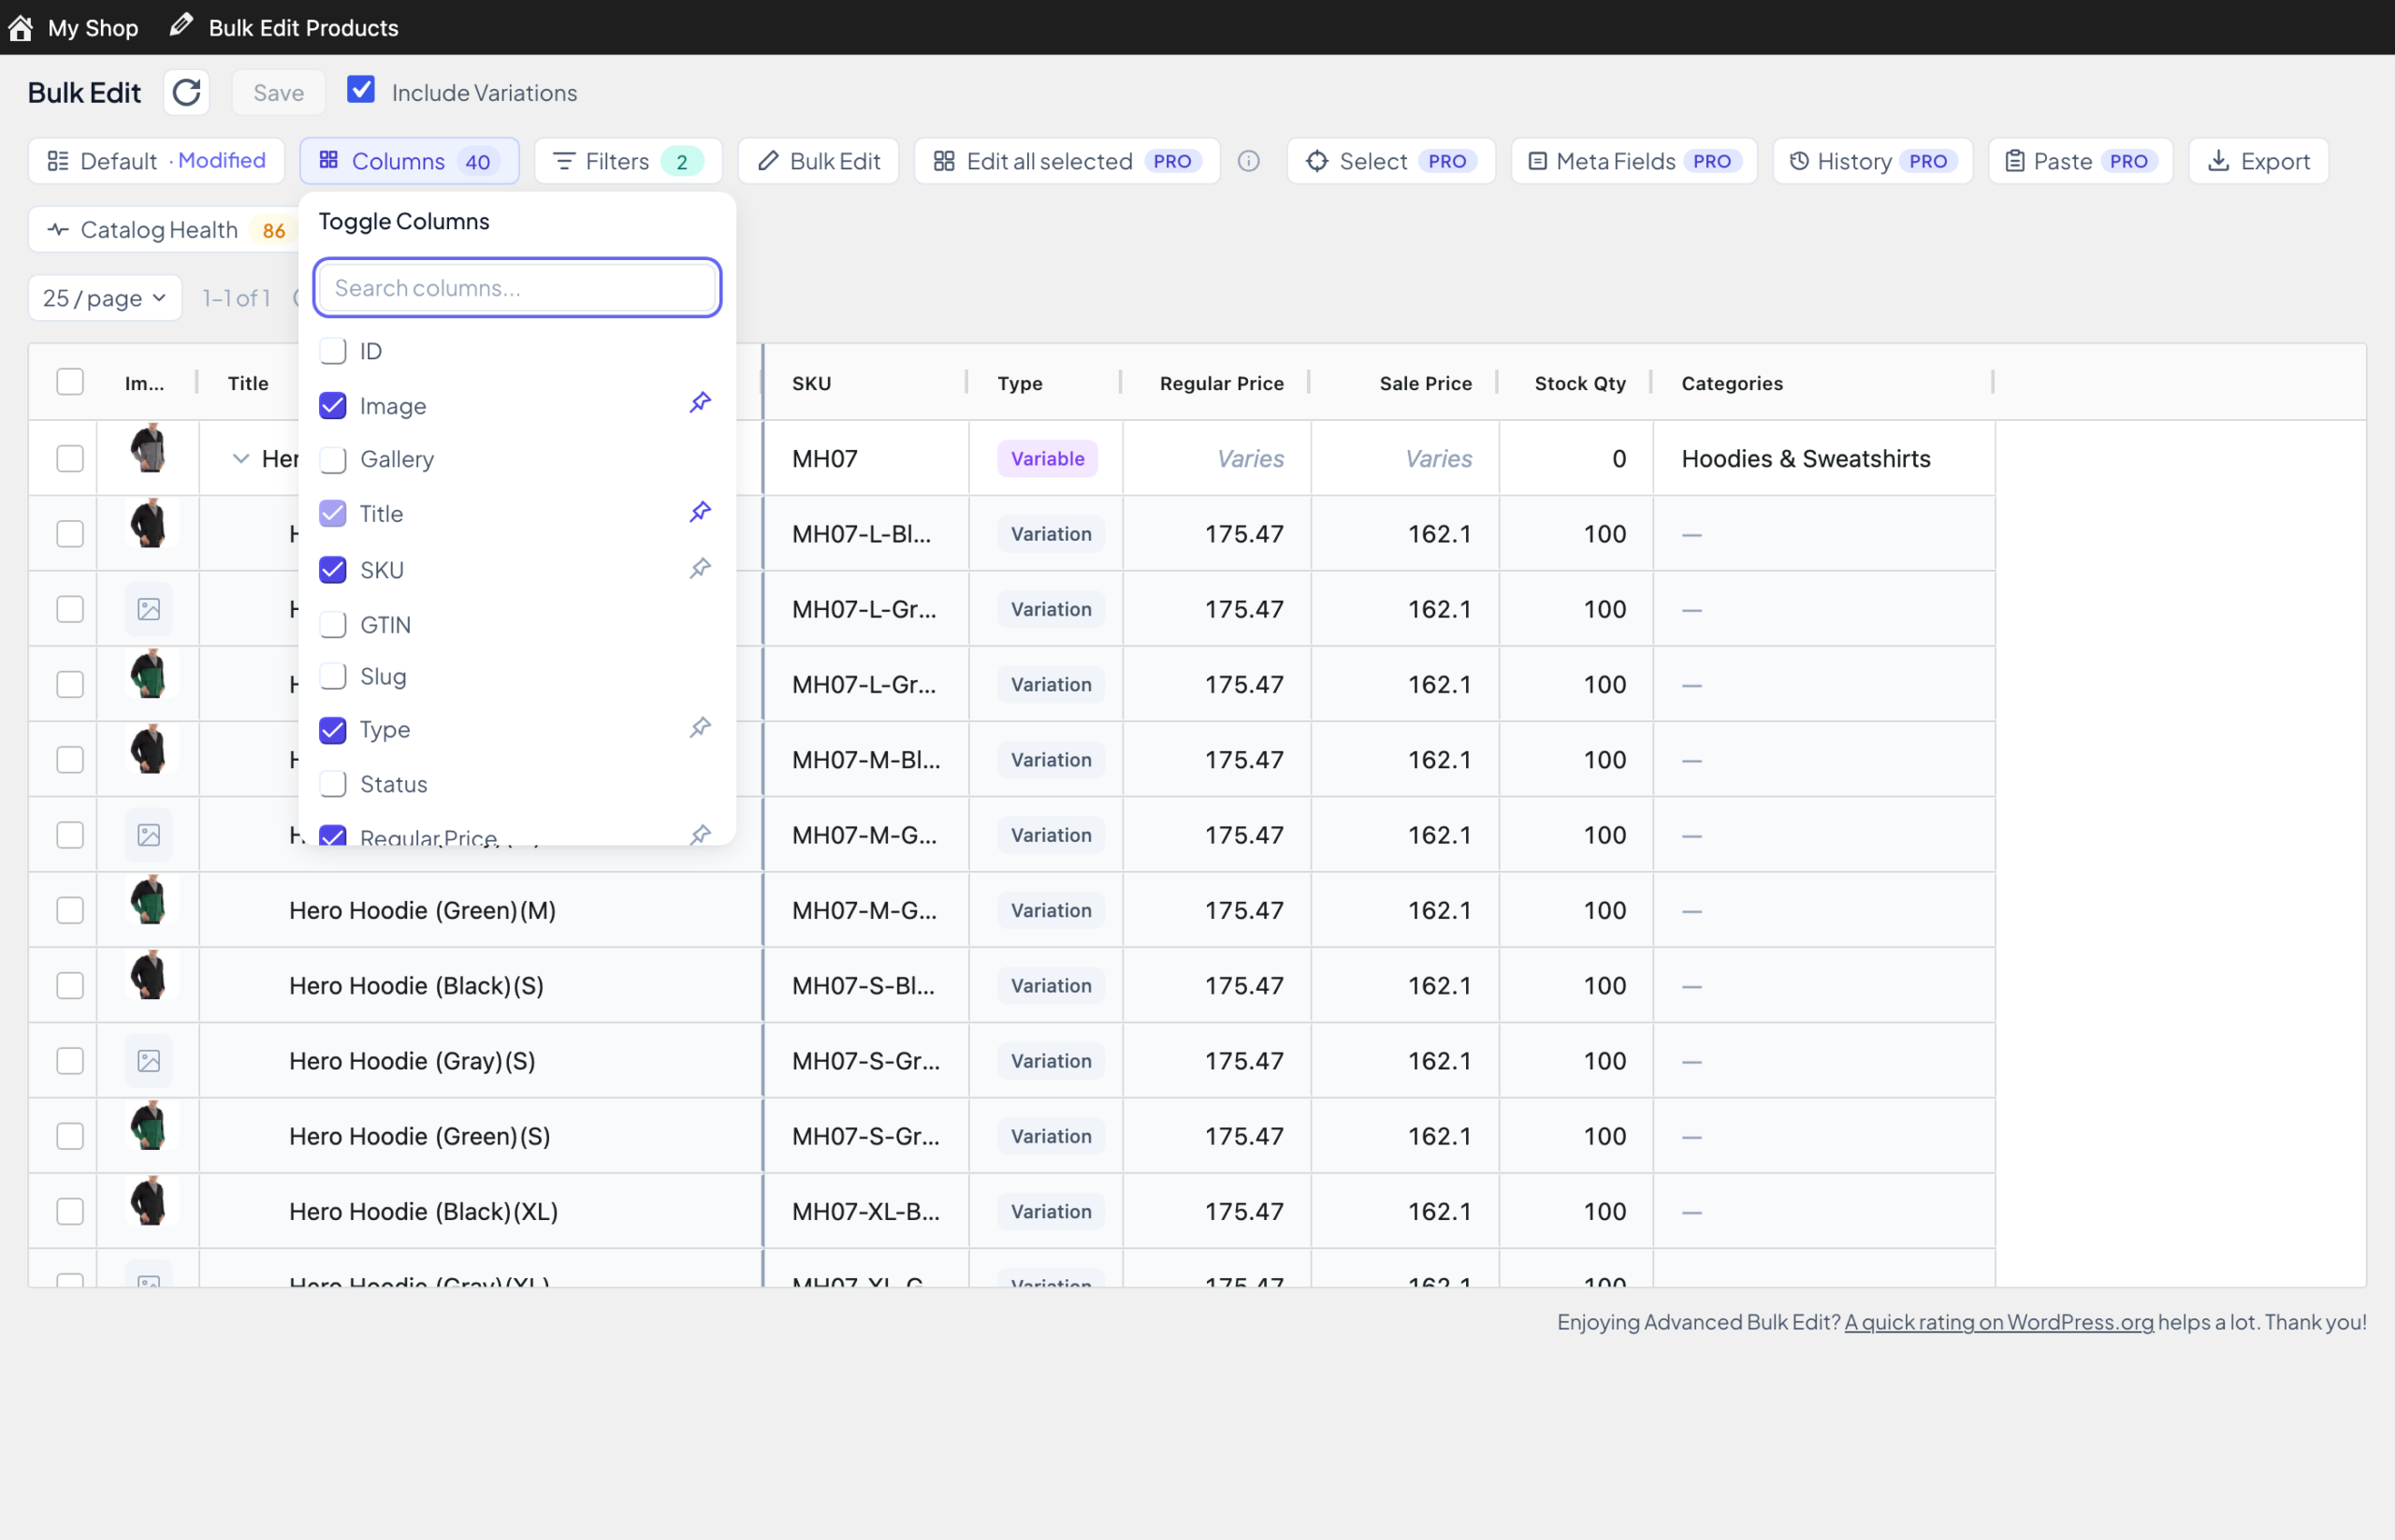
- Choose the columns. Click Columns and tick only what they need, for example Title, Categories, Regular Price, Sale Price and Stock Qty. (Keep Categories: the Category filter needs it.)
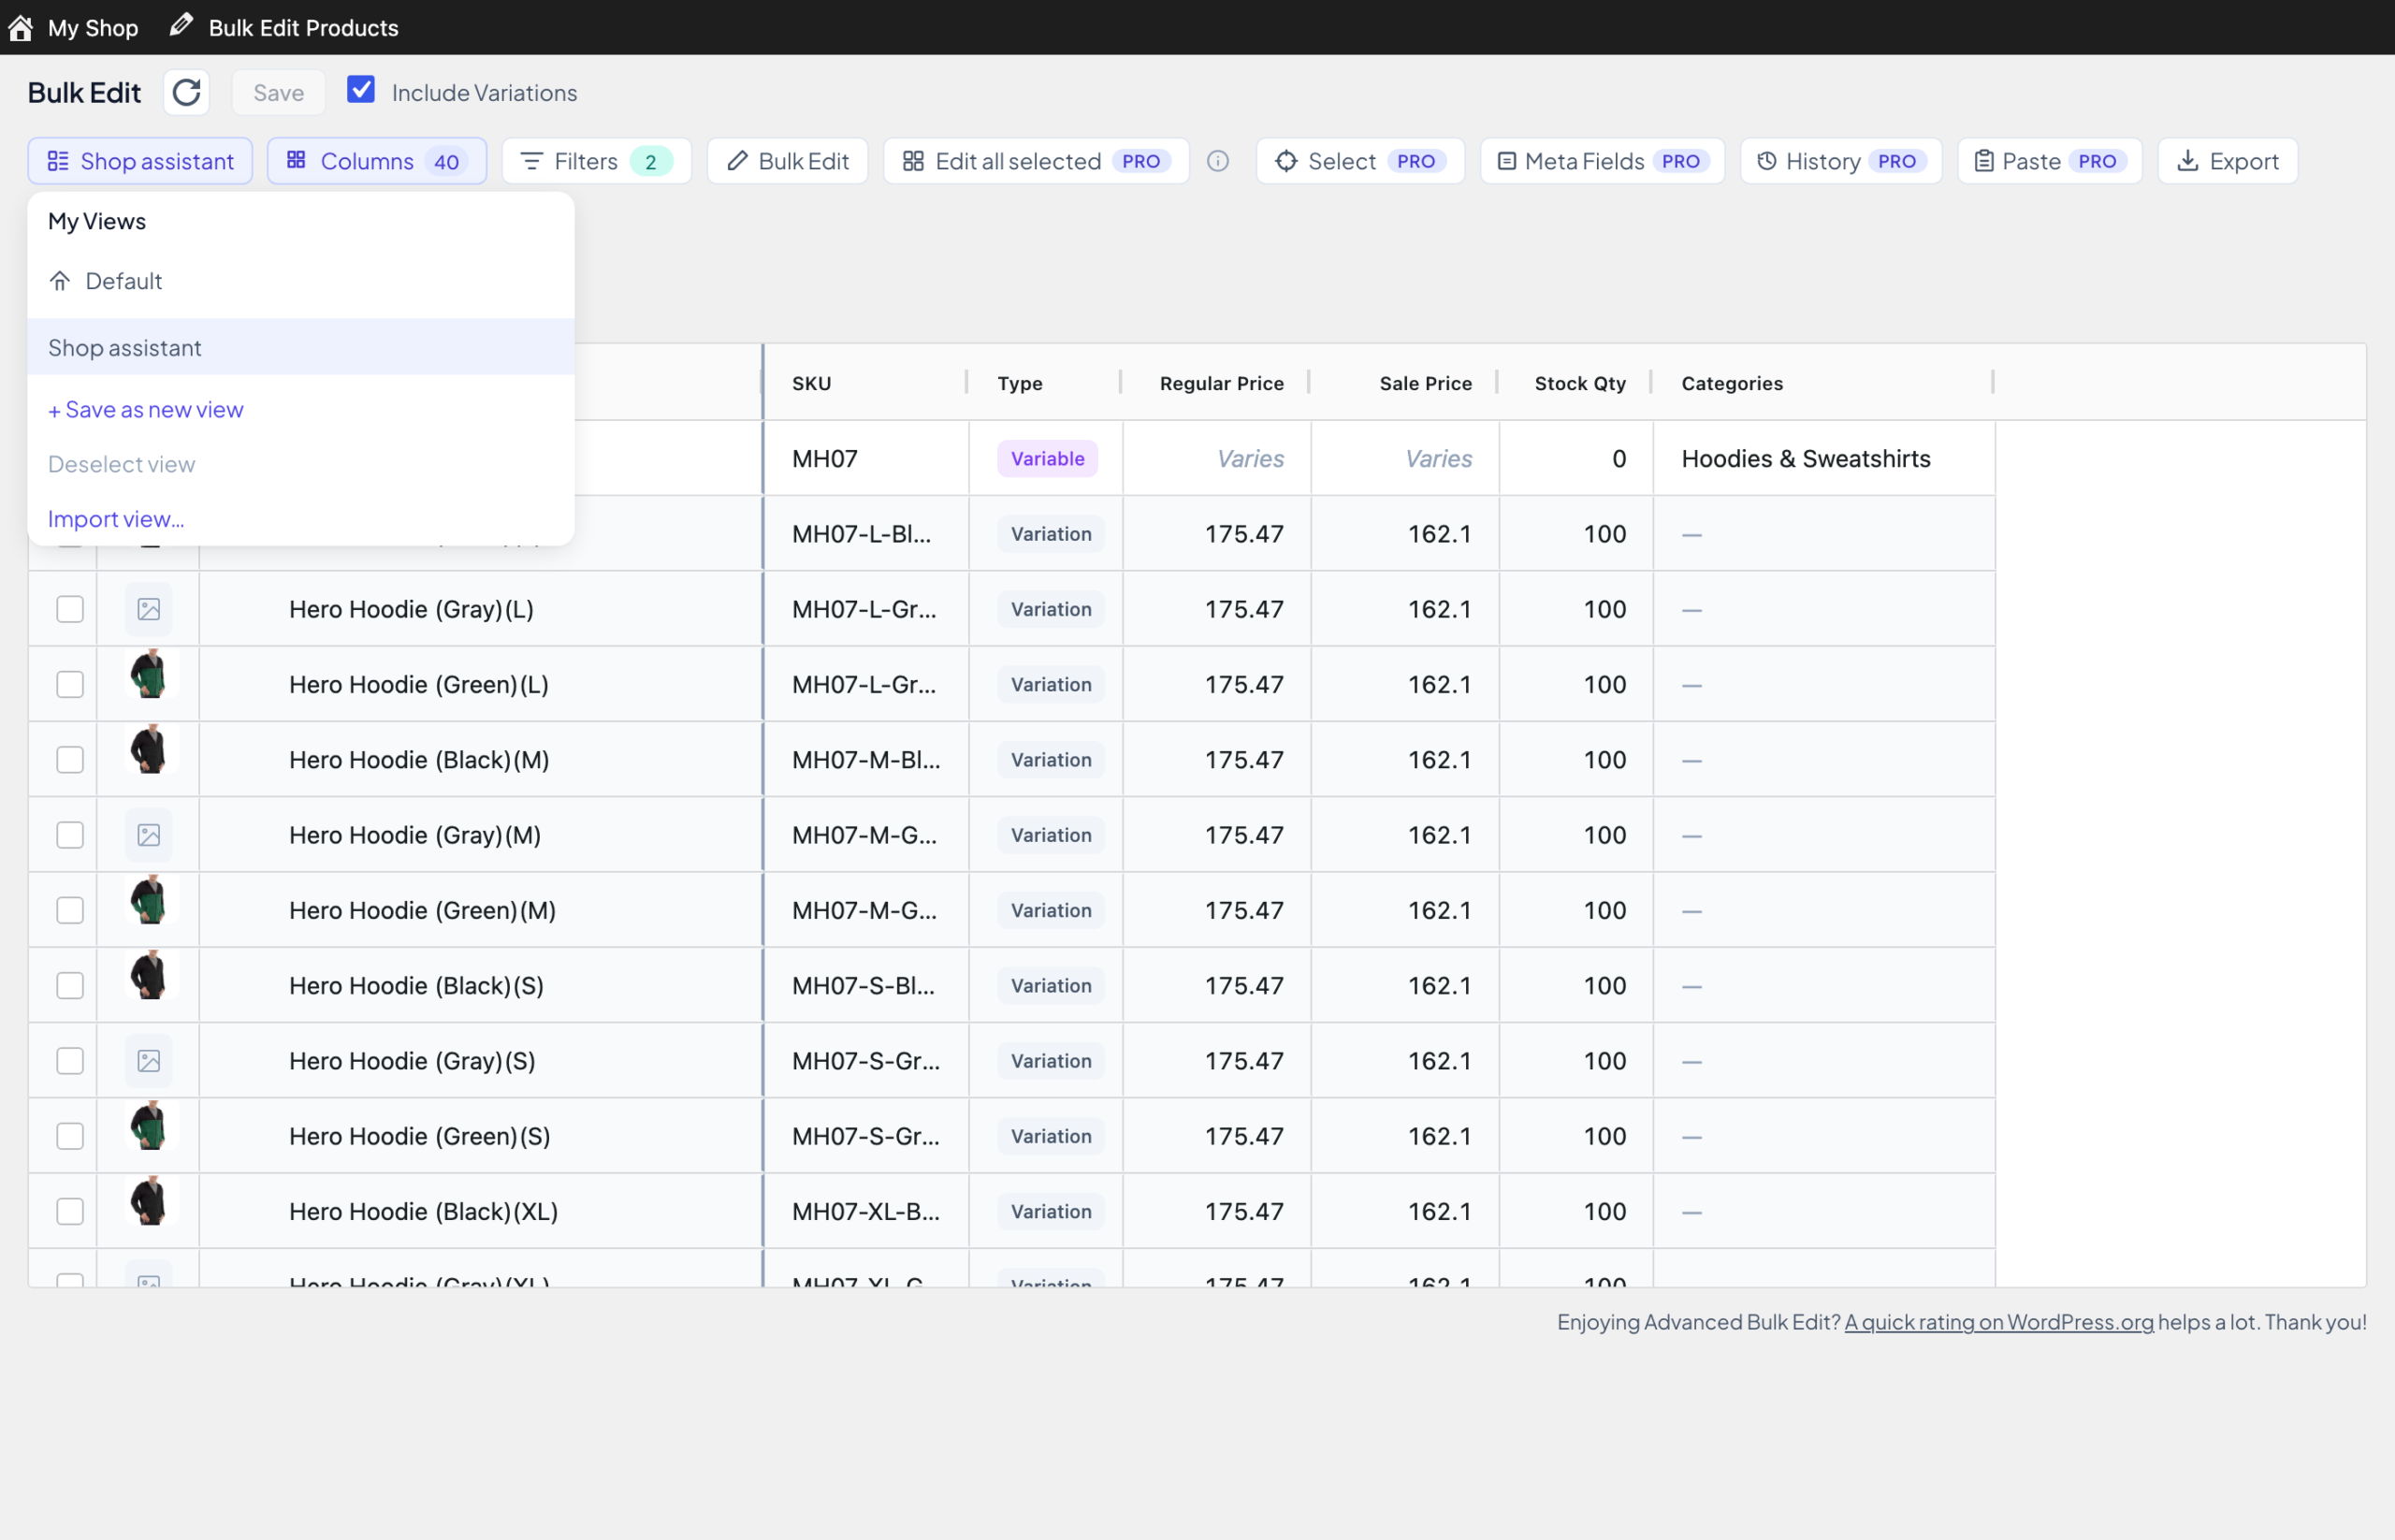
- Save it as a view. A view is a saved screen: which columns show and which filters are on. Click the views button (it says Default), then + Save as new view, and give it a name like “Shop assistant”.
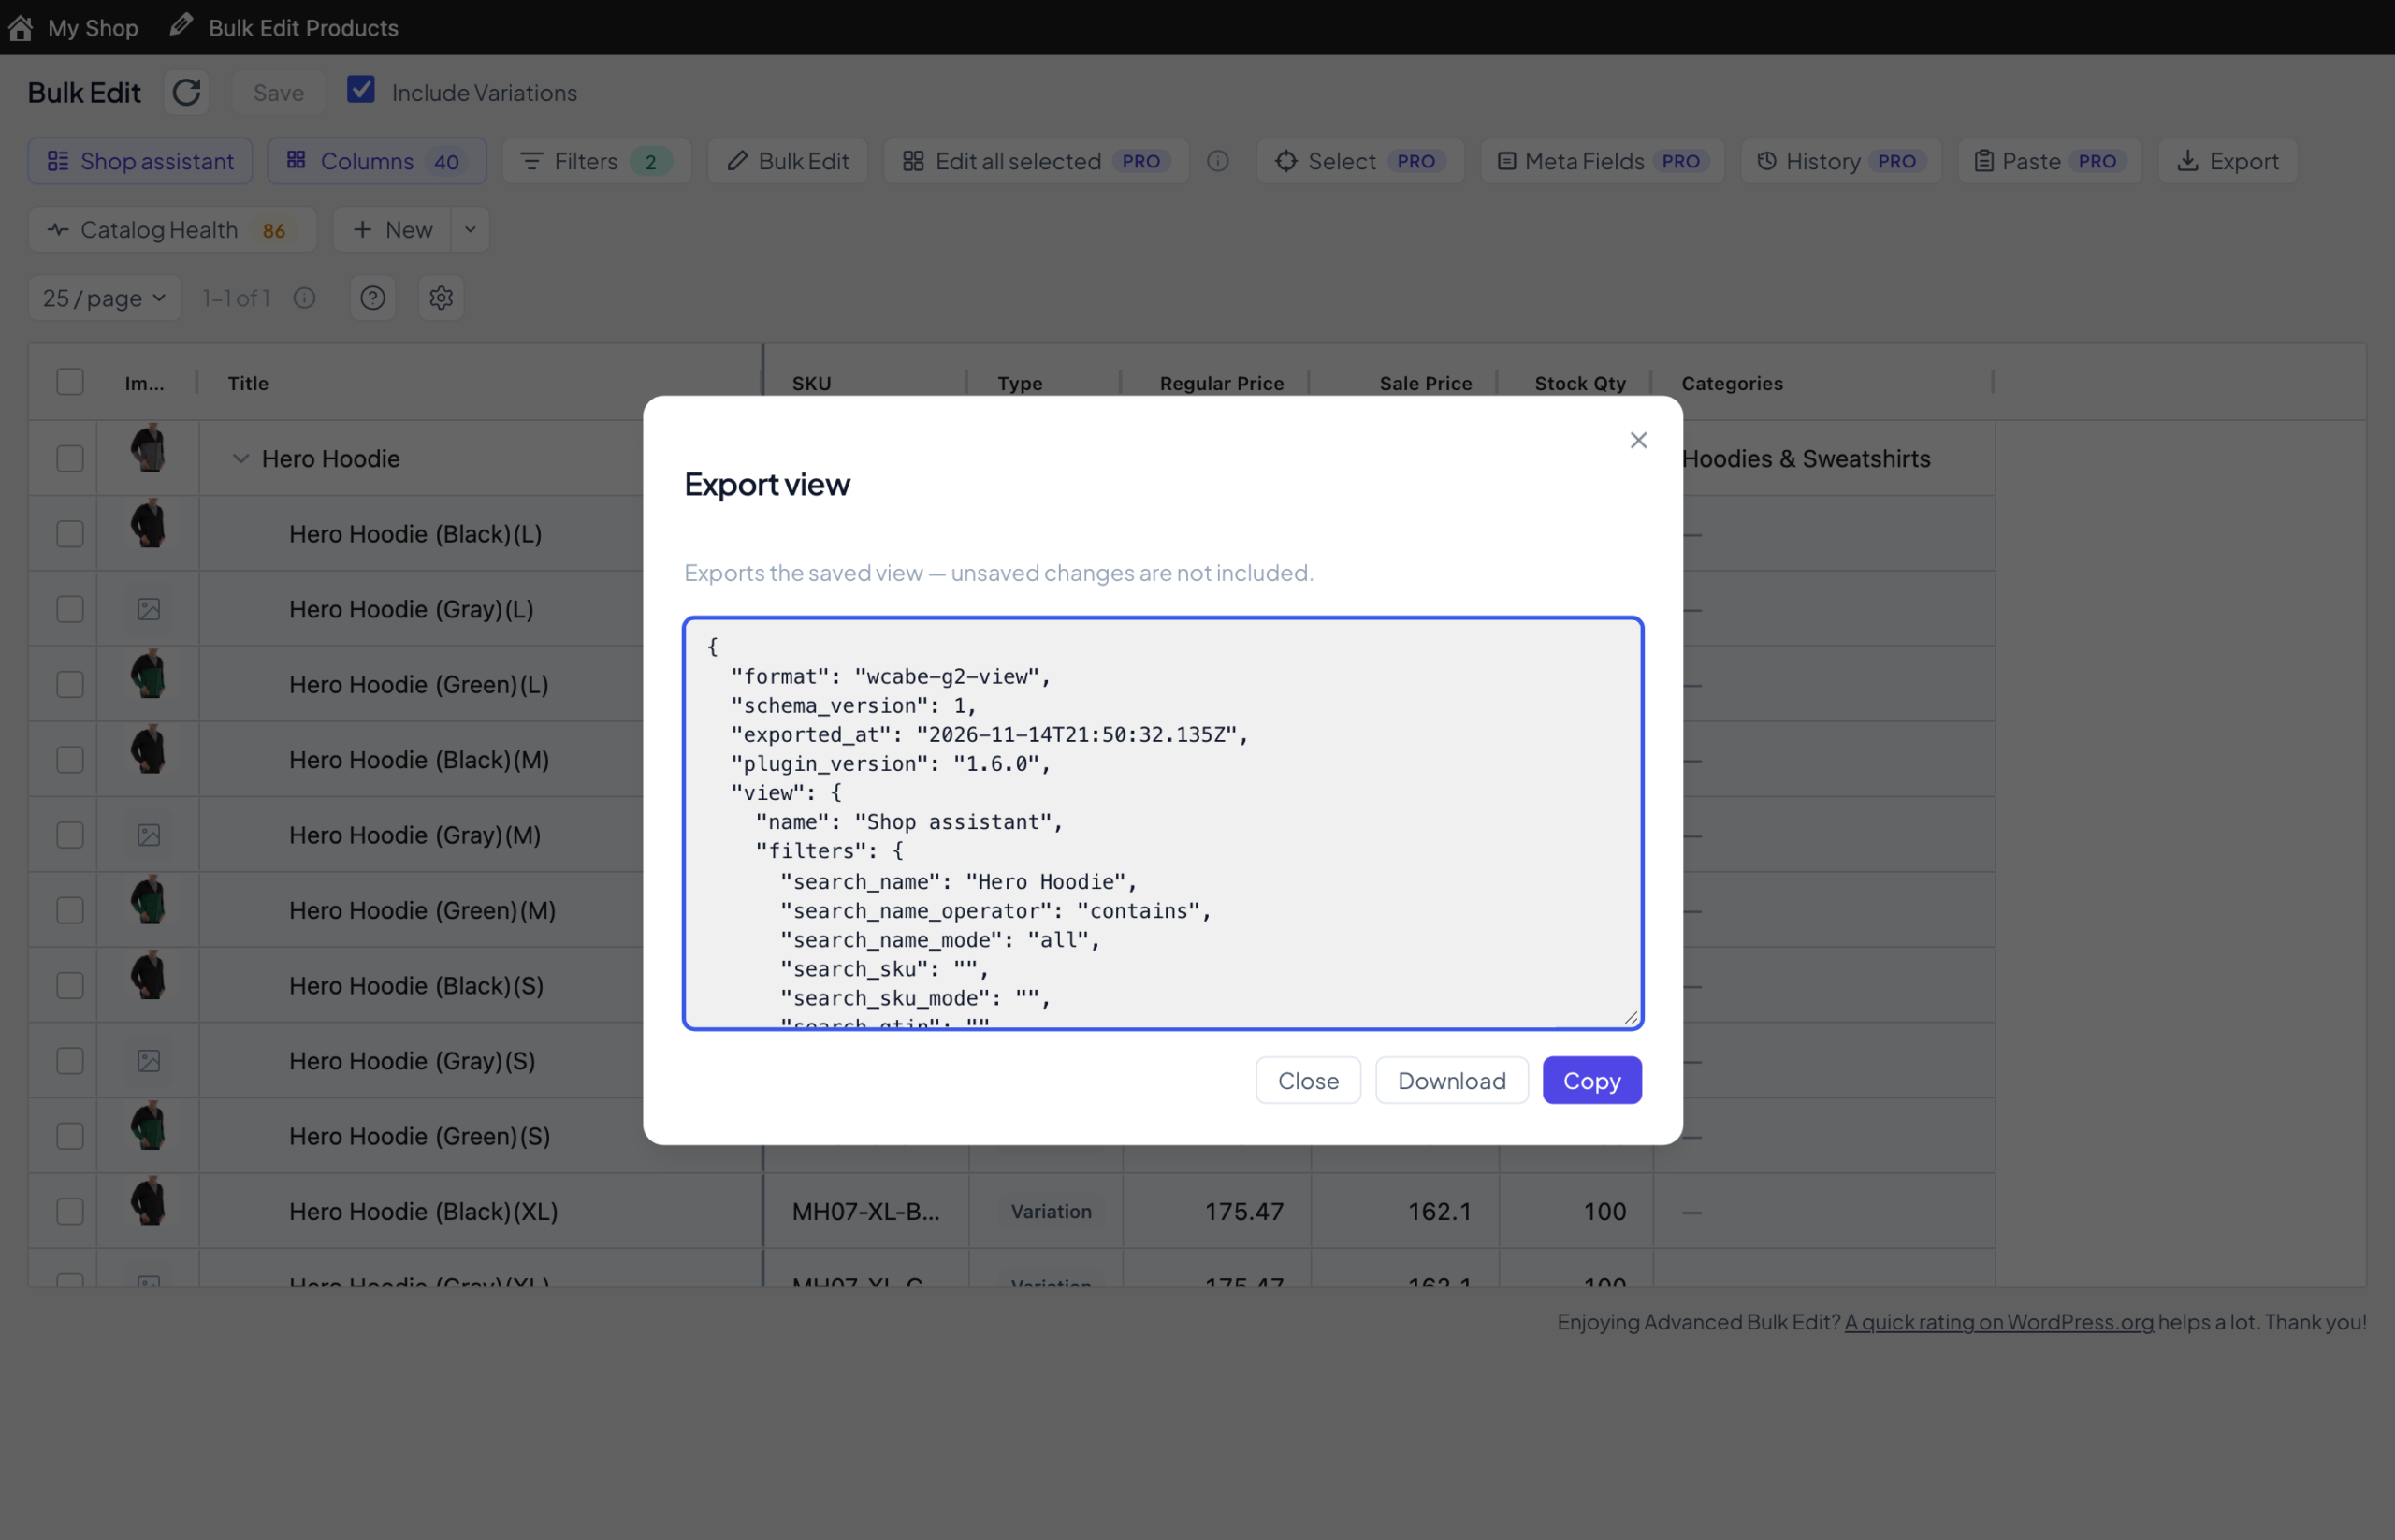
- Copy it for your staff member. Views belong to each user, so your colleague can’t see yours yet. Open the views menu, point at your view, click the ⋮ button and choose Export…. Click Copy (or Download) and send it to them.
- They import it. Your colleague logs in with their own account, opens Bulk Edit, clicks the views button, chooses Import view…, pastes the text and clicks Import. Then they pick the view from the menu.
Good to know: Shop Managers can use everything above. A few switches in the gear menu (Settings) apply to the whole shop, like deleting images with a product. Ask staff to leave those alone. Only an Administrator sees License & Updates PRO.
Mistakes are fixable
- Before you save: nothing has changed in your shop yet. Fix the cell, or click Discard to drop every yellow change.
- After you save, in the free version: there is no undo, just like in the classic WCABE. Before a big change, click Export and keep the CSV file as a backup; WooCommerce’s own importer (Products → Import) can put the values back.
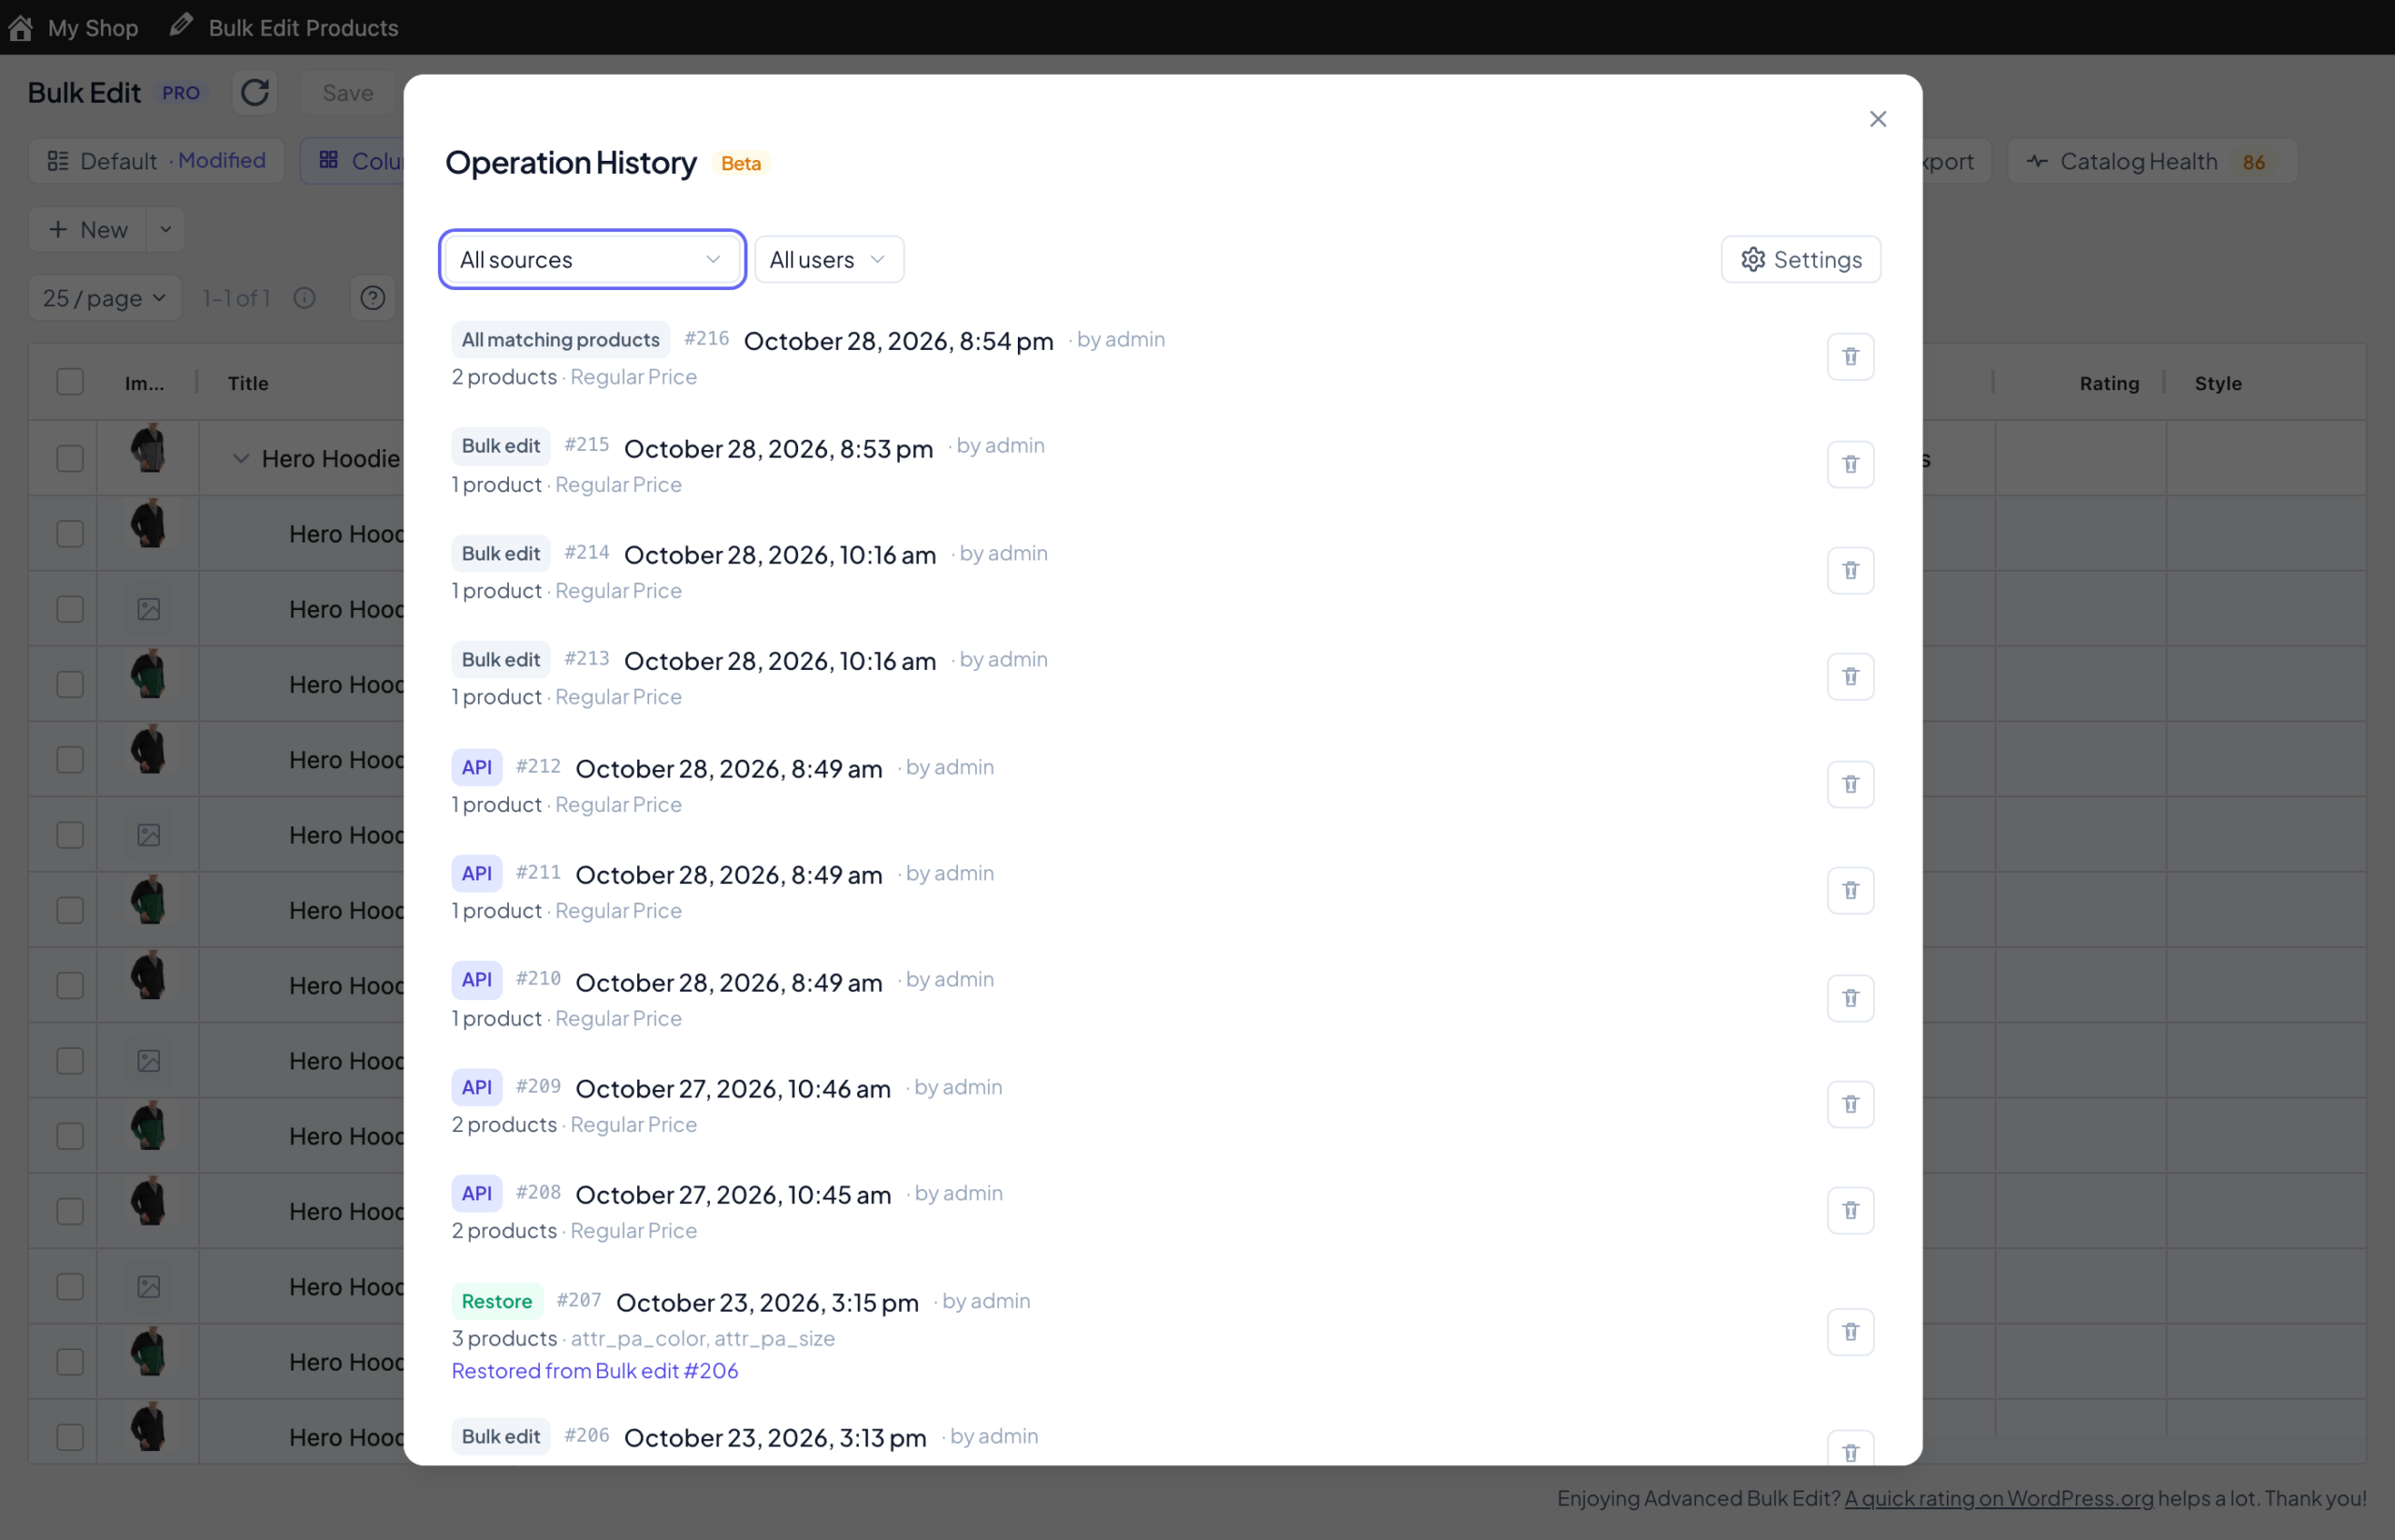
- After you save, with Pro: Operation History keeps a record of each save. Open History, find the change, and click Restore. You see what will be put back before anything happens. PRO
Operation History is off until you switch it on: click History, then Settings, and tick Record operation history. Changes saved before that can’t be restored.
Need help?
- Show your team the short video Bulk Edit basics for your team. It walks through the daily routine above.
- For a fuller tour, read Getting started with WPMelon Advanced Bulk Edit.
- Stuck, or missing something from the classic WCABE? Get in touch with support.