
Getting started: add product options to WooCommerce (free)
On this page10 sections
By the end of this guide your product page asks the shopper what to print on a T-shirt, which print color they want and which size, shows the price of each choice, and updates the total as they pick. Their choices then follow the order into the cart, checkout, the order screen and the order emails.
We’ll build it on a T-shirt sold for $18, from an empty store to a test order, in nine steps. Everything here is in the free plugin.
Prefer to watch? This 3-minute video follows the same steps.
Want to click around first? Try it live in your browser.
What you need
- WooCommerce, with at least one simple or variable product
- WPMelon Product Customization Fields 1.1 or later (free on WordPress.org)
- An Administrator account to install the plugin; a Shop Manager can do the rest
Free and Pro
Every step in this guide works in the free version. Pro adds price formulas, image swatches and more; the few places where it changes something are marked (Pro).
1. Install the plugin
In your WordPress admin, go to Plugins → Add Plugin, search for WPMelon Product Customization Fields, then click Install Now and Activate on WPMelon Product Customization Fields for WooCommerce. WooCommerce has to be active first.
2. Create an option group
Go to Products → Product Options. Options live in option groups: a set of fields you build once and then show on one product, a few, or all of them. Click Create your first option group (later on, the button at the top reads Add option group).
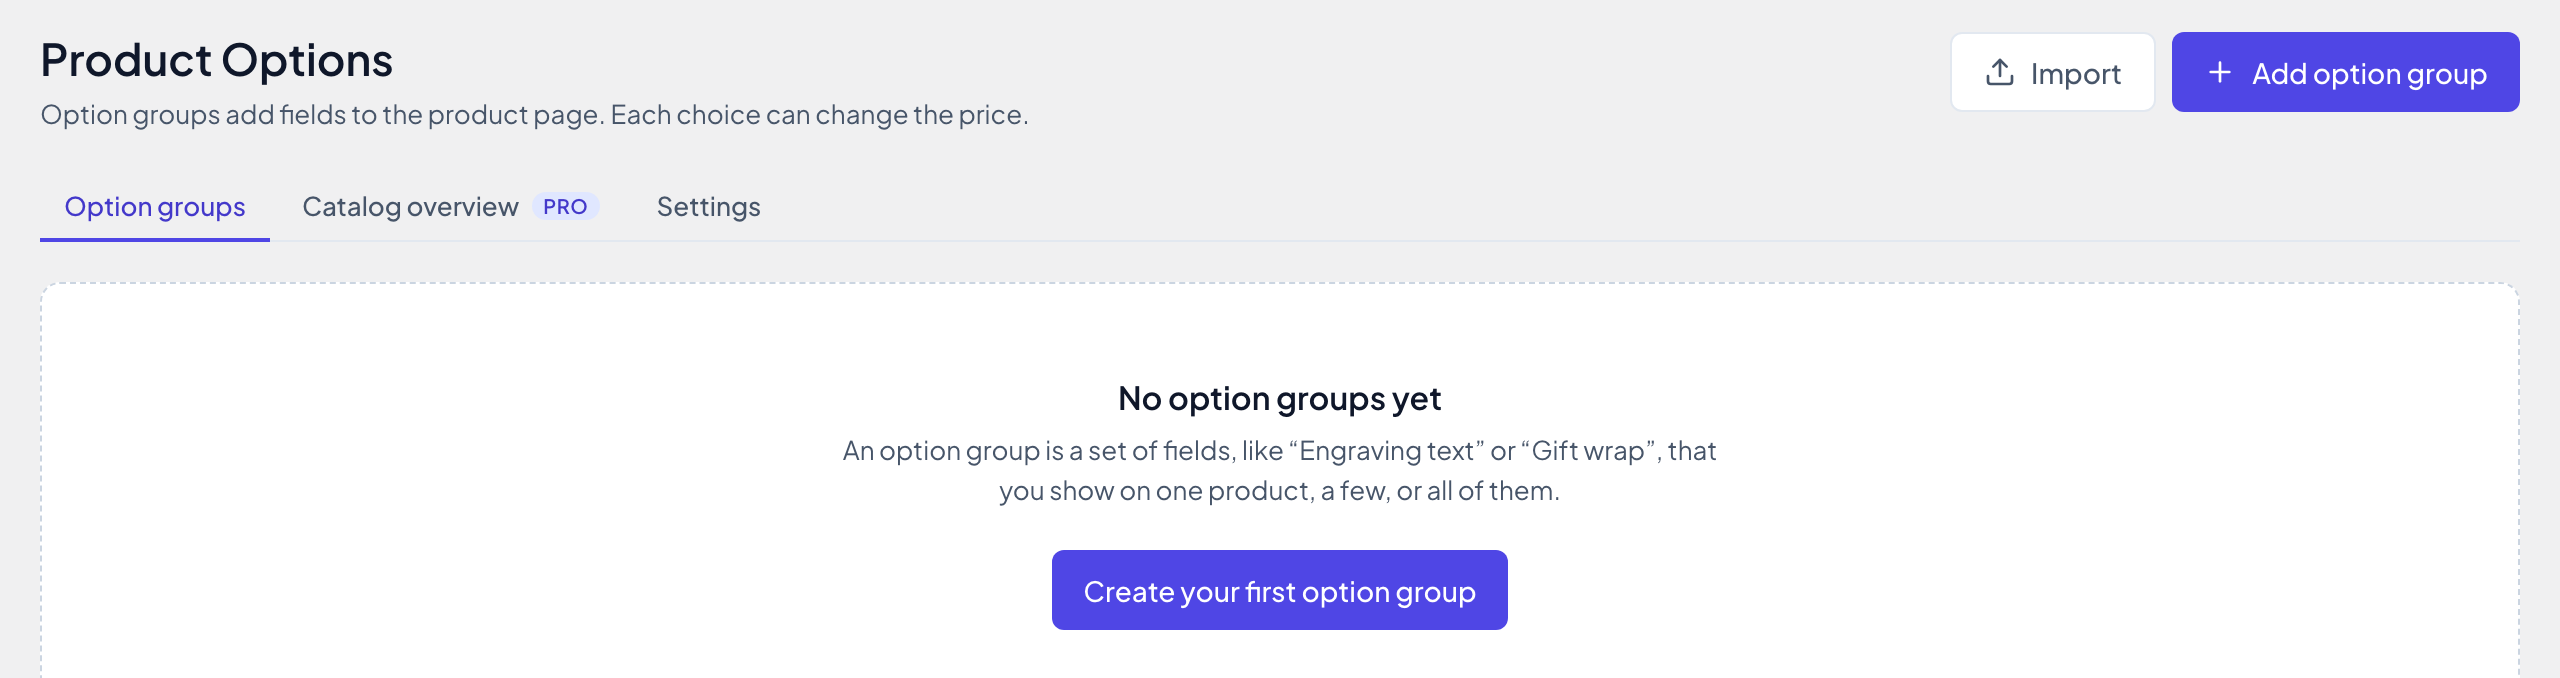
Give the group a name, for example T-shirt options. Only you see this name; shoppers see the fields, not the group.
3. Add a text field with a price
Click Add field and choose Text. The settings open on the right:
- Label: Text to print. Shoppers see it on the product page, in the cart and on the order.
- Placeholder: Up to 20 characters.
- Turn on Required, so the T-shirt can’t be added to the cart without it.
- Maximum length: 20.
- Under Price, choose Flat amount and enter 2. Printing text costs $2 more.
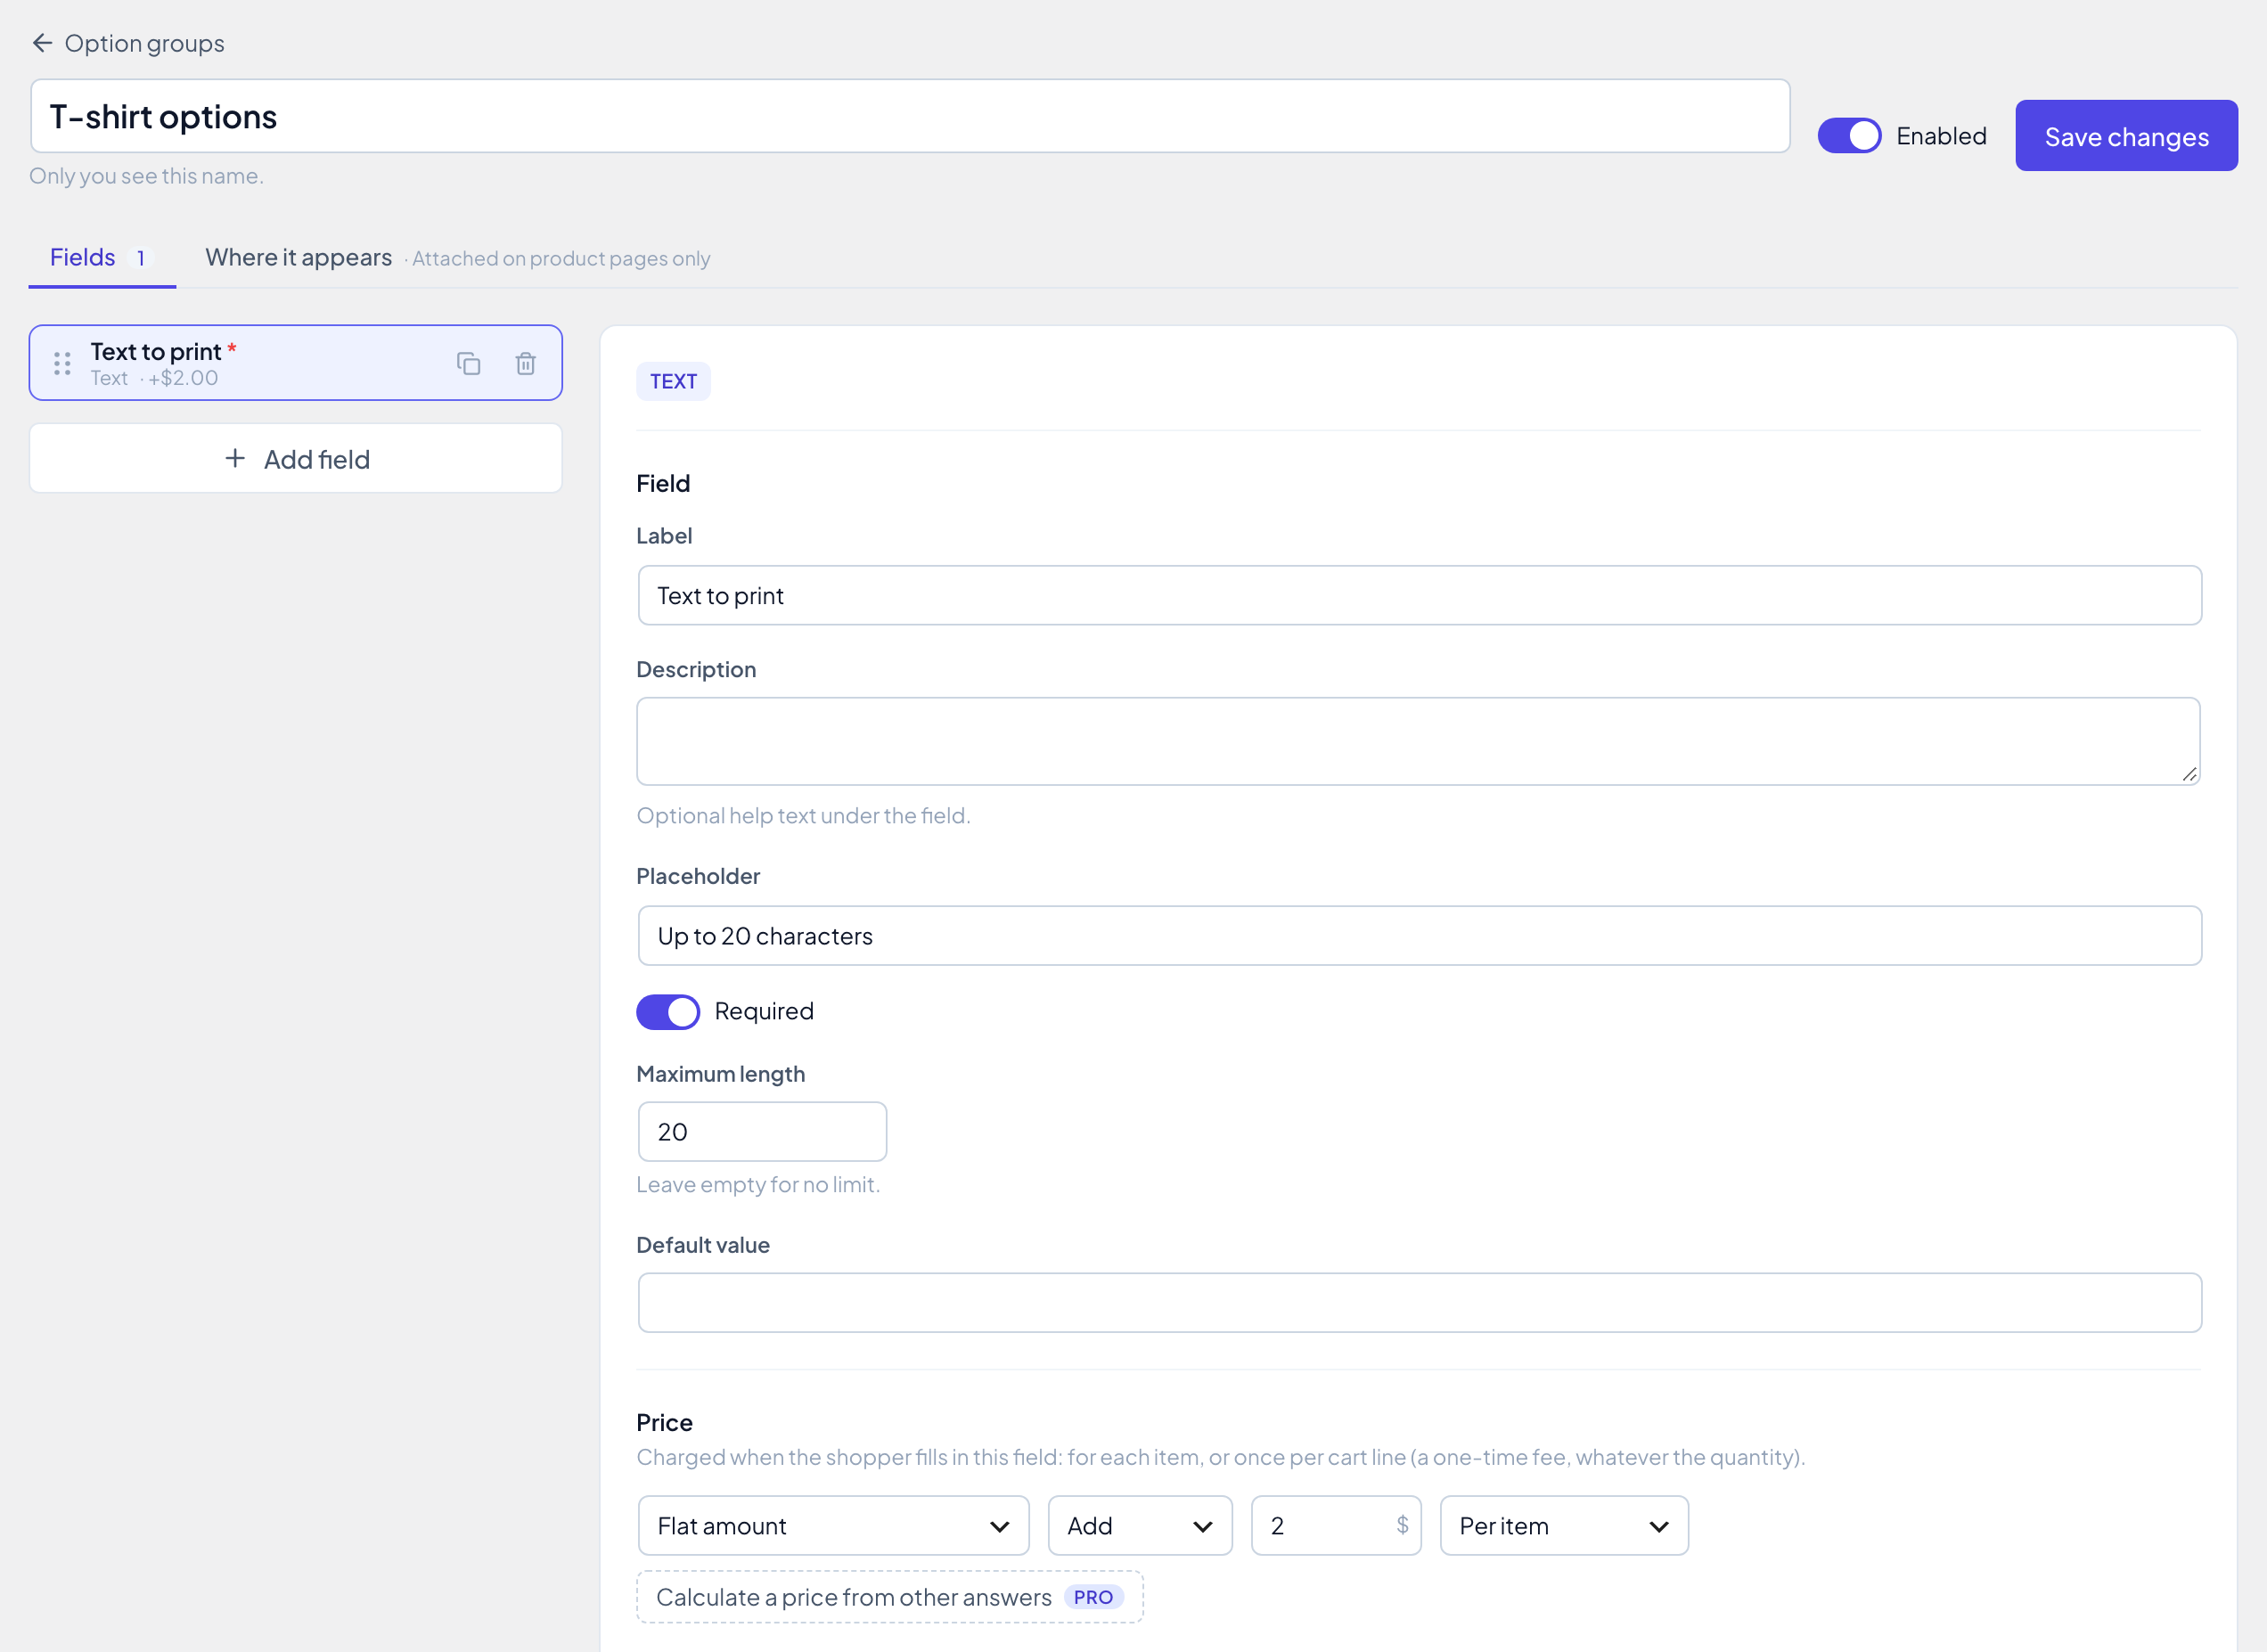
The price is charged only when the shopper fills in the field, and Per item means it’s multiplied by the quantity. The other price types, and one-time fees, are in Price options.
4. Add a color swatch
Click Add field again and choose Color swatch. Set the label to Print color. Under Options, rename the two starting options and click Add option for more: Black, Navy, Red and Green. Click the small color square in each row to pick its color. Tick Def. on Black to have it selected when the page opens.
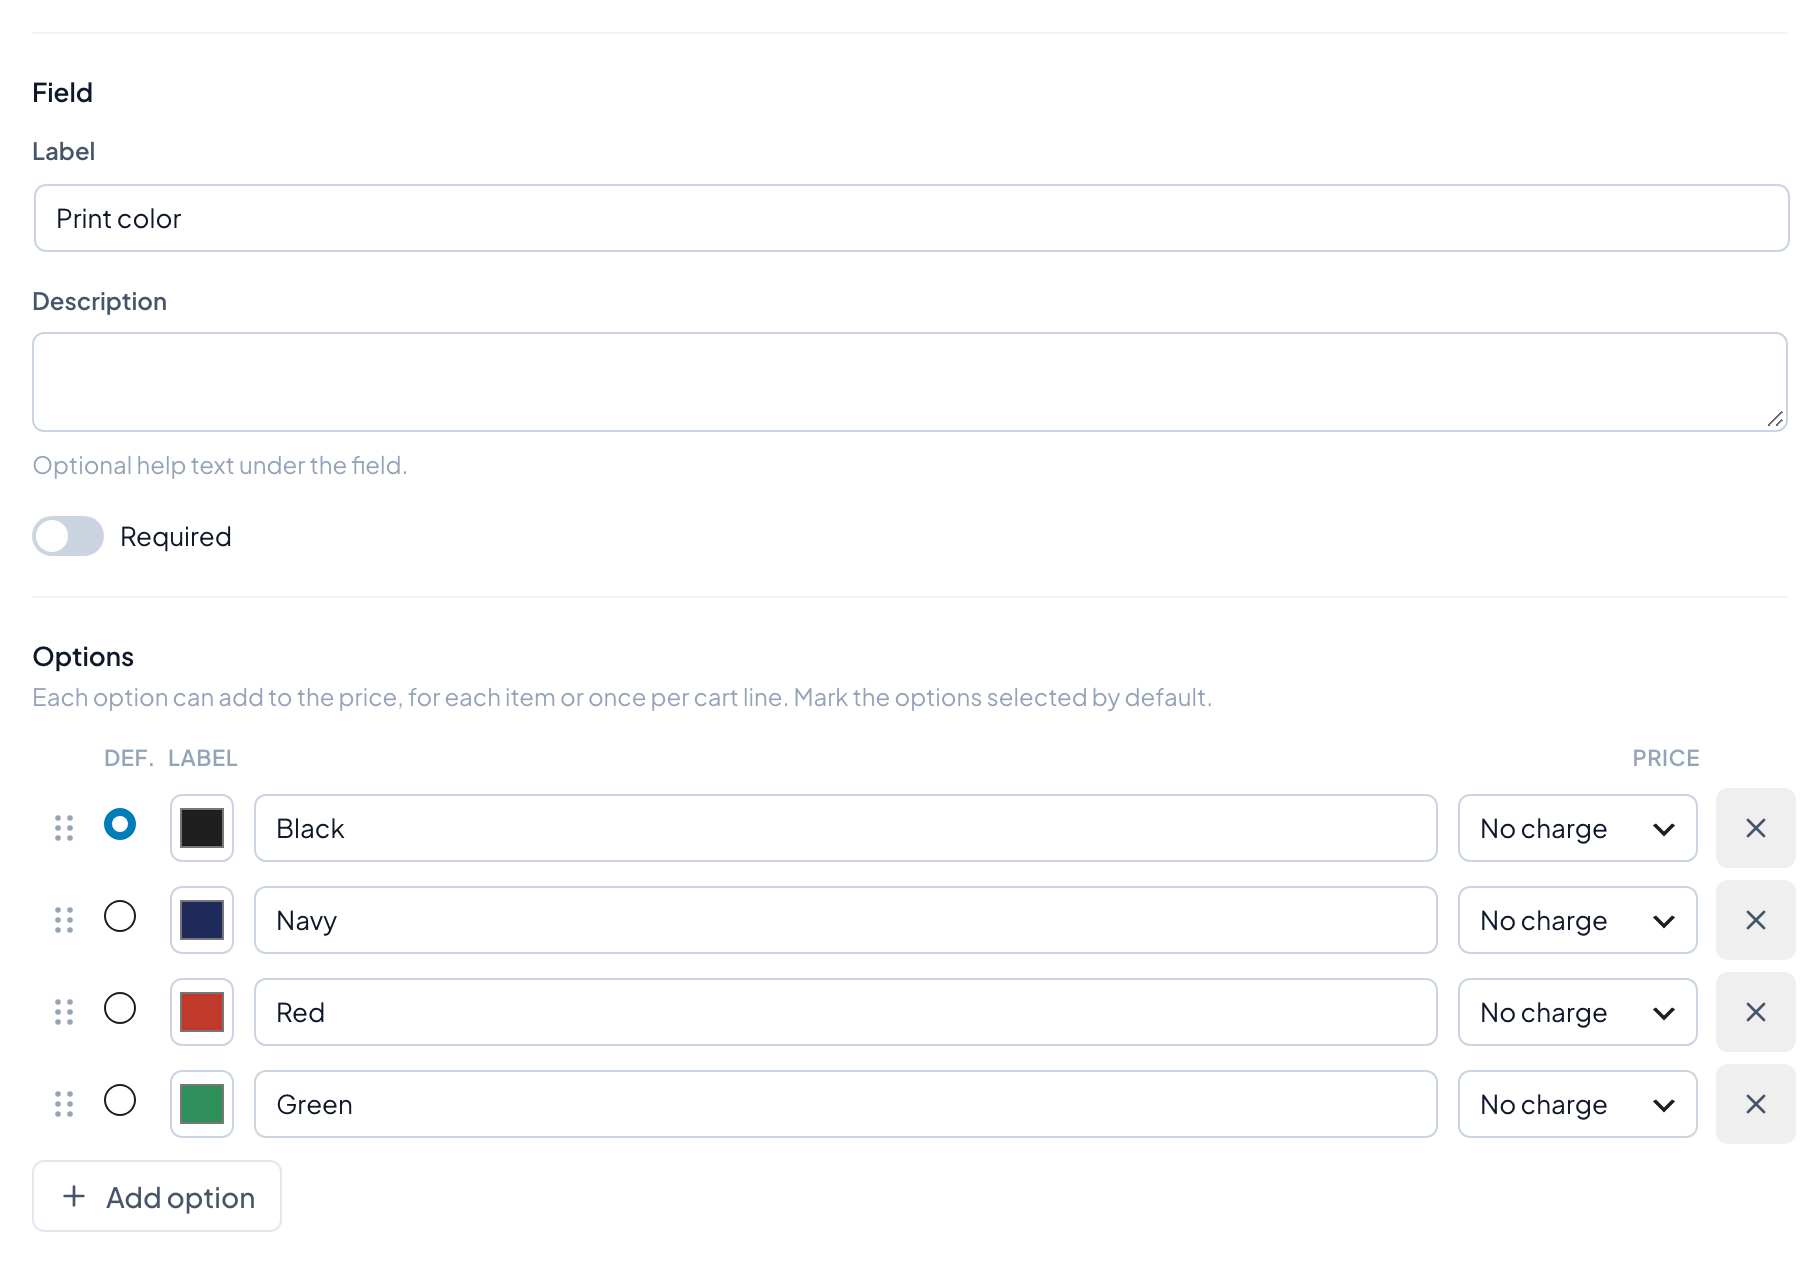
Each option can have a price of its own. These colors all cost the same, so they keep No charge.
5. Add a size swatch
Add a Label swatch field named Size and turn on Required. Add the options S, M, L and XL, tick Def. on M, and give XL a price: choose Flat amount in its row and enter 2.
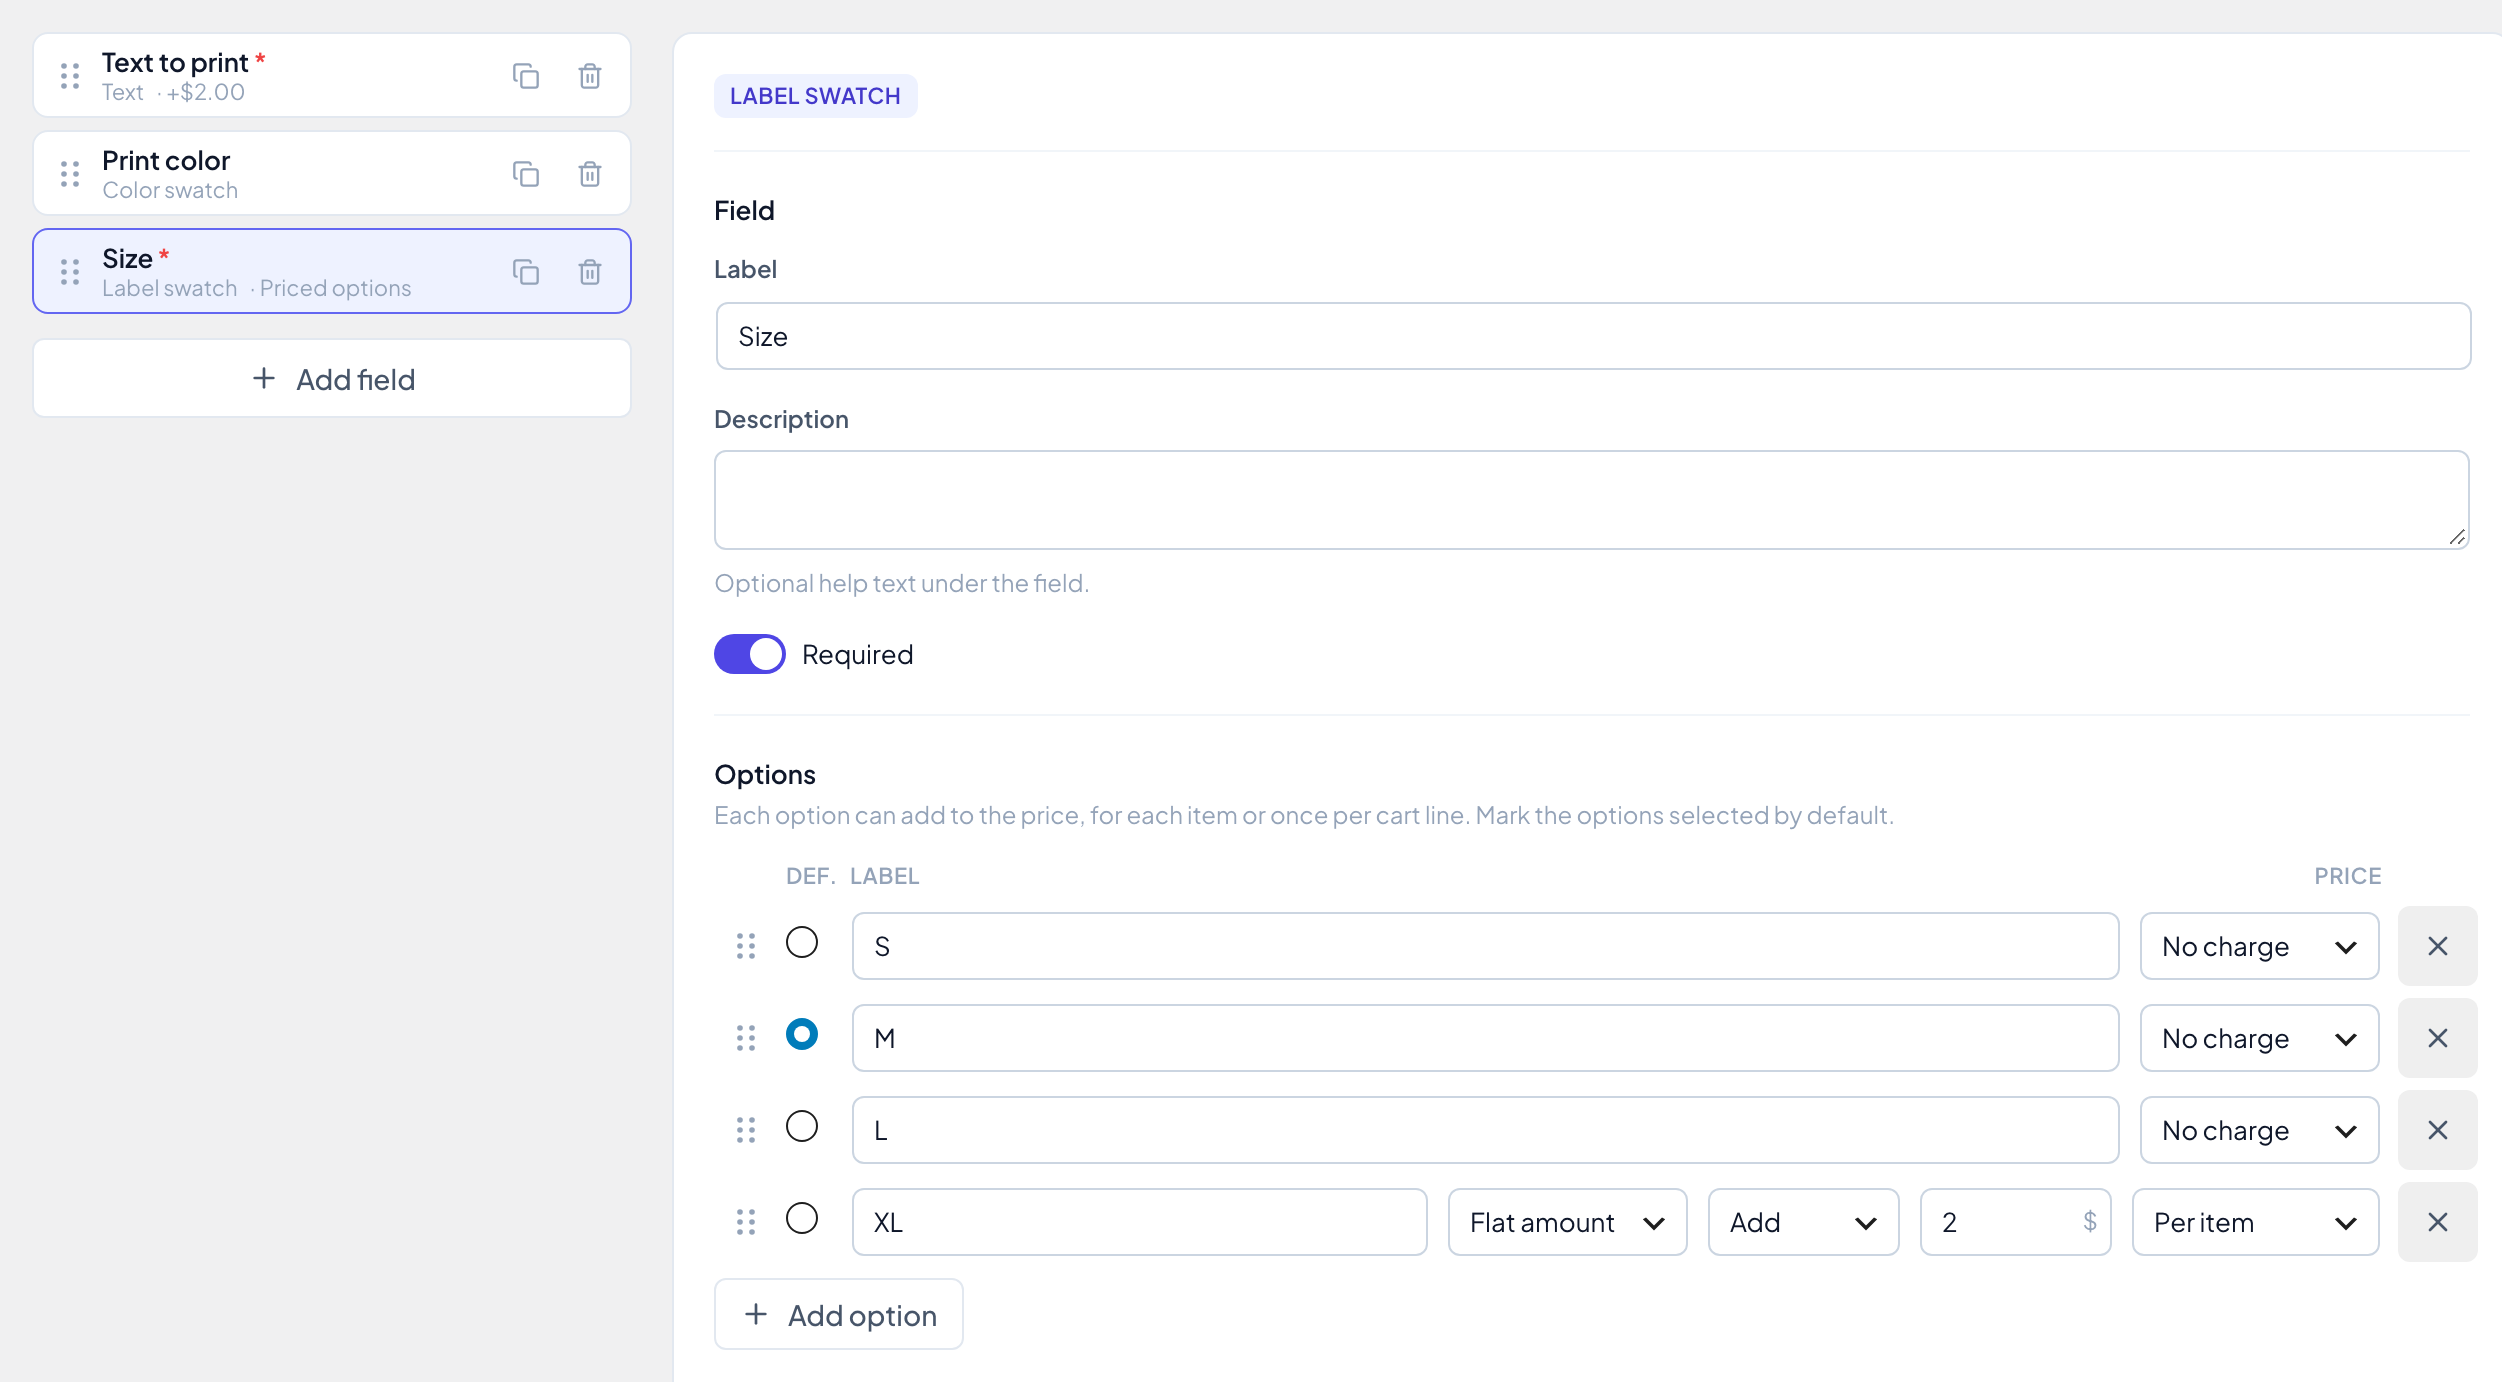
The list on the left shows the fields in the order shoppers see them. Drag a field by its handle to move it.
6. Choose the product and save
Open the Where it appears tab. A new group starts on Only where attached, so it shows nowhere until you choose. Pick Specific products, categories or tags, type the product’s name under Products and select it. Then click Save changes. The group is enabled from the start (the switch next to the button).
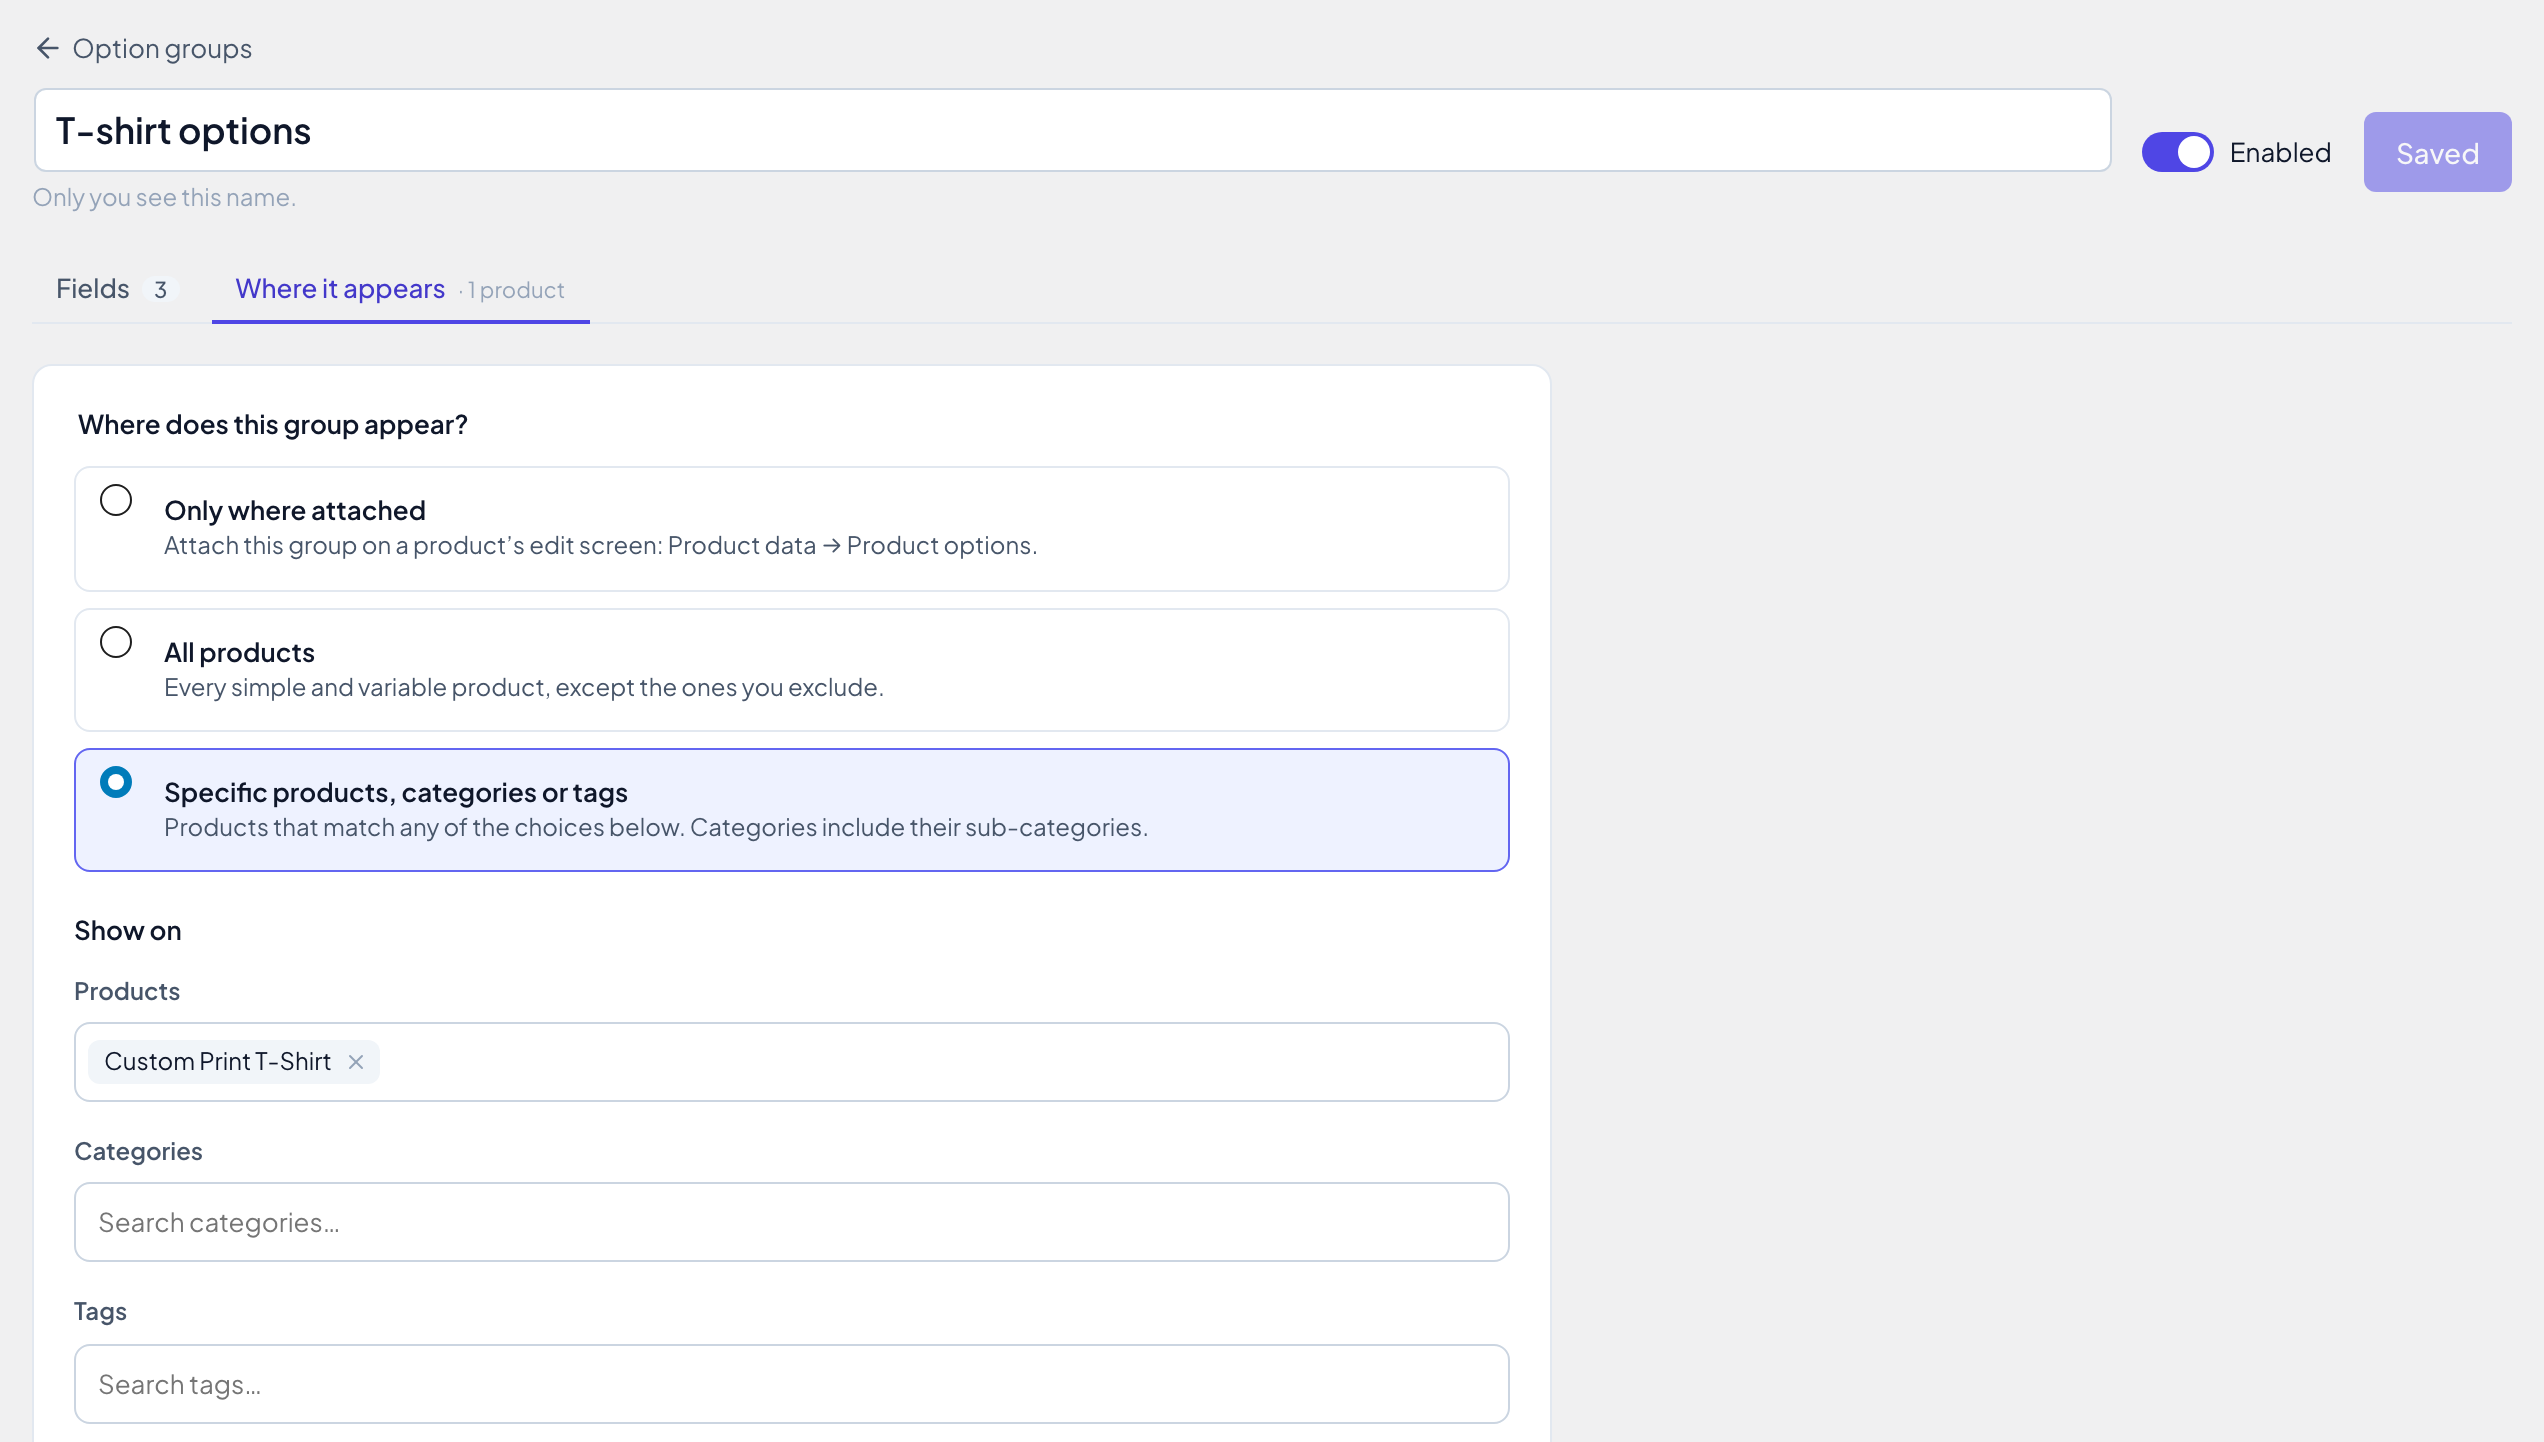
To show one group on a whole category, on every product, or everywhere except a few products, see Show one option group on many products.
7. Check the product page
Open the product in your store. The fields sit above the Add to cart button, with each price next to its label. As soon as a choice adds to the price, a line appears under the fields with the options, and the new total: here “Options: +$4.00 · Total: $22.00” for printed text and size XL.
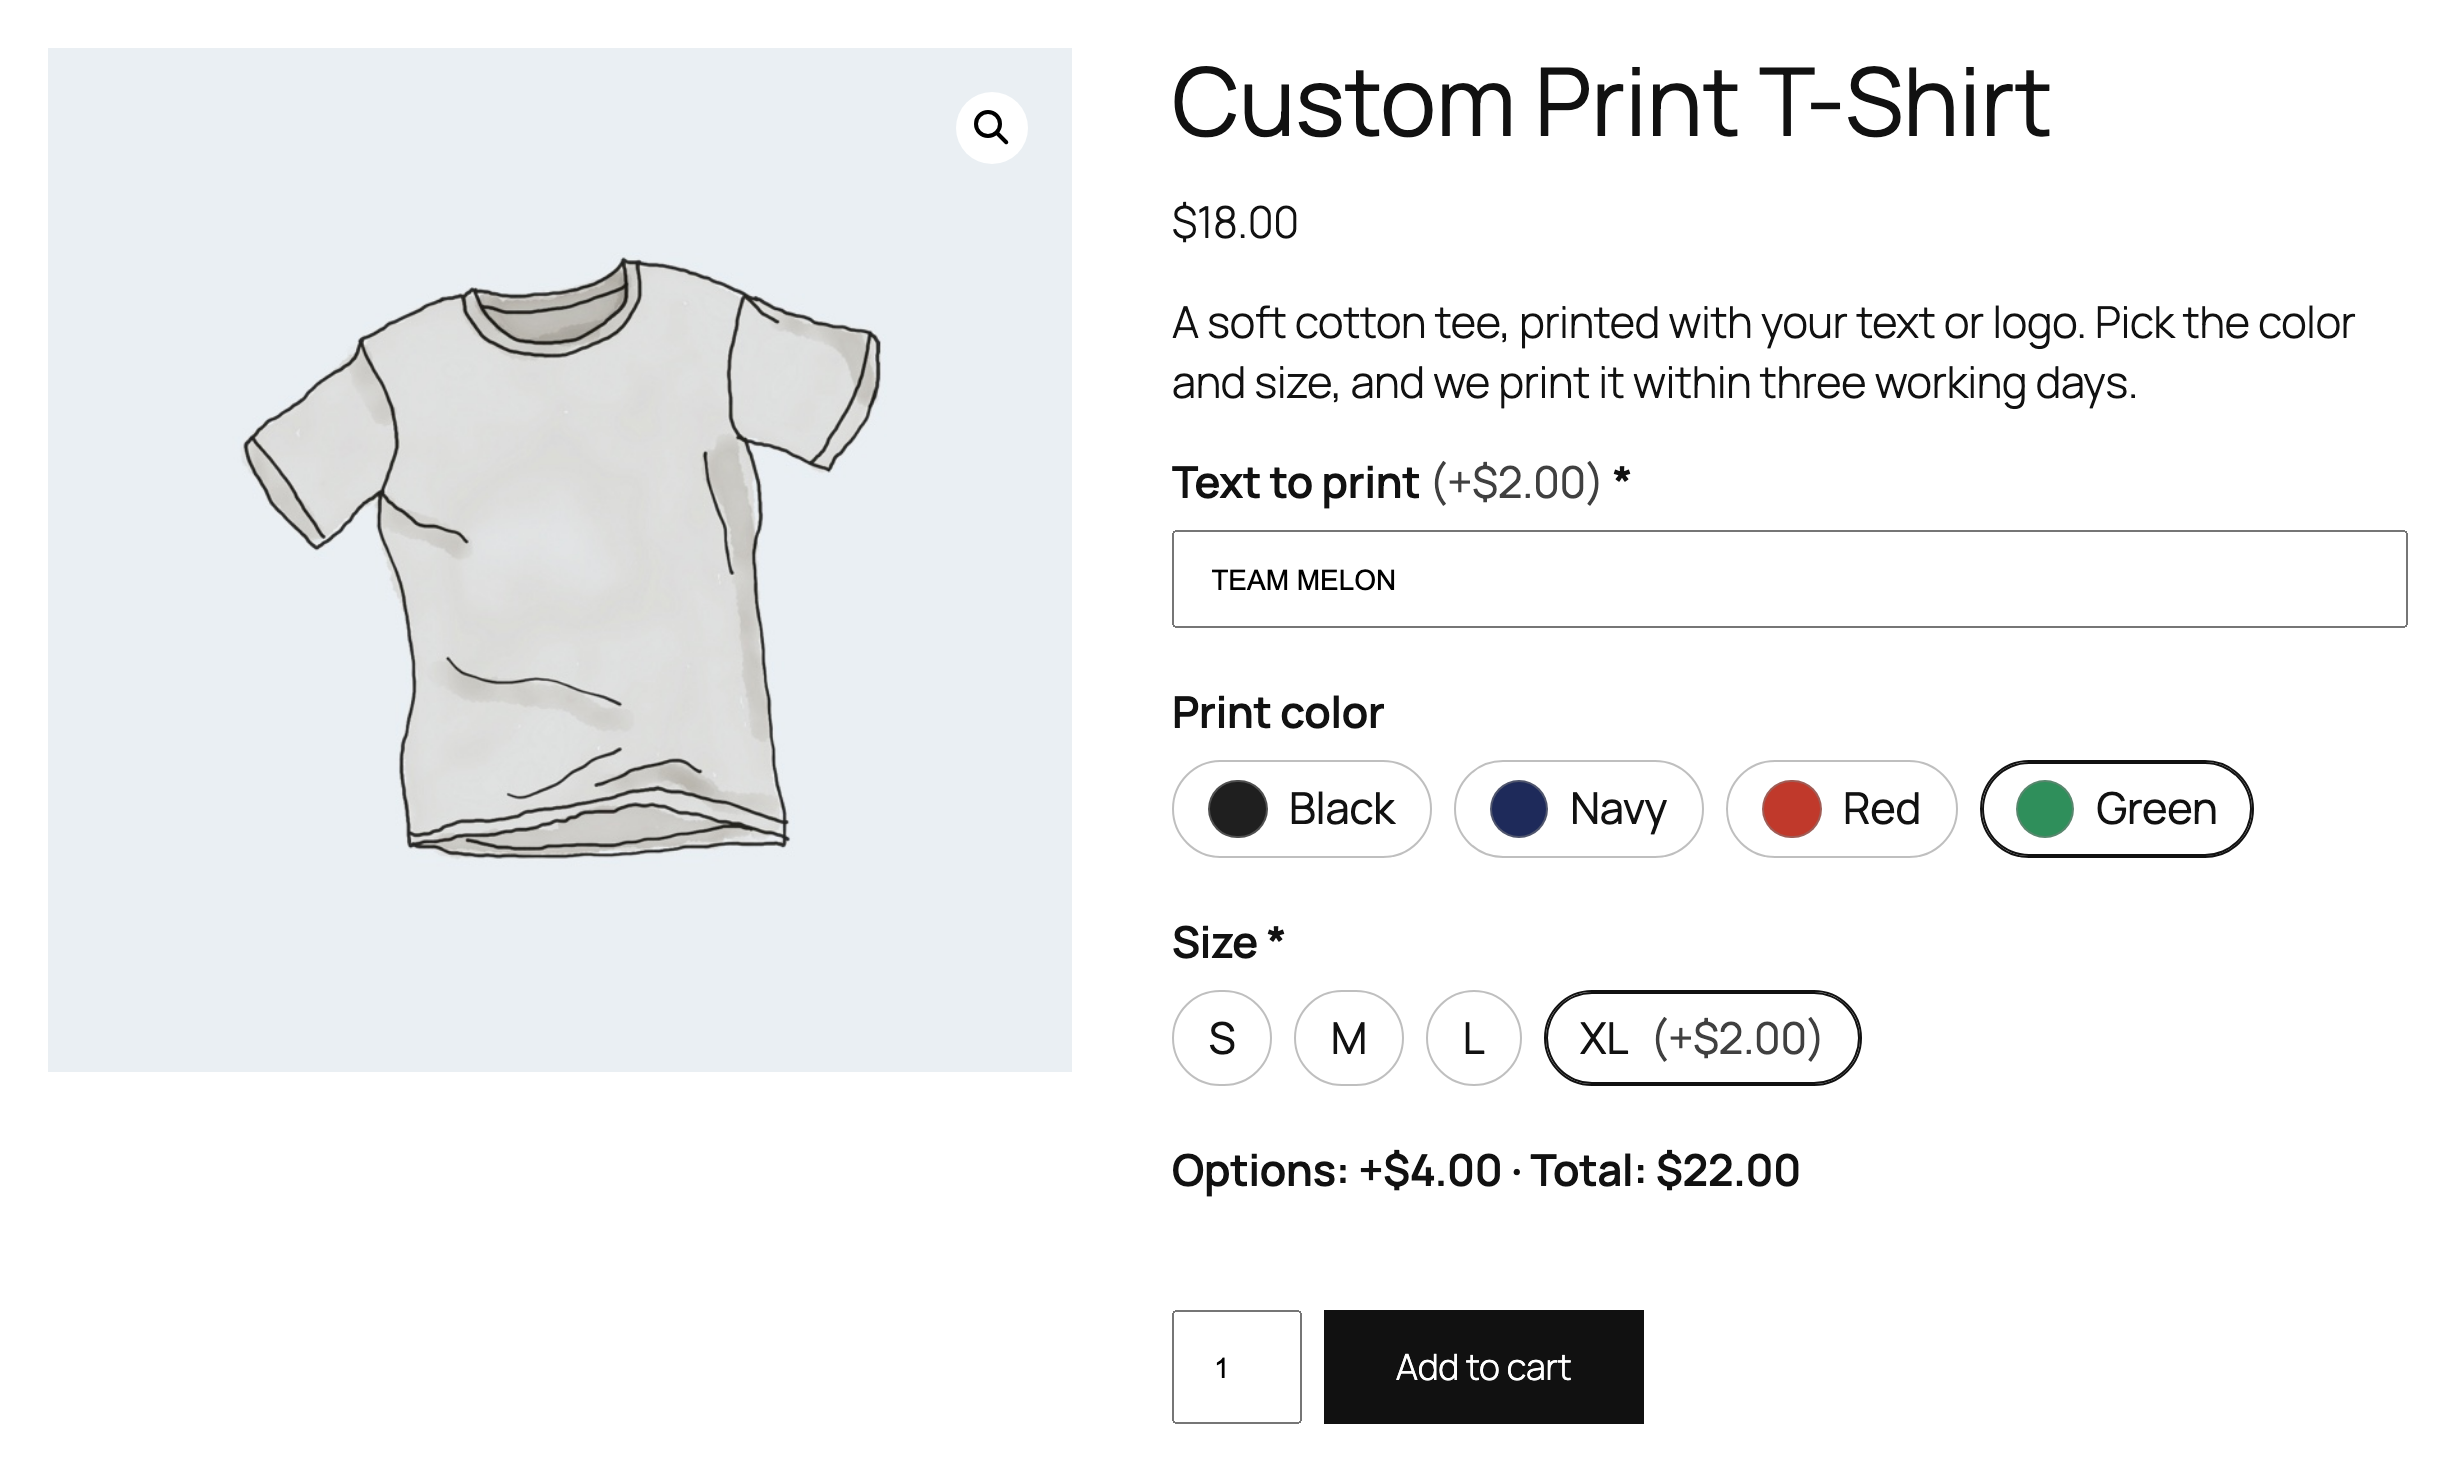
The total on the page is a preview. The store works the price out again when the product is added to the cart, so nobody can change it in their browser.
8. Add it to the cart
Fill in the fields and click Add to cart. In the cart, the line shows each choice with its price, and the item price includes them: $18 + $2 + $2 = $22. It works the same in the classic cart and the block cart.
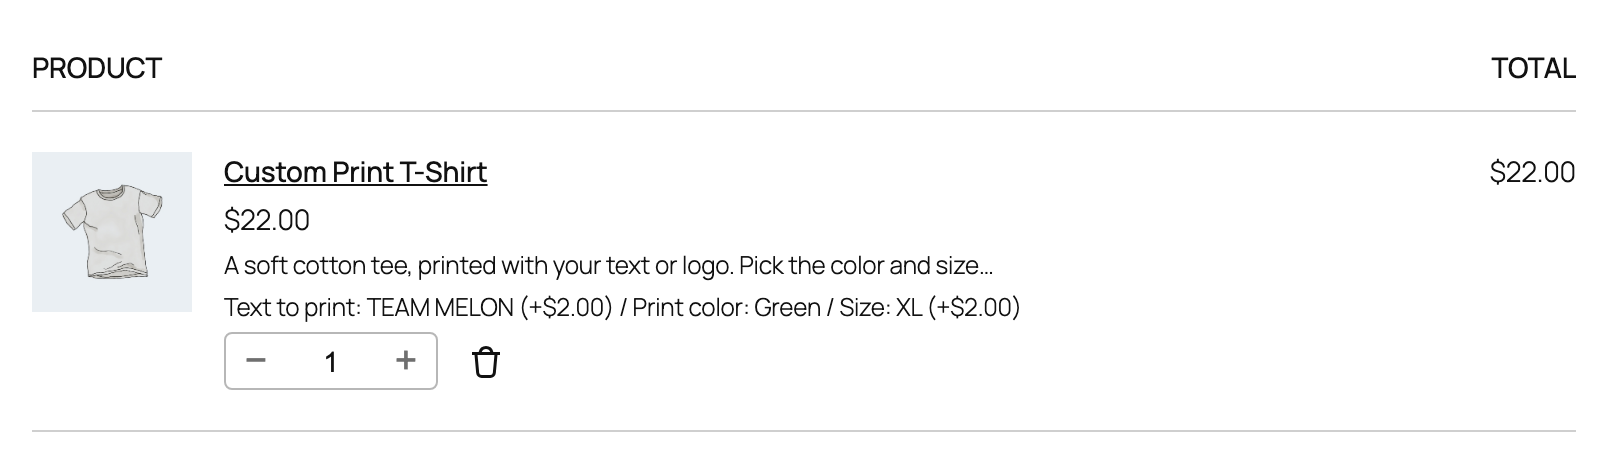
In the shop and category pages, a product with a required field that shows by default gets a Select options button instead of Add to cart, so shoppers go to the product page and make their choices first.
9. Place a test order
Go to checkout and place the order with a test payment method, for example Cash on delivery (WooCommerce → Settings → Payments). Then open the order under WooCommerce → Orders. Each choice is saved on the order line, with its price, and the same lines appear in the order emails and in the customer’s My Account.
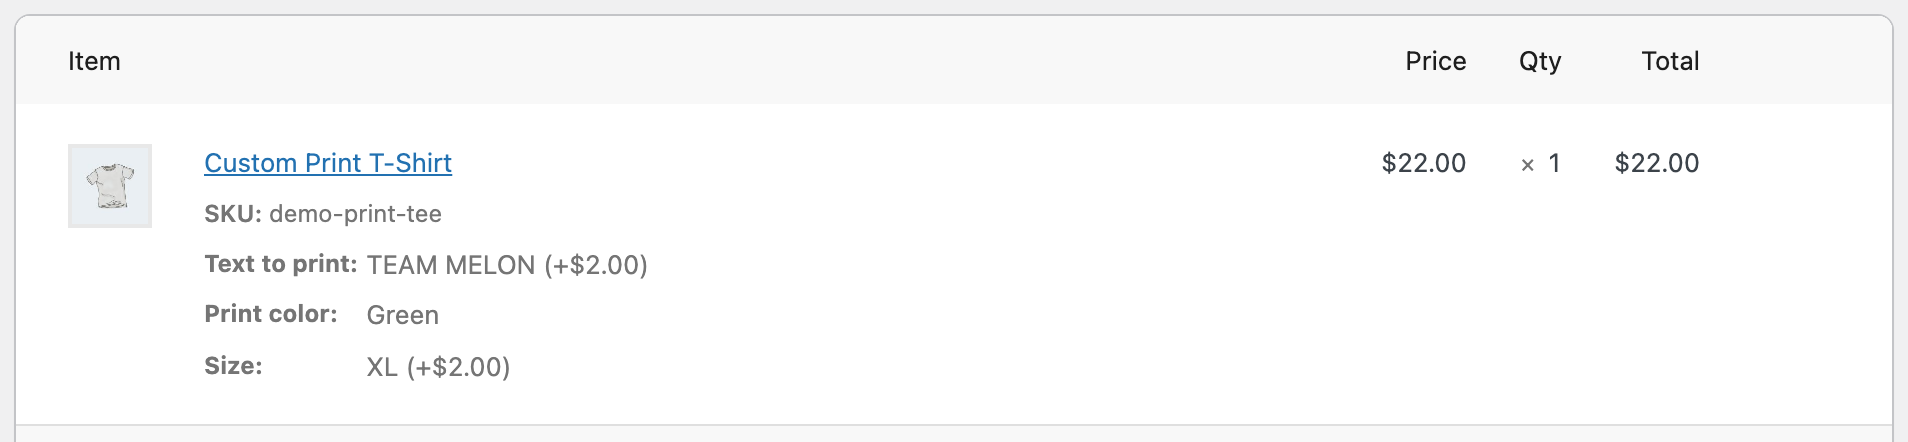
What the order shows is saved when the order is placed. Editing or deleting the group later doesn’t change orders that already used it.
What Pro adds to this setup
- Per character (Pro): charge the printed text per letter or per word instead of a flat $2.
- Image swatches (Pro): show print designs as pictures, with the chosen image in the cart and on the order.
- Price formulas (Pro): work a price out from the shopper’s answers, like a price per square meter.
Next: Price options: flat, percentage, discounts and one-time fees