
Show one option group on many products
On this page7 sections
Most stores reuse the same options: one gift wrap choice for every gift, one proof question for every printed product. Build the option group once and choose where it appears. Shoppers get the same fields on every product it covers, and a new product in the category gets them without you doing anything.
What you need
- WPMelon Product Customization Fields 1.1 or later (free on WordPress.org)
- An option group (see Getting started)
Free and Pro
All the ways to place a group are free. Pro adds groups for chosen customer roles and a catalog overview of which groups each product gets, marked (Pro) below.
1. Choose where the group appears
Open the group under Products → Product Options and go to the Where it appears tab. “Where does this group appear?” has three answers:
- Only where attached: nowhere, until you attach the group on a product’s edit screen (step 4). New groups start here, so a group never shows up across your store by accident.
- All products: every simple and variable product, except the ones you exclude.
- Specific products, categories or tags: the products that match any of your choices.
2. Pick products, categories or tags
With Specific products, categories or tags, fill in any of the three boxes under Show on: start typing and pick from the list. A product that matches any one of them gets the group. Categories include their sub-categories, so choosing “Clothing” also covers “Clothing › T-shirts”.
In this store, a “Digital proof” group asks whether the customer wants to approve a proof before printing. It’s set to show on the Custom prints category.
3. Leave some products out
Under Except, choose the products, categories or tags the group must skip. Except always wins over Show on: here the Engraved Mug is in Custom prints too, but it’s engraved, not printed, so it’s excluded. The group shows on the T-shirt and not on the mug.
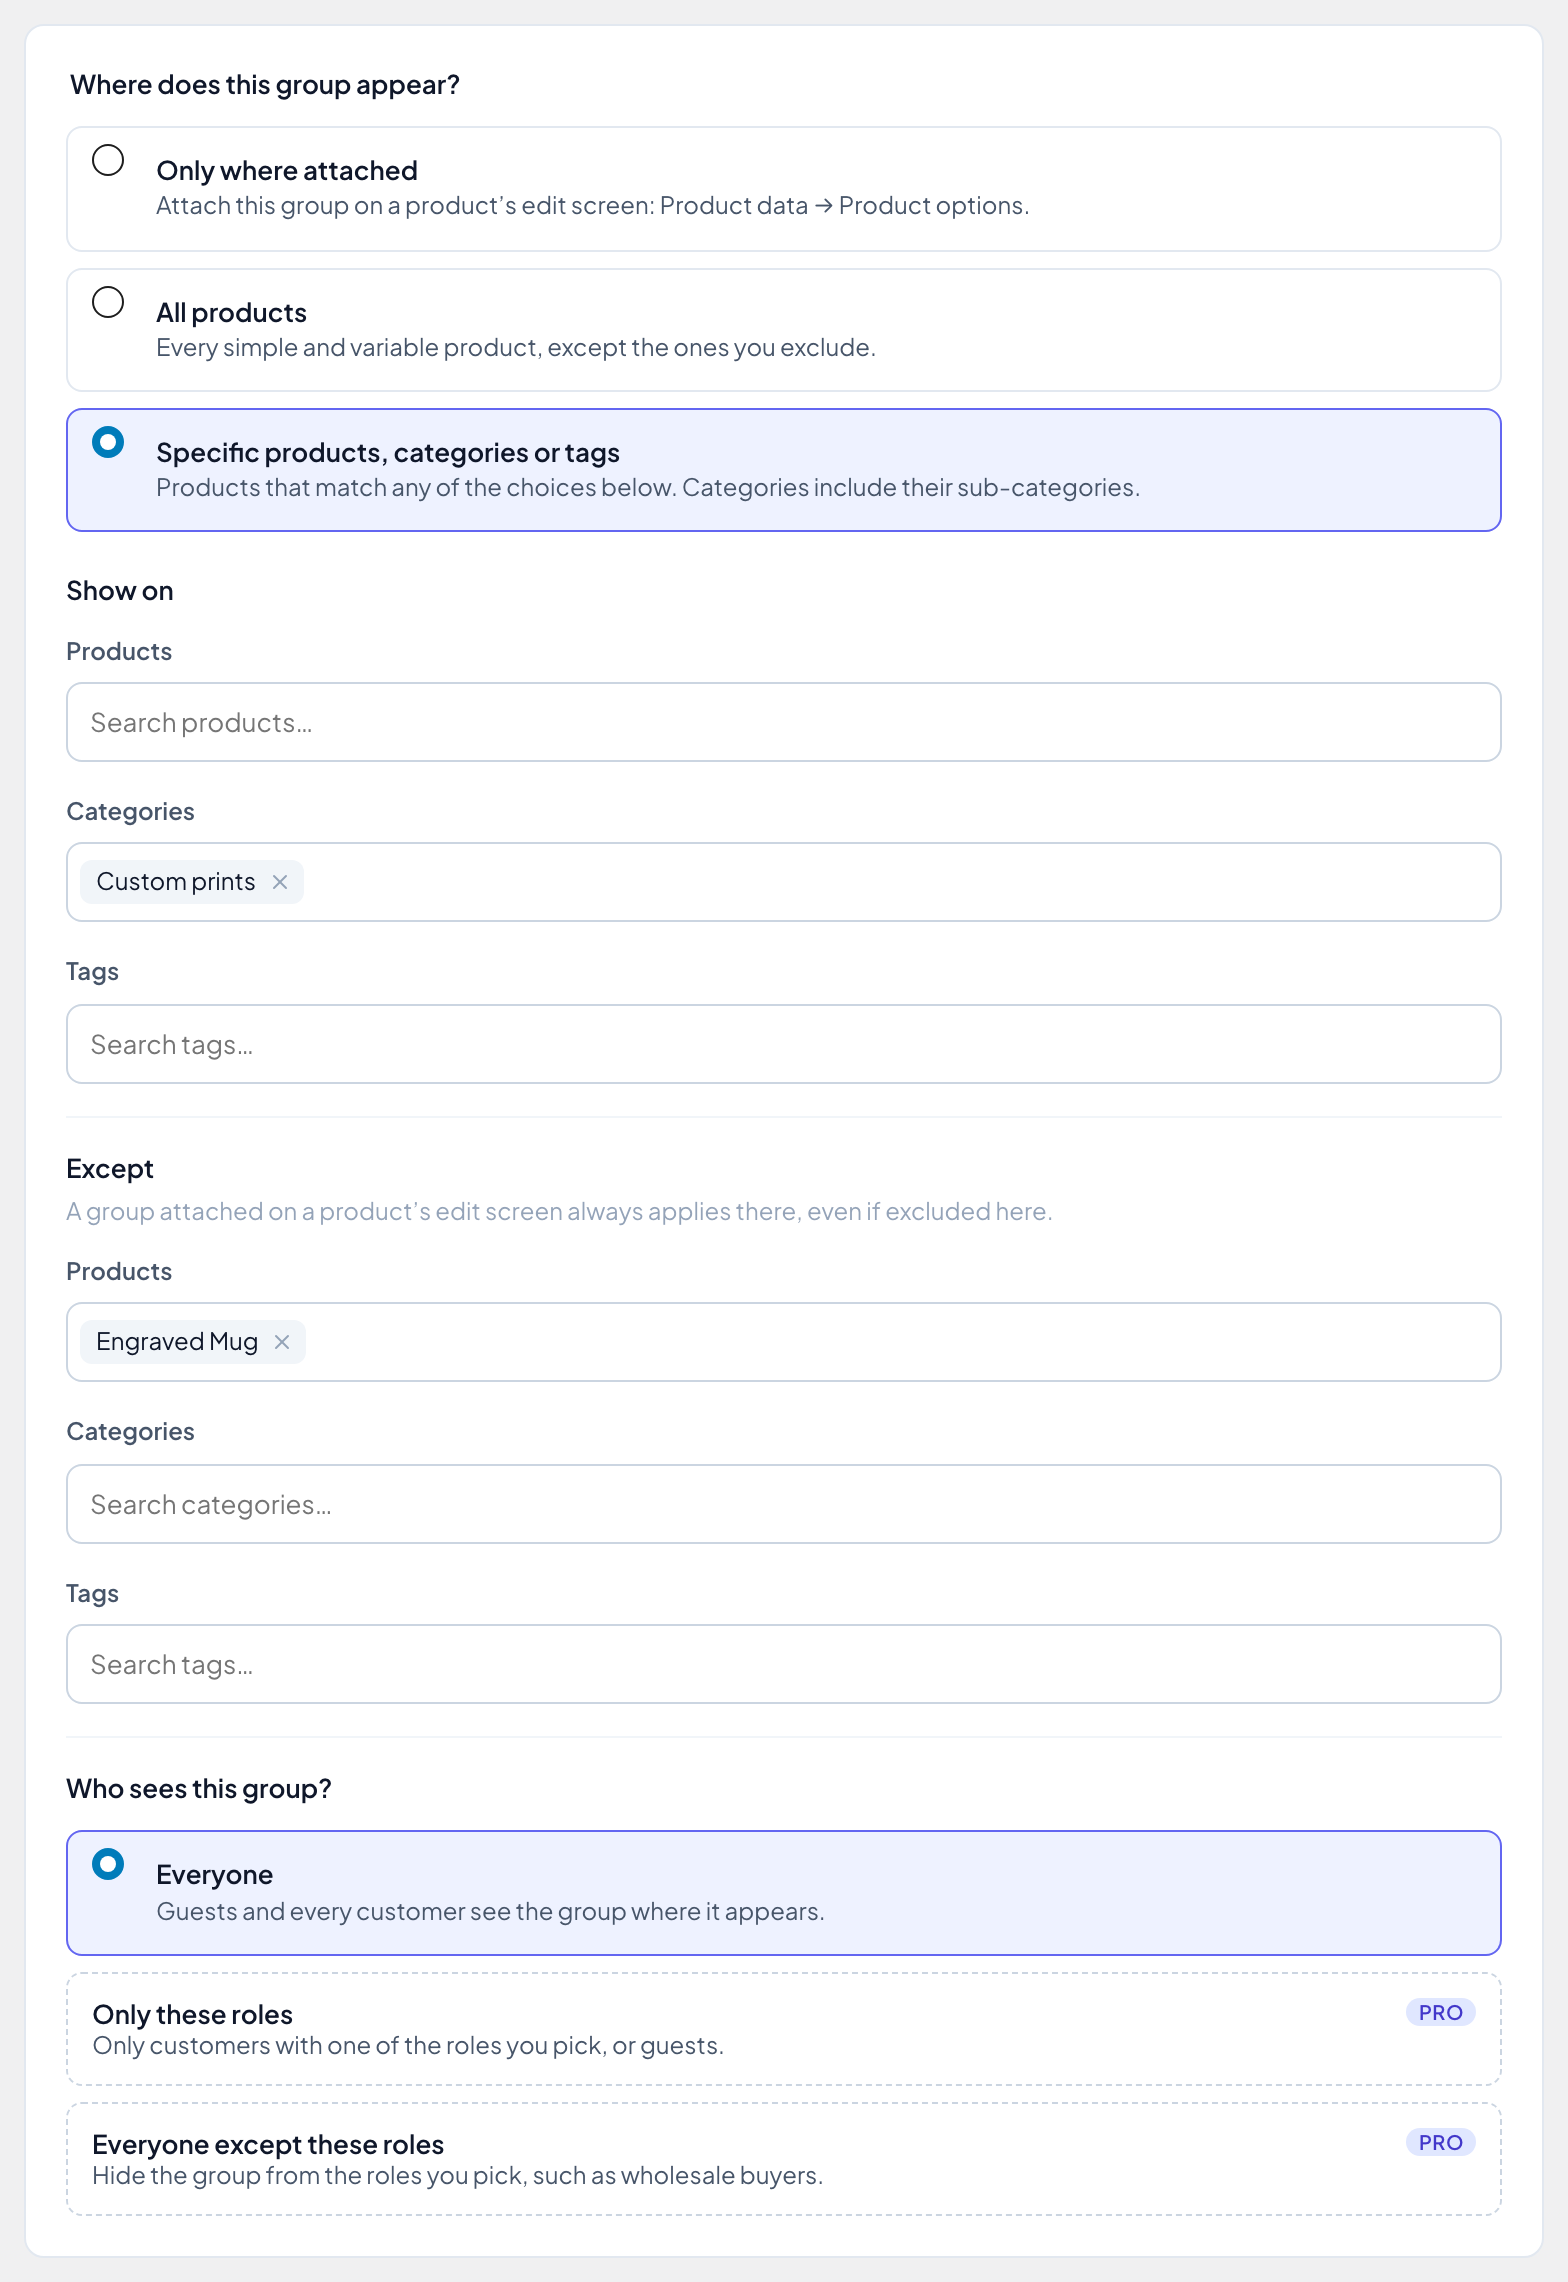
Except works with All products too: every product but a few, or every product outside one category. Click Save changes when you’re done.
4. Attach a group on one product
For options that belong to one product, like the cake’s size, delivery date and candles, attach the group from the product itself. Edit the product, and in the Product data box open the Product options tab. Choose the group under Attached option groups and update the product.
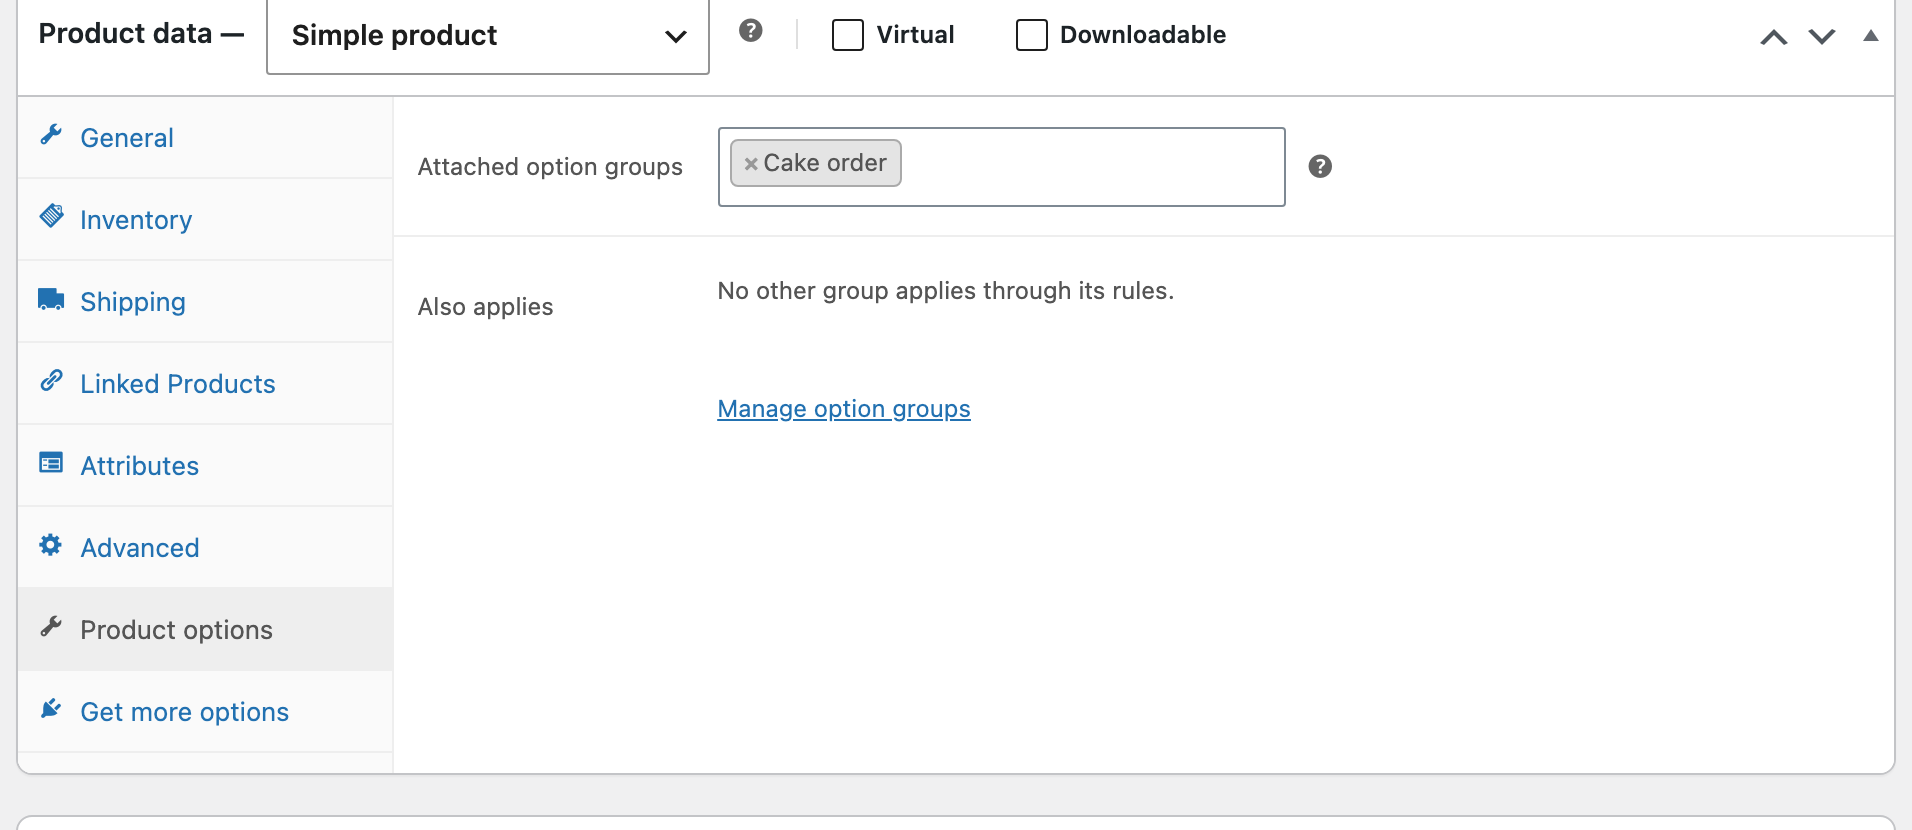
- Any group can be attached, whatever its Where it appears setting, and an attached group always applies to that product, even if the group excludes it.
- Also applies lists the other groups that reach this product through their own settings, so you can see everything the product gets in one place.
- Disabled groups are listed with “(disabled)” and show on no product until you turn them back on.
- The tab is in the classic product editor, for simple and variable products.
5. Set the order when several groups apply
A product can get several groups. Their fields show one group after the other: first the groups attached on the product, then the others; within each part they follow the order of the group list. Drag a group by its handle in the list to move it. A group that applies twice, attached and through a rule, shows once.
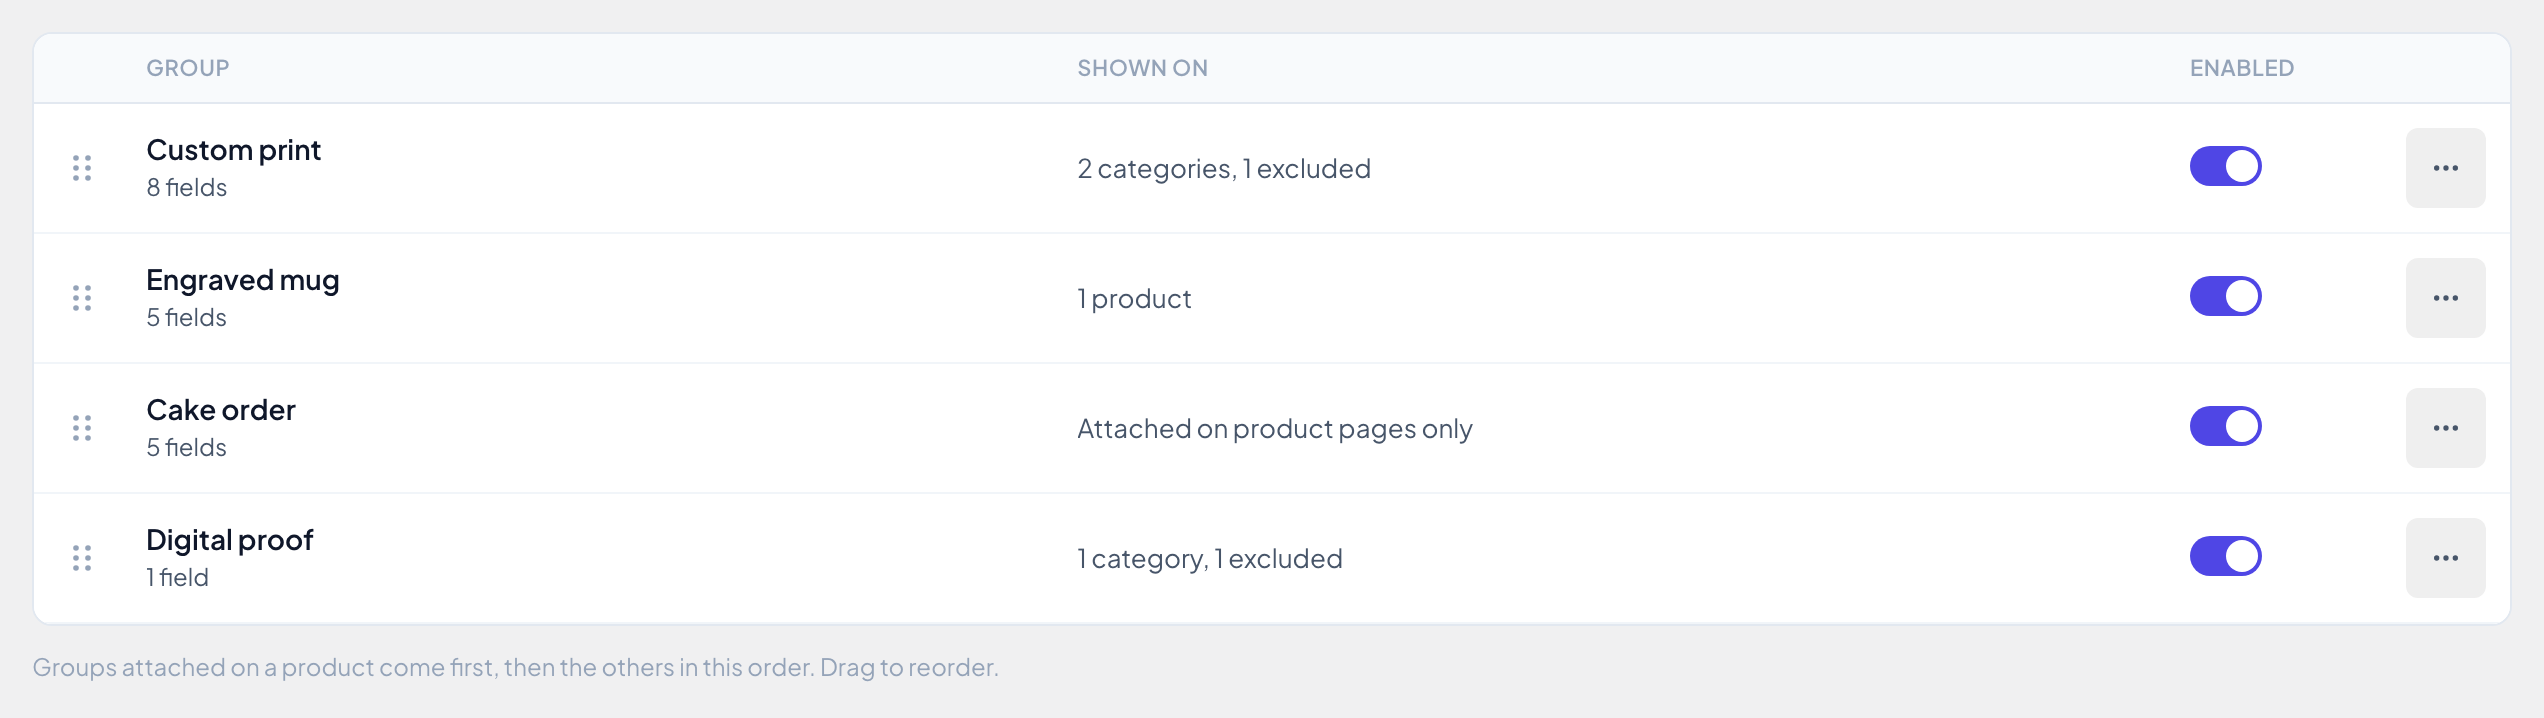
The Shown on column sums up each group’s setting, and the switch turns a group off everywhere at once, without deleting it.
Good to know
- Product types: groups show on simple and variable products.
- Translations: with WPML or Polylang, a group set for a product, category or tag also applies to its translations.
- Changes apply at once, in carts too: a cart always shows and charges a group’s current settings. Orders already placed keep the options they were placed with.
More control in Pro
- Who sees this group? (Pro): show a group only to some customer roles, or hide it from them, such as wholesale buyers. Guests count as a role of their own. The free version shows the setting with Everyone selected.
- Catalog overview (Pro): one table of every product and the groups it gets, which come from rules and which are attached, and why a group doesn’t apply. Find products with no options before your shoppers do.
Next: back to Getting started, or see all Product Customization Fields docs.